Table of Contents
ToggleKey Takeaways
- Considerations for safety measures
- Techniques for preparing surfaces
- Methods for applying finishes
- Assessment of the durability of DIY coatings
- Tips for maintenance after refinishing
- Examples of successful DIY bathtub refinishing
- Options beyond DIY refinishing
Common Mistakes to Avoid
When undertaking a bathtub refinishing project, one of the most common missteps is inadequate surface preparation. Skipping essential steps, such as cleaning and sanding, can lead to poor adhesion of the refinishing material. Dirt, mold, or existing paint can compromise the new finish, resulting in peeling or chipping over time. Taking the time to properly prepare the surface ensures a stronger bond and more durable end result.
Another frequent error is neglecting to follow the manufacturer’s instructions on the refinishing product. Each product may have specific application guidelines, including recommended drying times and conditions for optimal performance. Skipping these details can lead to an uneven finish or improper curing, affecting both the appearance and longevity of the refinished surface. Adhering closely to these guidelines can make a significant difference in the success of the project.
| Common Mistakes | Consequences | Solutions |
|---|---|---|
| Inadequate Surface Preparation | Poor adhesion, peeling, or chipping of the finish | Thoroughly clean and sand the surface before refinishing |
| Neglecting Manufacturer’s Instructions | Uneven finish, improper curing | Carefully read and follow application guidelines provided with the product |
| Rushing the Drying Process | Soft or tacky surface, increased risk of damage | Allow adequate drying time as recommended, avoiding moisture and temperature extremes |
| Using Incompatible Materials | Adhesion failure, compromised finish longevity | Ensure all materials used are compatible with each other and the refinishing product |
Safety Precautions to Consider
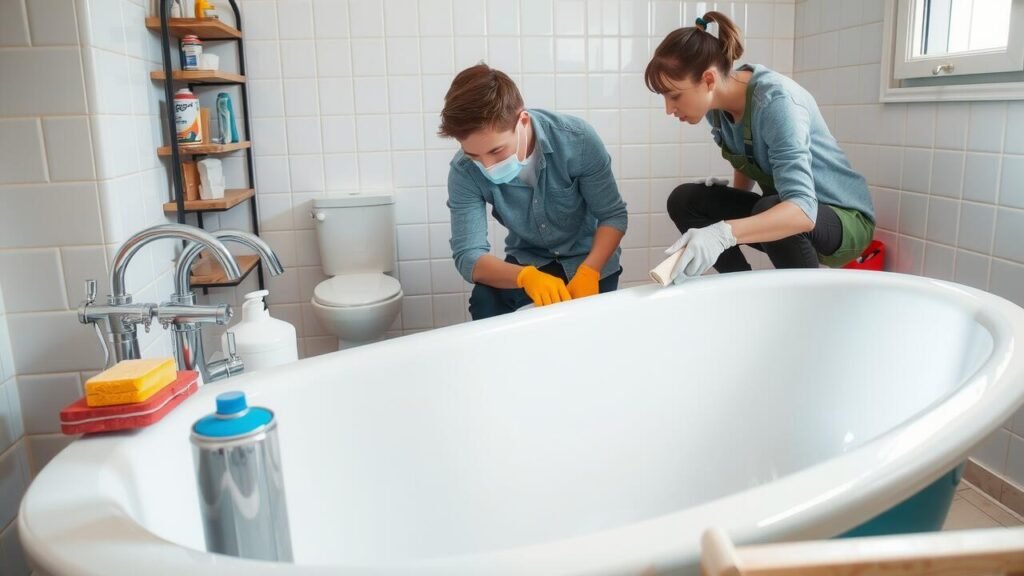
Engaging in bathtub refinishing can present numerous safety hazards if proper precautions are not taken. It is crucial to work in a well-ventilated area to minimize exposure to harmful fumes released by cleaning agents and refinishing materials. Wearing protective gear, including gloves, goggles, and masks, will provide essential barriers against chemical splashes and inhalation of toxic vapors. Ensuring that all electrical equipment used during the process is in good condition can prevent accidental shocks and injuries.
Additionally, securing the surrounding area is vital to avoid slips and falls that may occur due to wet surfaces or spilled chemicals. Keeping children and pets away from the workspace is another prudent safety measure. Familiarizing oneself with the specific products used for refinishing can also enhance safety. Understanding the material safety data sheets (MSDS) for each substance will ensure that any potential risks are acknowledged and mitigated effectively.
Ensuring a Safe Work Environment
Creating a safe work environment is essential during bathtub refinishing. Start by ensuring proper ventilation in the area where you will be working. Open windows and use fans to circulate fresh air. If possible, work outside to avoid inhaling harmful fumes from the chemicals used in the refinishing process. Wearing safety goggles and a mask can further protect you from dust and hazardous substances that may arise during surface preparation and applying the refinishing products.
It’s also important to keep the workspace organized and free from clutter. Ensure that tools and materials are within easy reach to minimize hazards that can arise from stretching or reaching for items. Consider laying down a tarp to protect the floor from any drips or spills. By planning your workspace and prioritizing safety measures, you can create an environment conducive to achieving a successful refinishing project without accidents.
- Regularly inspect and maintain tools to ensure they are in good working condition.
- Keep a first aid kit readily available in case of accidents.
- Ensure that all chemicals are stored safely and correctly labeled.
- Review safety data sheets (SDS) for all products being used.
- Limit distractions by keeping the work area focused and removing potential hazards.
- Use appropriate protective clothing and equipment at all times.
- Train all personnel involved in the process on safety protocols and emergency procedures.
Surface Preparation Techniques
Proper surface preparation is critical to achieving a smooth and durable finish when refinishing a bathtub. Start by thoroughly cleaning the tub to remove any soap scum, oils, or dirt. Using a strong cleaner or abrasive pad can help with this task. After cleaning, it is essential to address any chips, cracks, or imperfections in the surface. This may require filling the areas with a suitable filler and sanding them down to create an even surface. Sanding also helps to create a better bond for the refinishing material.
Once the surface is clean and repaired, focus on the next steps to ensure effective adhesion. Lightly sand the entire bathtub surface using fine-grit sandpaper to create micro-abrasions. These tiny scuffs encourage the new coating to stick better. After sanding, thoroughly rinse the bathtub and dry it completely to eliminate any dust particles lingering from the sanding process. This preparation stage will significantly influence the final result of the refinishing project, setting the foundation for a successful application.
Importance of Proper Surface Treatment
Proper surface treatment is crucial for achieving a long-lasting finish when refinishing a bathtub. Any irregularities or contaminants on the surface can prevent adhesive materials from bonding effectively, leading to premature deterioration. Thorough cleaning, sanding, and priming of the bathtub surface create a smooth and even base for the refinishing materials. This preparation minimizes the risk of peeling or chipping, significantly extending the lifespan of the new finish.
In addition to improving durability, effective surface treatment enhances the overall appearance of the bathtub. Uneven surfaces can result in an inconsistent finish, affecting the aesthetic appeal of the completed project. By investing time in proper preparation techniques, homeowners ensure that their refinishing efforts yield attractive results that meet their expectations. A well-executed surface treatment not only improves the final look but also maintains the functionality of the bathtub for years to come.
Application Methods for Refinishing
Selecting the right application method is crucial for achieving a smooth and durable finish. Rollers and sprayers are two popular options, each with its own advantages. Rollers are generally easier to control and can provide a consistent coating, especially on larger surfaces. Sprayers, on the other hand, allow for even distribution and can reach intricate areas that rollers might miss. However, using a sprayer requires more practice to avoid drips and overspray.
After determining the method, proper technique becomes essential for the overall success of the project. Whether using a roller or sprayer, maintaining a consistent distance from the surface ensures an even application. It’s also important to apply several thin coats rather than one thick layer. Thick applications can lead to issues like bubbling and peeling, diminishing the overall quality and longevity of the refinished surface. Careful attention to detail during this phase can lead to impressive results.
Choosing the Right Technique
Selecting the appropriate method for bathtub refinishing significantly impacts the overall outcome. Several techniques are available, including spray application and brush-on methods. Spray application often results in a smoother finish and can be more efficient for larger surfaces. Conversely, brush-on techniques may require more time and effort but allow for greater control in detailing, especially around curves and edges.
Understanding the specific characteristics of the refinishing materials can also guide your choice. Some products are designed for quick drying and rapid application, while others may necessitate a longer curing time for optimal results. Evaluating the size of the project and your own comfort level with different application methods will lead to a more successful refinishing experience.
Evaluating the Longevity of DIY Finishes
The longevity of DIY finishes largely depends on the materials used and the application techniques employed. High-quality products designed for bathtub refinishing can significantly extend the life of the finish. Proper surface preparation plays a crucial role, as any debris or unevenness can lead to premature wear. Users often overlook the importance of curing time, believing the finish is ready for use sooner than it actually is, leading to chipping and peeling.
Environmental factors can also influence the durability of refinished surfaces. Humidity and temperature fluctuations may impact how the finishing product adheres to the bathtub. Regular maintenance is vital for preserving the integrity of the finish. Routine cleaning with gentle, non-abrasive solutions helps to avoid damaging the surface, thus enhancing its lifespan. Understanding these factors can help DIY enthusiasts make informed decisions regarding their refinishing projects.
Factors Affecting Durability
The lifespan of a DIY bathtub refinishing project hinges on several critical factors. The quality of the materials used plays a significant role; high-grade epoxy or acrylic coatings often yield better results than cheaper alternatives. Environment conditions during application can also impact durability. Applying finish in humid, cold, or poorly ventilated areas may lead to uneven curing, compromising the protective layer’s resilience.
Proper surface preparation is another essential aspect influencing durability. Imperfections, dirt, or residue left on the bathtub surface can prevent the new coating from adhering properly. This could result in peeling or chipping over time. Ensuring the bathtub is thoroughly cleaned, sanded, and primed can enhance the bond between the surface and the refinishing material, leading to a longer-lasting finish.
Post-Refinishing Maintenance Tips
Maintaining the finish of your newly refinished bathtub is crucial for preserving its appearance and prolonging its lifespan. Regular cleaning is essential, but avoid abrasive cleaners that can scratch or dull the surface. Instead, opt for soft sponges or cloths, along with mild soaps, to gently wipe away soap scum and residues. Be cautious with products containing bleach or acid, as they can damage the finish over time.
To prevent discoloration and damage, try to minimize exposure to extreme temperatures by ensuring the bathroom remains well-ventilated. Direct sunlight can fade colors, so consider installing window treatments that block harmful UV rays. Additionally, using a bath mat can keep the surface from becoming slippery and reduce the likelihood of chipping or cracking caused by heavy items being dropped. Regular inspections for any signs of wear or damage allow for early intervention, ensuring your refinished bathtub remains beautiful and functional.
Caring for Your Newly Finished Bathtub
After refinishing your bathtub, implementing a regular maintenance routine will help preserve the new finish. Avoid abrasive cleaners and harsh scrubbing pads, as these can cause scratches that compromise the surface integrity. Instead, opt for mild soap and a soft cloth for everyday cleaning. Rinse thoroughly to remove any residue that could dull the finish over time.
Additionally, it’s important to manage water exposure during the initial curing process. Allow the new surface to set according to the manufacturer’s specifications before subjecting it to heavy use. This extra care in the beginning can contribute significantly to the longevity of your refinishing work. Be mindful of temperature fluctuations and avoid extreme conditions, as these can affect the adhesive properties of the finish.
Success Stories of DIY Bathtub Refinishing
Many homeowners have turned their old, worn bathtubs into stunning centerpieces through DIY refinishing projects. For example, a couple in California successfully transformed their chipped porcelain tub using a simple refinishing kit. They followed the instructions closely and took time to prepare the surface thoroughly, which allowed the new finish to adhere properly. The result was a beautiful, glossy appearance that revived the bathroom’s aesthetic and saved them thousands of dollars compared to professional services.
Another success story features a single mother who managed to refinish her fiberglass tub on a tight budget. With limited experience but plenty of determination, she researched various techniques online and chose an epoxy-based refinishing product for its durability. After successfully executing the project, she not only enjoyed a fresh, clean bathtub but also gained confidence in her DIY skills. Her experience encouraged her friends and family to consider similar projects, highlighting the potential of DIY refinishing as a viable option for many homeowners.
Real-Life Case Studies
Homeowners often share their experiences after attempting DIY bathtub refinishing, shedding light on both the challenges and triumphs. One case involved a family in a mid-century home who struggled with an outdated green bathtub. They opted for a refinishing kit, taking time to carefully sand and clean the surface before applying the coating. After a weekend dedicated to the process, they found that not only did their tub look brand new, but they also saved a considerable amount compared to hiring a professional.
Another success story comes from a young couple who transformed their old, chipped white tub. They documented their journey online, emphasizing the importance of following safety precautions and ensuring adequate ventilation during the application. Through trial and error, they learned effective techniques for achieving an even finish. Their project took slightly longer than anticipated, but the end result was a refinished bathtub they were proud to showcase, illustrating the potential rewards of taking a DIY approach.
Alternatives to DIY Refinishing
For those hesitant about embarking on a DIY project, professional refinishing services remain a viable alternative. These companies often bring years of experience to the table. Their expertise can help ensure a smooth finish that adheres to safety and industry standards. With specialized equipment and high-quality materials, professionals can often deliver results that outperform typical DIY approaches.
Additionally, there are various resurfacing and replacement options to consider. Acrylic or fiberglass inserts can provide a fresh look without the need for refinishing. Some homeowners might also opt for a complete bathtub replacement, which, while generally more expensive, eliminates concerns about surface preparation or potential longevity issues associated with refinishing. Each option comes with its own set of pros and cons, allowing homeowners to choose what best suits their budget and aesthetic preferences.
Exploring Other Refinishing Options
For those considering alternatives to DIY refinishing, professional services offer a comprehensive solution. Experts in the field utilize advanced techniques and high-quality materials, ensuring a long-lasting finish. Their experience typically results in a smoother and more durable outcome than what might be achievable through home methods. Hiring a professional also eliminates the guesswork regarding surface preparation and application techniques, providing peace of mind for homeowners seeking the best results.
Additionally, there are commercial products specifically designed for refinishing that can provide a middle ground between DIY approaches and full-service refinishing. These solutions often come with detailed instructions, making them accessible for those who prefer a hands-on approach without the complexities of traditional methods. Some products feature user-friendly application systems, such as spray-on finishes, that can yield beautiful results with less effort and time investment compared to manual refinishing techniques.
Conclusion
DIY bathtub refinishing can be a rewarding experience, both in terms of saving money and customizing your space. By taking the time to thoroughly prepare the surface, select appropriate materials, and apply techniques correctly, individuals can achieve professional-looking results without the hefty price tag associated with hired professionals. Awareness of common pitfalls and safety precautions plays a critical role in ensuring the task goes smoothly and healthily.
For those who opt for DIY refinishing, the long-term maintenance and care of the finished product will significantly impact its durability and overall appearance. Adopting preventive measures and proper cleaning practices not only enhances the longevity of the refinished tub but also contributes to the ongoing satisfaction of the homeowner. Exploring alternative refinishing options may provide additional avenues for those considering making their space beautiful without the extensive commitment that comes with a full renovation.
FAQS
What are the main benefits of DIY bathtub refinishing?
DIY bathtub refinishing can save you money compared to hiring a professional, allows for creative control over the design, and can be a fulfilling project for homeowners who enjoy hands-on work.
What are some common mistakes to avoid when refinishing a bathtub?
Common mistakes include inadequate surface preparation, using the wrong type of paint or materials, neglecting safety precautions, and failing to follow application instructions carefully.
What safety precautions should I take when refinishing my bathtub?
Safety precautions include wearing protective gear such as gloves, goggles, and a mask, ensuring proper ventilation in the workspace, and following all manufacturer guidelines for the materials used.
How can I ensure a safe work environment for bathtub refinishing?
To ensure a safe work environment, clear the area of clutter, use drop cloths to protect surrounding surfaces, and keep all necessary tools organized and within reach.
What factors affect the longevity of DIY bathtub finishes?
Factors affecting durability include the quality of materials used, proper surface preparation, application technique, and ongoing maintenance after refinishing.
What maintenance tips should I follow to care for my newly finished bathtub?
To care for your newly finished bathtub, avoid abrasive cleaners, use gentle cleaning solutions, and ensure not to overload the tub with heavy items that could scratch or damage the surface.
What are some alternatives to DIY bathtub refinishing?
Alternatives include hiring a professional refinishing service, replacing the bathtub entirely, or considering bathtub liners or coatings as a different solution for updating the tub.
How do I evaluate the cost efficiency of DIY bathtub refinishing?
Evaluating cost efficiency involves comparing the total costs of materials and tools needed for DIY versus the cost of hiring a professional, as well as considering the time and effort required for a successful refinishing project.