Table of Contents
ToggleKey Takeaways
- Protective Equipment and Safety Precautions
- Guidance Materials and Instructional Resources
- Organizing Solutions for Repair Kits
- Care Recommendations for Bathtubs
- Situations Requiring Expert Assistance
- Financial Planning for Bathtub Repairs
- Supplementary Information for DIY Fixes
How to Select Quality Caulk
Selecting the right caulk is crucial for ensuring a watertight seal around your bathtub. Look for products labeled as waterproof and mold-resistant to increase durability. Silicone-based caulks are generally preferred for bathtub applications due to their flexibility and strong adhesion. They can withstand humidity and resist mold growth, making them ideal for wet environments. Always check for a label indicating the caulk’s intended use and application surfaces to ensure compatibility with your bathtub material.
Pay attention to the drying time and curing period indicated on the packaging. Some caulks can take several days to fully cure, which may influence how quickly you can use your bathtub after repairs. Consider the color of the caulk as well; many brands offer different options to match your bathroom decor. It is also advisable to read customer reviews and product ratings when choosing a caulk brand. This will provide insight into the experiences of others and help you make an informed decision.
| Caulk Brand | Type | Waterproof | Mold-Resistant | Drying Time |
|---|---|---|---|---|
| Gorilla Silicone Sealant | Silicone | Yes | Yes | 30 minutes |
| DAP 100% Silicone | Silicone | Yes | Yes | 2 hours |
| Loctite Polyseamseal | Latex/Silicone | Yes | Yes | 7 days |
| Red Devil Kitchen & Bath | Silicone | Yes | Yes | 24 hours |
Safety Gear
Prioritizing safety is crucial when undertaking any repair project, particularly in the bathroom. It is essential to wear protective gear that minimizes the risk of injury. Basic safety equipment includes safety goggles, gloves, and a dust mask. Safety goggles safeguard your eyes from debris and hazardous materials. Gloves protect your hands from sharp tools and potentially harmful substances. A dust mask helps to prevent inhalation of dust and fumes, ensuring a safer work environment.
In addition to personal protective equipment, it is wise to have a first aid kit nearby. This kit should contain essentials such as antiseptic wipes, band-aids, and adhesive gauze to address minor injuries. Wear sturdy, non-slip footwear to prevent falls on wet surfaces. These precautions create a safer workspace while boosting confidence, making the task less daunting. Being adequately prepared not only protects you physically but also allows you to focus on the repair without distractions.
Essential Protective Equipment
When undertaking bathtub repairs, having the right protective equipment is crucial for ensuring safety. A sturdy pair of gloves is essential to shield your hands from harsh chemicals and sharp tools. Additionally, safety goggles will protect your eyes from splashes while working with caulk or cleaning solutions. Depending on the materials used in the repair, a mask might also be necessary to guard against inhaling any potentially harmful fumes.
Wearing old clothes that you don’t mind getting stained is also advisable, as repair work can lead to unexpected spills. Knee pads can provide comfort and protection for your knees during prolonged periods spent on hard surfaces. Ensuring you are fully equipped with this essential protective gear will not only help keep you safe but also enable you to focus on the task at hand without distraction.
Instructions and Guides
When undertaking any bathtub repair, having clear instructions and guides is essential for success. Detailed guidelines help you understand the process step by step, reducing the likelihood of errors that could lead to more significant problems later on. Incorporating visual aids, such as diagrams or video tutorials, can enhance comprehension and ensure that even the most novice DIYers can tackle repairs with confidence.
Following repair instructions closely can save time and resources. Each bathtub repair may come with specific requirements based on the materials and methods involved. Adhering to these directions not only maximizes the effectiveness of the repair but also minimizes risks, ensuring that the repair will hold up over time and maintain the integrity of the tub.
Importance of Following Repair Instructions
Following repair instructions is crucial for achieving effective and long-lasting results. Each product used in bathtub repairs often comes with specific guidelines tailored to its intended use. Neglecting these directions may lead to improper application, resulting in potential leaks, adhesive failures, or unsatisfactory finishes.
Additionally, thorough attention to instructions helps ensure safety during the repair process. Many repair materials contain chemicals that require proper ventilation or protective gear. Skipping these crucial steps can lead to health hazards or accidents. Adhering to the provided guidelines not only enhances the quality of the repair but also safeguards the well-being of everyone involved.
Storage Options for Repair Kits
A well-organized repair kit is essential for tackling any bathtub issues efficiently. Consider using a sturdy plastic container with adjustable compartments. This allows for easy categorization of items such as caulk, tools, and replacement parts. Labeling these compartments can help you quickly find what you need, especially in emergencies when time is of the essence. Choosing a compact size also makes it easier to store the kit under the sink or in a dedicated storage area.
In addition to a primary container, think about incorporating a portable toolbox for frequently used items. This allows for quick access when handling minor repairs or routine maintenance. Ensuring that all components are waterproof and resistant to chemical damage will protect your supplies over time. Regularly checking the contents and replacing any damaged items will keep your repair kit fully functional, ensuring you are always prepared for any bathtub-related tasks.
Keeping Your Kit Organized
An organized repair kit not only saves time but also ensures that all necessary tools and materials are easily accessible when tackling a bathtub repair. Start by categorizing items based on their function. Place caulking tools, adhesives, and sealants in one compartment, while cleaning supplies like sponges and towels can go in another. Using clear bins or labeled pouches allows for quick identification and retrieval, which is especially helpful during urgent repairs.
Regularly checking the kit will help maintain its organization. Remove any expired materials and restock items that have been used. Consider creating a checklist to track supplies, ensuring that you are always prepared. A well-maintained repair kit enhances efficiency and can make the difference between a quick fix and a frustrating day spent searching for misplaced items.
Maintenance Tips for Bathtubs
Regular maintenance can significantly extend the life of your bathtub and keep it looking pristine. Routine cleaning helps prevent the buildup of soap scum and mineral deposits, which can damage the surface over time. Using non-abrasive cleaners is crucial to avoid scratching or dulling the finish. Paying attention to the caulking around the tub also plays a vital role; if it appears cracked or discolored, re-caulking can prevent water leaks that lead to mold and mildew growth.
Inspecting the bathtub for any signs of damage is equally important. Checking for chips, cracks, or discoloration should become a regular practice. Promptly addressing any issues will help maintain the integrity of the tub and avoid more extensive repairs down the line. Additionally, keeping the bathroom well-ventilated aids in preventing moisture buildup, further protecting the tub from potential wear and damage.
Preventing Future Damage
Regular maintenance is key to ensuring the longevity of your bathtub. Routine cleaning with appropriate products helps prevent the buildup of soap scum and mildew. Be mindful of how you use the tub; avoid harsh chemicals that can erode surfaces over time. Additionally, promptly address any leaks or cracks to prevent further damage, as water seepage can lead to more costly repairs.
Consider the materials you use within the tub as well. Soft cloths and non-abrasive sponges can help preserve the finish while still ensuring cleanliness. Implementing a regular inspection schedule can help you catch small problems before they escalate. Using bathtub mats can protect the surface from scratches and slips, adding an extra layer of safety to your bathing experience.
- Regularly clean with non-abrasive cleaners to avoid surface damage.
- Inspect for leaks and cracks at least once a month.
- Use soft cloths and sponges for cleaning to maintain finish.
- Replace worn-out or damaged bathtub mats promptly.
- Avoid using harsh chemicals or abrasive tools when cleaning.
- Keep the area around the tub well-ventilated to reduce moisture buildup.
- Schedule professional inspections every few years for thorough maintenance.
When to Consider Professional Help
Homeowners should recognize when DIY efforts might not suffice for bathtub repairs. Significant issues such as persistent leaks, extensive water damage, or structural concerns often indicate a need for expert intervention. Attempting to tackle complex problems without proper experience can lead to further damage, increased costs, and a prolonged repair process.
It’s also crucial to consider professional help when specialized tools or techniques are required. Certain repairs may involve intricate plumbing or electrical components that necessitate expertise not typically found in a general repair kit. A professional can ensure that the repair is done correctly, efficiently, and in compliance with local codes.
Signs You Need Expert Assistance
When tackling bathtub repairs, there are indications that a project may be beyond your DIY abilities. Persistent leaks that cannot be resolved with standard fixes often signal deeper plumbing issues. Cracks or significant damage to the tub surface can result in further complications if not addressed correctly. If you notice mold or mildew growth that resists treatment, it may necessitate professional evaluation to ensure a comprehensive solution.
In some cases, the scale of the damage may require specific expertise. Electrical components for tub features, such as whirlpool jets, should only be handled by trained professionals. Attempting these repairs without proper knowledge can lead to safety hazards. Seeking expert assistance can save time and prevent further deterioration of your bathtub. It’s crucial to recognize your limitations to maintain both safety and the integrity of your home.
Budgeting for Bathtub Repairs
When embarking on bathtub repairs, it is crucial to establish a realistic budget that encompasses all necessary supplies and tools. Begin by identifying the specific issues that need addressing, which will help in determining the types of materials required. Researching the average costs of caulk, waterproofing solutions, and any replacement parts will provide a clearer picture of expected expenses. Including a small buffer for unexpected issues can help avoid surprises during the project.
It is also wise to consider the costs associated with acquiring quality tools if they aren’t already in your possession. Investing in durable equipment can ultimately save money in the long run as they can be used for future repairs or projects. Additionally, account for any instructional materials or resources you might need, such as guides or classes, which can enhance your repair skills and help ensure a successful outcome. Balancing quality with cost-effective choices will lead to a well-planned renovation without overspending.
Cost Breakdown of Repair Kits
The cost of a complete bathtub repair kit can vary significantly based on the quality and quantity of items included. Basic kits, which may contain essential tools such as caulk, putty knife, and a cleaning agent, usually fall in the $20 to $50 range. More comprehensive kits that feature additional items like epoxy, patches, and specialized tools can range from $50 to $150. When budgeting for repairs, consider whether you opt for brand-name products or generic alternatives, as the price difference can affect overall costs.
In addition to the initial investment in a repair kit, it’s important to factor in any future costs for maintenance supplies. Regular upkeep may require purchasing caulk and cleaning agents periodically. Over time, these expenses accumulate, so it’s wise to allocate a portion of your budget for ongoing repairs and maintenance. Investing in high-quality materials upfront can reduce the likelihood of repeated repairs, ultimately providing better value in the long run.
Additional Resources for DIY Repair
For those looking to handle bathtub repair projects on their own, a wealth of resources is available to facilitate the process. Websites dedicated to home improvement often feature step-by-step guides, video tutorials, and forums where DIY enthusiasts share tips and tricks. These platforms provide insights into various techniques, such as caulking and resurfacing, making them invaluable for both novice and experienced repairers.
Additionally, social media groups and online communities can be excellent sources of support. Members often post their own experiences, answer questions, and offer solutions to common problems encountered during repairs. By engaging with these resources, individuals can gain confidence in their abilities and discover innovative approaches to maintaining and restoring their bathtubs.
Where to Find Helpful Tutorials
Numerous online platforms provide valuable resources for anyone looking to tackle bathtub repairs. Websites such as YouTube offer a plethora of video tutorials that guide users through various repair processes step-by-step. These visual aids can be especially helpful for visual learners who may benefit from seeing the techniques in action. Similarly, DIY blogs often feature detailed articles that break down projects and highlight common pitfalls to avoid.
For those who prefer written instructions, specialized home improvement websites can serve as excellent repositories of knowledge. Many of these sites curate resources from experienced DIY enthusiasts and professionals, ensuring that the content is both accurate and relevant. Online forums and community groups also present opportunities to seek advice or share experiences with fellow DIYers, further enriching the learning experience. Utilizing these resources can enhance both confidence and competence when repairing a bathtub.
Conclusion
A comprehensive bathtub repair kit equips homeowners with the necessary tools to address common issues effectively. Understanding each component’s purpose and how to use them can transform a daunting repair task into a manageable project. This readiness not only saves time but also reduces the potential for further damage, ensuring the bathtub remains in good condition for years.
Investing time in maintaining a well-stocked and organized repair kit can lead to smoother repairs when needed. Knowledge of when to tackle a project independently and when to seek professional assistance will ultimately help maintain the quality and appearance of your bathtub while saving on potential costs associated with extensive repairs.
FAQS
What are the essential components of a complete bathtub repair kit?
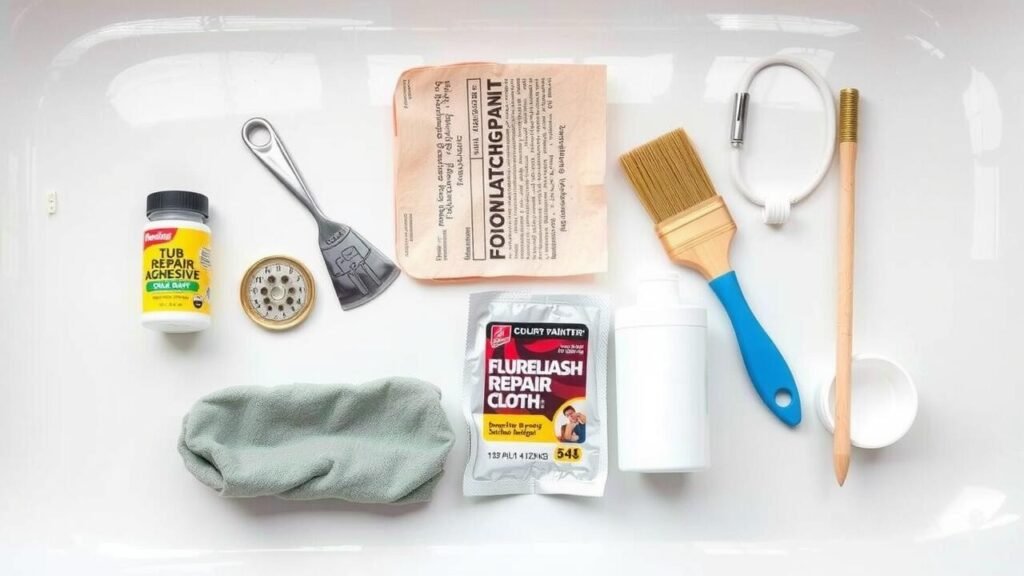
A complete bathtub repair kit typically includes quality caulk, a putty knife, sandpaper, a sponge, cleaning agents, a replacement drain plug, and safety gear such as gloves and goggles.
How do I select quality caulk for bathtub repairs?
When selecting caulk for bathtub repairs, look for mildew-resistant silicone caulk that is waterproof and designed specifically for bathroom use. Check for clear or colored options that match your bathtub for a seamless finish.
What safety gear should I use while repairing my bathtub?
Essential protective equipment includes safety goggles, gloves, and a mask to protect yourself from dust, fumes, and sharp tools during the repair process.
Why is it important to follow repair instructions when fixing a bathtub?
Following repair instructions is crucial to ensure that the repair is done correctly, preventing further damage and ensuring safety. It also helps to achieve a professional-looking finish and prolongs the lifespan of your bathtub.
How can I keep my bathtub repair kit organized?
To keep your repair kit organized, use a sturdy storage container with compartments or dividers. Label items clearly and regularly check the kit to replenish any used supplies or replace items that have expired.