Table of Contents
ToggleKey Takeaways
- Methods for effective chip restoration
- Duration for drying and setting
- Care following chip restoration
- Typical errors in color coordination
- Sophisticated techniques for color alignment
- Expert versus do-it-yourself chip restoration
- Upcoming developments in color coordination technology
Sample Testing on Different Surfaces
Sample testing is a crucial step in the chip repair process. Different surfaces, such as metal, plastic, and wood, can react uniquely to paint and color matching efforts. It is essential to evaluate how the color adheres to each type of surface. This may involve applying small amounts of paint in less visible areas first to observe the final appearance. Testing ensures an accurate assessment of both color match and finish.
When conducting sample tests, consider various environmental factors that may influence the final result. Temperature, humidity, and lighting can all affect how the paint looks once it dries. For instance, a color may appear differently under fluorescent vs. natural light. Evaluating these factors helps in making informed decisions about the best approach to take for matching colors across disparate surfaces.
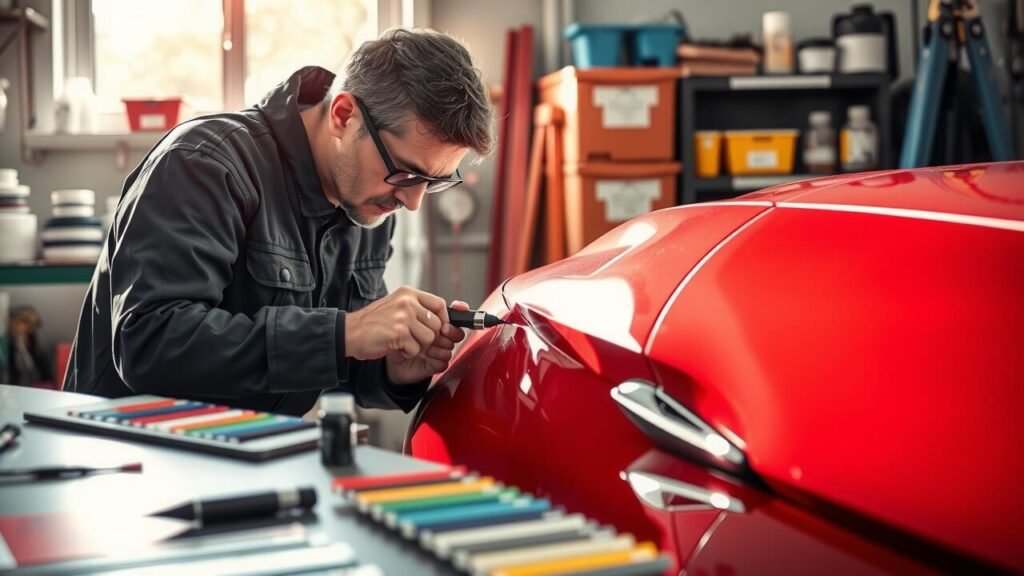
Application Techniques for Chip Repair
Effective application techniques are crucial for successful chip repair. Start by thoroughly cleaning the area around the chip. Use a mild detergent and water or a specialized cleaner to remove dirt, grease, and any loose paint. After cleaning, the surface should be dried completely to ensure optimal adhesion of the repair materials. Using fine-grit sandpaper to lightly scuff the edges of the chip can help create a textured surface, allowing the filler or paint to bond more effectively.
When applying the filler or paint, utilize tools such as a small brush or a precision applicator for detailed control. Apply in thin layers and build up as necessary, ensuring each layer dries according to the manufacturer’s recommendations. This method minimizes the risk of drips and promotes a smoother finish. Patience during the application process can lead to better results, enhancing the overall appearance of the repair.
Best Practices for Paint Application
Achieving a seamless finish during chip repair requires careful attention to detail during the paint application process. Begin by preparing the surface thoroughly. Clean the area to remove dirt and grease, and lightly sand the chip to create a better bonding surface for the paint. Using a primer can enhance adhesion, especially for larger chips. Selecting the right tools also plays a crucial role. A fine-tipped brush or airbrush can help control the application and reduce the risk of drips.
When applying the paint, it’s important to build up the color gradually. Thin, even layers will yield better results than a single thick coat. Allow adequate drying time between layers to prevent smudging and ensure that each coat adheres properly. After achieving the desired color match, finish with a clear coat to protect the repair and add a shine that blends with the surrounding area. Regularly stepping back to assess the application from different angles can help identify any inconsistencies that may need correction.
Drying and Curing Times
Understanding the nuances of drying and curing times is crucial for effective chip repair. Various factors can affect how quickly paint dries, including temperature, humidity, and the type of paint used. Typically, surface drying, where the top layer feels dry to the touch, occurs first, often within minutes to a few hours. However, full curing can take significantly longer, sometimes days or even weeks, depending on the conditions and materials involved.
Proper timing in the repair process can prevent issues such as smudging or improper adhesion. For best results, it’s advisable to follow the manufacturer’s guidelines regarding drying times before handling or applying any additional coats. This attention to detail helps ensure a durable and seamless finish that matches the original surface as closely as possible.
Factors Influencing Drying Processes
Various environmental factors can significantly impact drying processes during chip repair. Humidity levels in the surrounding air play a critical role; higher humidity can slow down evaporation rates, leading to longer drying times. Conversely, low humidity conditions may facilitate quicker drying but can also cause issues such as paint skinning if the surface dries too fast. Temperature is another essential consideration. Warmer temperatures generally accelerate drying times, while cooler conditions can prolong the process, creating a potential imbalance in repair timelines.
The type of paint or filler used also affects how quickly repairs set and cure. Water-based products typically dry faster than oil-based alternatives. Additionally, the thickness of the application influences drying; a heavier coat may take longer to cure completely compared to a thinner layer. Proper ventilation is vital as well, allowing for effective air circulation, which enhances the overall drying process. Understanding these factors allows for better planning and execution during chip repair.
Maintenance After Chip Repair
After a successful chip repair, maintaining the integrity of the affected area is crucial. Regular cleaning is essential to prevent dirt and debris from accumulating on the repaired surface. A gentle wash with mild soap and water can help preserve the finish. It’s advisable to avoid harsh chemicals that may damage the new paint. Also, keeping the repaired spot away from intense sunlight for extended periods can mitigate fading and discoloration.
Monitoring the repaired area is important in the weeks following the repair. Observe for any signs of wear or damage. If the repair seems to be deteriorating, addressing it quickly can prevent larger issues down the line. Using protective wax or sealants can also enhance durability. Prevention is key to prolonging the life of the repair and maintaining the overall appearance of the surface.
Caring for Repaired Areas
After a chip repair, it is essential to allow the area to cure properly before exposing it to harsh conditions. Keeping the repaired surface clean helps maintain its integrity. Use a mild soap solution and a soft cloth for cleaning. Avoid abrasive materials, as they may damage the finish. Regular light cleaning can help keep the area looking fresh and vibrant.
Protection from the elements plays a crucial role in preserving the quality of the repair. Parking in shaded areas can minimize UV exposure, which can cause fading over time. Additionally, consider applying a protective wax once the repair area has fully cured. This not only enhances the appearance but also adds a layer of defense against contaminants and abrasives.
| Repair Tip | Description | Frequency |
|---|---|---|
| Curing Time | Allow the repaired area to cure fully before exposing it to harsh conditions. | Once after repair |
| Cleaning | Use a mild soap solution and a soft cloth to keep the surface clean. | Regularly (weekly) |
| Protection from UV | Park in shaded areas to minimize UV exposure that causes fading. | As needed |
| Protective Wax | Apply protective wax to enhance appearance and defend against contaminants. | Every 3 months |
Common Mistakes in Color Matching
One common mistake in the color matching process is underestimating the importance of lighting. Viewing colors in different types of light can dramatically alter perception. What may appear to be an exact match indoors may not hold up in natural sunlight or fluorescent environments. Ideally, it’s essential to assess your color match under various lighting conditions to ensure consistency and accuracy.
Additionally, many individuals fail to account for surface texture when matching colors. A flat surface reflects light differently compared to a glossy or textured finish. This discrepancy can lead to noticeable differences in color appearance. To achieve the best results, consider harmonizing not just the color but also the finish of the repair area with the surrounding surfaces.
Avoiding Pitfalls During the Process
Successful color matching for chip repair requires attention to detail. One common pitfall is neglecting the condition of the surrounding paint. Variations in age or wear can affect how well new paint blends with the original surface. Proper surface preparation is essential. Cleaning, sanding, and priming may be necessary to achieve a seamless transition between the repaired area and the existing finish.
Another mistake involves choosing the wrong type of paint or finish. It is crucial to match not just the color but also the sheen to ensure consistency across the surface. Testing the paint on a small area before proceeding with the full application can help identify any discrepancies. Patience and careful evaluation during the color matching process are key. Taking these steps can significantly enhance the final outcome of chip repairs.
Advanced Color Matching Techniques
Color matching has evolved significantly with the integration of advanced technologies. Color spectrophotometers are now widely used to analyze and replicate the exact shade of a surface. These devices capture color data in various lighting conditions, ensuring accurate results regardless of environmental factors. Digital color matching systems can access extensive databases, making it easier to find matching colors from different manufacturers and ensuring that repairs blend seamlessly.
In addition to hardware advancements, specialized software enhances color-matching precision. Image analysis tools assess color variations and provide recommendations for adjustments. This convergence of technology and artistry allows professionals to achieve superior results in chip repairs. Adopting such methods can save time and reduce the likelihood of color mismatches, ultimately leading to a more polished finish.
Utilizing Technology for Precision
The integration of technology in the color matching process has transformed how technicians approach chip repairs. Advanced spectrophotometers accurately measure paint colors and capture detailed data about hue and saturation. This equipment enables the creation of precise color formulations tailored to individual surfaces. Professionals can ensure a perfect match by analyzing the surrounding color environment.
Digital color-matching software complements the use of spectrophotometers by providing databases of various paint formulations. These programs often include features to adjust colors for factors like lighting conditions and surface texture. Utilizing such technology enhances the ability to replicate colors accurately, reducing the risk of mismatches and improving repair outcomes. Embracing these innovations allows for more efficient workflows and higher quality results in chip repair.
Professional vs. DIY Chip Repair
Deciding between professional and DIY chip repair often depends on several factors, including budget, time, and personal skill level. Professionals typically offer expertise and access to high-quality materials, ensuring a seamless match and a durable finish. They can swiftly address underlying issues that a novice might overlook. This often results in better long-term results that can preserve the value of the vehicle.
On the other hand, DIY chip repair can provide a rewarding experience and significant cost savings. With the right tools and materials, enthusiasts can learn the techniques necessary to perform effective repairs. However, success hinges on the careful application of processes and a keen eye for detail. Mistakes made during this process can lead to mismatches, which might end up costing more to rectify later.
Evaluating Your Skill Level
Assessing your proficiency in chip repair is crucial before deciding whether to tackle the project yourself. Consider your previous experience with similar tasks and comfort level with tools and materials. A novice may find the process overwhelming, while someone with a background in refinishing or automotive work might feel more confident in their abilities. Honest self-evaluation helps determine not only if you should proceed on your own but also how much research you may need to conduct before starting.
Understanding your limitations can save time and prevent potential frustration. If you realize that your skills fall short, enlisting a professional can be a wise choice. Professionals often possess advanced techniques and technologies that elevate the quality of work. Recognizing when to seek help can lead to a more satisfying outcome, whether through a skilled repair person or by improving your own techniques over time.
Future Trends in Color Matching Technology
The integration of artificial intelligence and machine learning is revolutionizing the field of color matching. Advanced software systems are now capable of analyzing complex color data in real-time, leading to more accurate and consistent results. Using digital colorimeters and spectrophotometers, technicians can capture color samples with precision, enhancing the ability to replicate exact shades. The merging of these technologies into user-friendly applications enables both professionals and DIY enthusiasts to achieve quality results with minimal effort.
Another promising trend is the development of eco-friendly and sustainable paint products. As environmental concerns become increasingly important, manufacturers are focusing on creating low-VOC and biodegradable options without compromising on color quality. This shift not only aligns with regulatory changes but also caters to consumer demand for greener solutions. The combination of sustainable materials and innovative color matching techniques signals a positive shift toward more responsible practices in the industry.
Innovations Shaping the Industry
Recent advancements in color matching technology have transformed the approach to chip repairs. Digital colorimeters now allow for precise measurement of paint colors, ensuring a more exact match to the original surface. These devices can analyze a wide spectrum of hues and shades, providing a detailed breakdown that helps minimize discrepancies. Additionally, color matching apps have emerged, enabling users to capture images of surfaces and receive real-time suggestions for corresponding paint colors. This democratizes the process, making professional-quality repairs accessible to DIY enthusiasts alongside seasoned experts.
Another significant trend is the development of automated color mixing systems. These machines utilize advanced algorithms to blend paints accurately according to specifications, reducing human error and time spent on repairs. The incorporation of artificial intelligence into these systems enhances their ability to learn from previous matches, continuously improving the accuracy of color formulations. As these innovations gain traction, they promise to streamline the chip repair process, elevating the quality and efficiency of outcomes across the industry.
- Improved accuracy in color matching reduces the likelihood of mismatched repairs.
- Enhanced efficiency in the repair process saves time and labor costs.
- Increased access to professional-grade tools democratizes repair options for non-experts.
- AI-driven systems adapt and improve over time, leading to better results.
- The ability to capture images and receive suggestions simplifies the decision-making process.
- Digital colorimeters bridge the gap between art and technology for better outcomes.
- Automated systems allow for consistent results across various repair jobs, fostering trust and reliability.
Conclusion
Effective color matching plays a crucial role in the success of chip repair. By carefully selecting the right colors and employing appropriate application techniques, the repaired area can blend seamlessly with its surroundings, ensuring a satisfactory result. The importance of patience and precision during the process cannot be overstated. Understanding the composition of different surfaces and testing samples contributes significantly to achieving that perfect match.
Continual advancements in color-matching technology promise to enhance the efficiency and accuracy of repairs. With tools that allow for greater precision, both professionals and DIY enthusiasts can better address challenges in matching colors. As individuals become more adept at utilizing these innovations, the likelihood of achieving high-quality repairs increases. Awareness of common pitfalls and the commitment to best practices will further elevate the standard of chip repair projects.
FAQS
What is the importance of color matching in chip repair?
Color matching is crucial in chip repair to ensure that the repaired area blends seamlessly with the surrounding surface, maintaining the aesthetic integrity of the item being repaired.
What surfaces should I test for color matching?
It’s best to test color matching on various surfaces such as metal, plastic, glass, or wood, as the paint may react differently depending on the material.
How long does it take for paint to dry and cure after a chip repair?
Drying and curing times can vary based on the type of paint used, environmental conditions, and the thickness of the application. Typically, paint may dry in a few hours, but full curing can take several days.
What are common mistakes to avoid during the color matching process?
Common mistakes include using the wrong type of paint, failing to test the color on the surface before application, and not properly preparing the area before applying the paint.
Should I attempt chip repair myself or hire a professional?
This decision depends on your skill level and the complexity of the repair. If you feel confident and have the right tools, DIY can be a viable option. However, for more intricate repairs or if you’re unsure, hiring a professional is advisable.