Table of Contents
ToggleKey Takeaways
- Proper drying and curing are essential for achieving optimal results.
- Adding finishing touches enhances the overall appearance of the repair.
- Thorough inspection of the work is crucial to ensure quality.
- Utilizing touch-up techniques can improve the final look.
- Ongoing maintenance is important after completing repairs.
- Being aware of common errors can prevent future issues.
- Knowing when to seek professional help is vital for complex repairs.
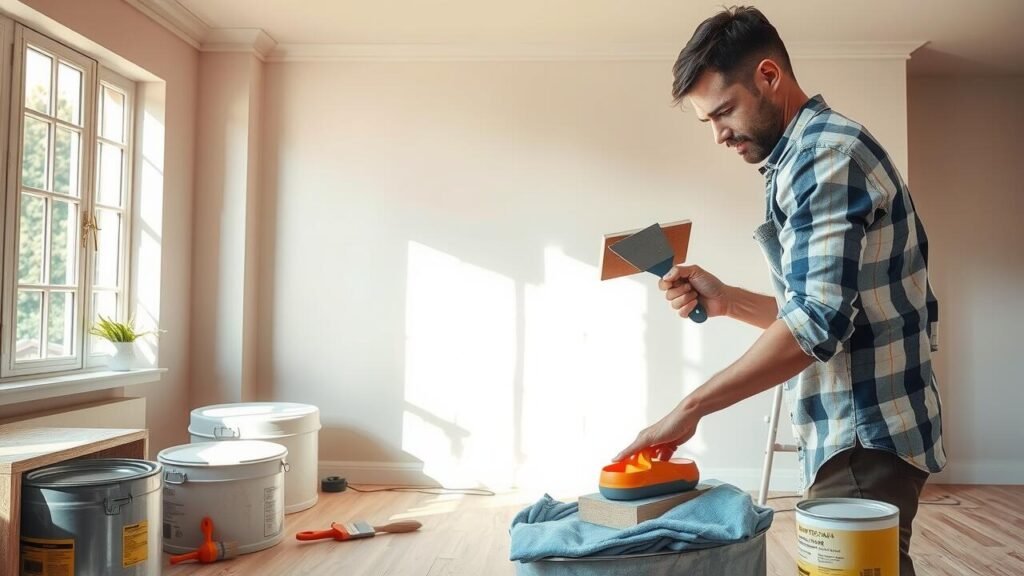
Building Up Layers for a Natural Look
Achieving a natural look when repairing a surface relies heavily on the technique of layering materials. Start by applying thin coats of repair compound or paint, allowing each layer to dry adequately before moving on to the next. This gradual buildup not only helps to create a smooth transition between the repaired area and the surrounding surface but also enhances the overall uniformity of color and texture. It’s essential to ensure that each layer is feathered out slightly beyond the edges of the repair to minimize any visible lines or imperfections.
As you build up the layers, pay careful attention to the thickness of each application. Too thick of a layer can lead to bubbling or cracking as the material dries, negatively impacting the final appearance. Aim for consistency in the application technique, using tools like brushes or rollers to achieve an even finish. Regularly stepping back to assess the work from different angles can help identify any areas that may need additional attention or refinement.
Drying and Curing
The drying and curing process is critical to achieving a seamless finish after repairs. Proper drying allows the material to solidify and create a strong bond with the surrounding area. Temperature and humidity can significantly influence drying times. Therefore, it’s essential to be mindful of environmental conditions when performing repair work. High humidity can prolong drying, while excessive heat may cause cracks or other issues if the material dries too quickly.
Curing, on the other hand, is the chemical process that occurs as the material fully hardens and reaches its maximum strength. Different materials have varying curing times, which should be adhered to for optimal results. It’s advisable to resist the urge to touch or paint over the area too soon. Patience during this phase ensures a more durable and aesthetically pleasing outcome, ultimately enhancing the longevity of the repair work.
Understanding the Importance of Proper Drying Time
Proper drying time plays a crucial role in the outcome of any repair project. Insufficient drying can lead to a range of issues, including bubbling, cracking, or peeling of the applied materials. Understanding the recommended drying time for specific products is essential. Each layer, whether paint, plaster, or adhesive, may have unique requirements that need to be adhered to for the best results. Rushing through this step often results in more work later on, as imperfections become visible.
Waiting for the designated drying time not only ensures that the repair remains intact but also improves adhesion between layers. Environmental factors, such as temperature and humidity, can influence drying rates. Keeping an eye on these conditions is beneficial for achieving a flawless finish. Patience in this phase pays off, leading to a smoother, more professional-looking result that enhances the overall appearance of the repaired area.
| Material | Recommended Drying Time | Influencing Factors |
|---|---|---|
| Paint | 1-2 hours (touch dry); 24 hours (fully cured) | Temperature, humidity, thickness of application |
| Plaster | 24-48 hours (depending on thickness) | Ambient temperature, airflow |
| Adhesive | 30 minutes to 2 hours (tack-free); up to 24 hours (full strength) | Humidity, material porosity |
| Wood Stain | 1-3 hours (dry to touch); 72 hours (fully cured) | Temperature, type of wood |
Finishing Touches
Applying the final coat is crucial for achieving a polished look. Use a high-quality paint that matches the existing surface. A fine brush or roller produces the best results and ensures an even application. Lightly feather the edges into the surrounding area to create a smooth transition. This step helps to disguise any differences between the repaired and original sections.
After the final coat is applied, allow adequate drying time according to the manufacturer’s instructions. Once dry, inspect the area for any inconsistencies or imperfections. A light sanding can help even out any bumps. If necessary, touch up small areas with a brush for added precision. Taking these additional steps ensures a cohesive finish that blends seamlessly with the rest of the surface.
Final Steps for a Seamless Appearance
After applying the final coat of paint or finish, it is essential to ensure an even texture across the repair area and the surrounding surfaces. This can often be achieved using a fine-grit sandpaper to gently buff the area once everything is dry. Sanding not only helps eliminate any raised spots or imperfections but also allows for a smoother blend that mimics the original surface. Care should be taken to blend the edges without over-sanding the surrounding areas, ensuring a transition that appears natural.
Following the sanding process, a thorough inspection of the surface is crucial. Any visible discrepancies can be addressed with additional touch-ups, using a small brush or roller for precision. The goal is to create uniformity in both color and texture. It may also be beneficial to apply a clear protective coat over the area to enhance durability and sheen, further contributing to a seamless finish that integrates well with the adjoining surfaces.
Inspecting the Work
Reviewing the blended area is crucial for achieving a seamless finish. Take your time to thoroughly inspect the surface under good lighting. Look for any inconsistencies in texture, color, or shine that may indicate imperfections. A closer look can help identify areas that might require additional sanding or touch-ups. Use your fingers to feel for any unevenness, as texture might be less visible to the eye.
Pay special attention to the edges where the repaired area meets the surrounding surface. This transition zone often reveals the success of the blending technique. If the edges feel sharp or abrupt, consider additional feathering to soften the transition. Small adjustments at this stage can make a significant difference in the overall appearance. Taking the time to carefully inspect the work ensures that all efforts lead to a polished and professional look.
How to Identify Imperfections
Spotting imperfections in a blended repair area requires a keen eye and a careful approach. Begin by examining the surface under various lighting conditions. Natural light often reveals inconsistencies that artificial light may obscure. Look for differences in texture, sheen, and color that may indicate an area that has not fully blended with the surrounding surfaces.
In addition to visual inspection, run your fingers over the repaired area. A smooth feel is essential for a seamless finish. Any rough spots or raised edges can stand out noticeably, even from a distance. Be diligent in checking for these discrepancies, as they can affect the overall integrity and appearance of the repair. Taking the time to identify these issues early can save effort later in the finishing process.
Touch-Up Techniques
Minor flaws can often be addressed effectively with simple touch-up techniques. For small scratches or blemishes, a fine-tip paint applicator can help precisely fill in the affected areas. Be sure to choose a color that matches the original surface to ensure a cohesive look. Applying light layers will not only help achieve a smooth finish but also prevent buildup that can create noticeable patches.
When working on larger areas or more extensive imperfections, consider using a blending agent or a specialized touch-up product. These are designed to create a seamless transition between the repaired area and the surrounding surface. After applying the touch-up material, lightly feather the edges with a fine sanding tool to blend the repair into the existing finish. This technique minimizes the appearance of the repair, making it nearly undetectable.
Quick Solutions for Minor Flaws
When dealing with minor flaws in blended repair areas, it’s essential to have a few quick fixes in your toolkit. One effective method is to use a fine-grit sandpaper to lightly smooth any uneven spots. This approach helps restore a consistent surface without damaging the surrounding area. After sanding, applying a small amount of touch-up paint can effectively mask imperfections. Be sure to feather the edges to create a more natural transition.
Another helpful technique involves the use of a specialized touch-up pen or filler. These products are designed for quick application and can easily conceal small dents or scratches. Simply apply the product directly to the flaw and blend it in using a soft cloth or your fingertip. This quick solution often yields impressive results, allowing for a seamless appearance that requires minimal effort.
Maintenance After Repair
After completing any repair work, ongoing maintenance is essential to sustain the integrity and appearance of the blended area. Regularly inspect the surface to identify any signs of wear or damage that may arise over time. Simple cleaning with gentle products helps remove dirt and grime while avoiding harsh chemicals that could compromise the finish.
Paying attention to environmental factors is also crucial. Changes in humidity or temperature can affect how the repaired area interacts with surrounding materials. If the area requires touch-ups or additional care, prompt attention ensures a consistent look and longevity of the repair. Regular maintenance not only preserves the aesthetics but also contributes to the durability of the work done.
Caring for the Blended Area
After completing the repair process, it’s essential to give the blended area appropriate care to ensure longevity and maintain its appearance. Regularly inspect the finish for any signs of wear or damage. Clean the surface gently with a soft cloth and mild detergent to avoid disturbing the blend. Avoid abrasive cleaners or tools, as these can scratch or mar the finish, compromising the seamless effect achieved during repair.
To protect the blended area, consider applying a suitable sealant or topcoat, especially in high-traffic or moisture-prone areas. This step adds a layer of protection against dirt, stains, and environmental factors that could affect the integrity of the repair. Additionally, keeping the area well-maintained can prolong its life and ensure that it continues to blend in with the surrounding surfaces. Regular touch-ups may be necessary, so stay vigilant and proactive in your upkeep efforts.
Common Mistakes to Avoid
Blending repair areas effectively requires attention to detail, and certain common mistakes can compromise the final result. One frequent error is neglecting to prepare the surface adequately before starting repairs. This can lead to issues such as poor adhesion, uneven texture, and visible transitions. Properly cleaning the area and ensuring it is free of dust or grease is essential for achieving a seamless finish.
Another mistake often made is failing to mix colors correctly, which can create obvious patches. It’s crucial to test colors on a small, hidden section before application. Additionally, applying too thick a layer can result in cracking as it dries. Gradual layering and allowing each coat to dry properly can help produce a more natural appearance and reduce the risk of needing additional repairs later.
Pitfalls in Blending and How to Overcome Them
Achieving a seamless finish during repairs often trips up even experienced DIYers. One common mistake is neglecting to feather the edges of the repair area. This can create a noticeable line where the repair meets the surrounding surface. To avoid this, it is essential to gradually thin the applied material at the outer edges, ensuring a smooth transition. Additionally, using the correct tools can make a significant difference. A high-quality brush or roller designed for smooth finishes will help apply, blend, and refine the area more effectively.
Another challenge arises from improper drying and curing times. Rushing these stages can lead to cracking or uneven surfaces. Each repair material has specific drying and curing requirements, which should be followed closely. Take the time to read the manufacturer’s instructions and resist the temptation to speed up the process. In situations where immediate results are desired, using fast-drying products can be tempting, but they might not yield the best long-term results. Patience is key for ensuring the success of any repair work.
When to Call a Professional
Some repair projects can quickly escalate beyond the capabilities of a DIY enthusiast. Structural damage or extensive areas requiring blending often necessitate the expertise of a professional. If the imperfections are too large or the existing foundation is compromised, it’s best to consult with someone who has specialized training. Professionals will have the tools, knowledge, and experience to assess the damage accurately and execute a repair that ensures durability and aesthetic appeal.
In addition to evident physical damage, signs of poor workmanship can indicate that a professional’s touch is needed. If previous attempts at blending have resulted in visible imperfections or if the finish does not match the surrounding area despite multiple touch-ups, it may be time to seek expert assistance. Attempting complex repairs without the right skills can lead to further complications, resulting in more significant expenses down the line. Recognizing when to call for help can save both time and money in the long run.
Signs That Indicate Expert Help is Needed
Certain situations clearly signal the need for a professional touch in repair work. If the area remains noticeably uneven or the texture doesn’t match the surrounding surfaces after a thorough attempt to blend, it may be time to seek help. Persistent discoloration that does not improve with additional paint or finishing layers can also indicate that a more experienced hand is required for a satisfactory solution.
Further, extensive damage often presents a challenge that exceeds typical DIY capabilities. Cracks that extend beyond a few inches, or structural issues involving walls and ceilings, may necessitate professional intervention. Ignoring these signs can lead to larger problems down the line, making it crucial to recognize when the expertise of a skilled contractor is necessary for a successful repair.
- If repairs are causing more damage or frustration than improvement.
- When safety hazards arise, such as electrical issues or gas leaks.
- If the project is beyond your skill level or requires specialized tools.
- When timelines are critical, and you need to ensure timely completion.
- If you have health concerns, like mold exposure or lead paint.
- When modifications involve local building codes or permits you’re unfamiliar with.
- If you feel overwhelmed with the complexity of the project.
Conclusion
Achieving a seamless finish when blending repair areas requires patience and attention to detail. Following a systematic approach throughout the various stages of the repair process can significantly improve the final appearance. Carefully building up layers, ensuring proper drying times, and applying finishing touches are all crucial steps that contribute to a natural look.
Regular inspection of the work can help identify imperfections early on, allowing for timely touch-ups. By understanding common mistakes and knowing when to seek professional assistance, individuals can enhance their repair skills and achieve results that look both professional and polished. Maintaining the blended area afterwards ensures its longevity and keeps the surface looking fresh over time.
FAQS
What is the first step in blending repair areas for a seamless finish?
The first step is to build up layers for a natural look, ensuring each layer is applied evenly and allowed to dry properly before adding the next.
Why is proper drying time important in the repair process?
Proper drying time is crucial because it ensures that each layer adheres correctly and minimizes the risk of peeling or cracking once the repair is complete.
How can I identify imperfections in my blended repair area?
To identify imperfections, inspect the area under good lighting and feel the texture. Look for uneven surfaces or discoloration compared to the surrounding area.
What quick solutions can I use for minor flaws in the finish?
Quick solutions for minor flaws include using touch-up paint or applying a small amount of texture spray to blend imperfections seamlessly.
How should I maintain the blended repair area after it is finished?
To maintain the blended area, clean it gently with mild soap and water, avoid harsh chemicals, and periodically check for any signs of wear or damage.
What are common mistakes to avoid when blending repair areas?
Common mistakes include rushing the drying process, applying too much material at once, and failing to match the texture of the surrounding surface.
When should I consider calling a professional for my repair?
You should consider calling a professional if the area is large, if there are structural issues, or if you are unsure how to achieve a seamless finish on your own.