Table of Contents
ToggleKey Takeaways
- Methods for Utilizing Substitutes
- Instruments for Polishing and Refining
- Coating and Completing Instruments
- Purifying Instruments for Chip Restorations
- Preserving Your Repair Instruments
- Assessing Repair Efficiency
- Keeping Informed on Instruments and Methods
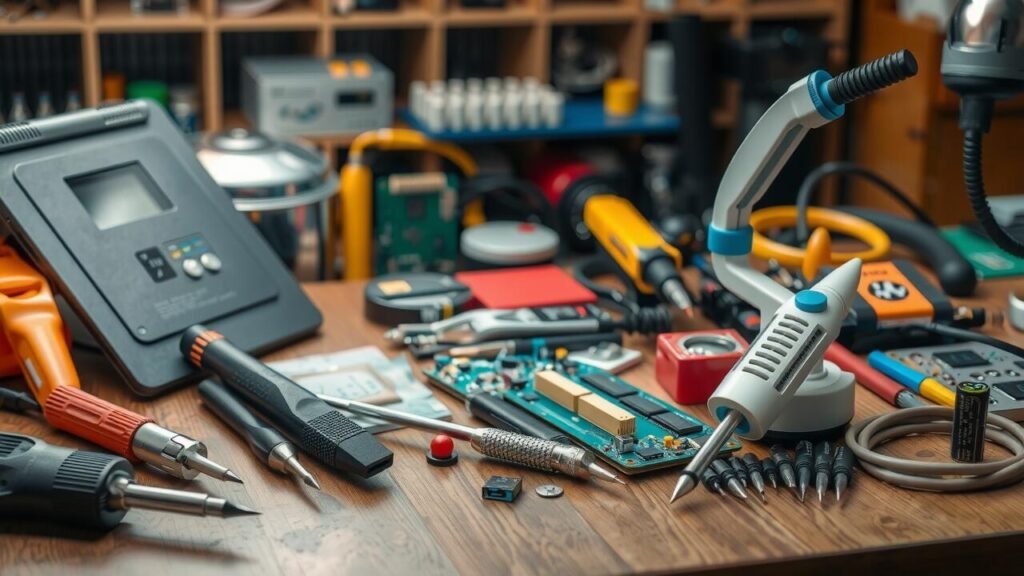
Key Components of a Complete Repair Kit
A complete repair kit is essential for anyone looking to efficiently tackle chip repairs. Basic components typically include fillers, putty knives, and sandpaper. Fillers are crucial for creating a seamless surface, while putty knives help apply them evenly. Sandpaper in various grits ensures that the surface can be smoothed effectively, allowing for a professional finish.
In addition to these basics, other important tools are necessary for comprehensive repairs. A cleaning solution is vital to prepare surfaces before applying fillers. Masking tape can be helpful in protecting adjacent areas during the fill and paint process. Lastly, an assortment of brushes and rags streamlines the application of paint and the cleanup process. Each component plays a significant role in achieving high-quality results.
Techniques for Applying Fillers
When applying fillers, preparation is crucial for achieving a durable and smooth result. Begin by cleaning the area thoroughly to remove any dust or debris. Choosing the right type of filler is important, as different materials and chip sizes may require specific formulations. Tools like spatulas or putty knives can help in spreading the filler evenly, ensuring that it penetrates any cracks and gaps effectively.
After applying the filler, it is essential to allow sufficient drying time according to the manufacturer’s instructions. Once the filler has cured, a light sanding can help create an even surface. Pay attention to any imperfections that might be visible. If necessary, an additional layer of filler can be added and sanded down again to achieve the desired finish. This method ensures that the repair blends seamlessly with the surrounding surface.
Step-by-Step Application Process
Begin by cleaning the chipped area thoroughly. Use a soft cloth and a suitable cleaner to remove any dirt, grease, or debris. Once clean, dry the surface completely with a lint-free cloth. If the chip is deep, consider using a putty knife to apply a filler that can create a solid base. Ensure the filler is evenly distributed and slightly overfill the area for a smooth finish later.
After the filler has had adequate time to cure, use sandpaper to smooth the surface. Start with a coarser grit to level the filler, transitioning to finer grits to achieve a seamless finish. Check frequently to ensure the surface is smooth and flush with the surrounding area. Once satisfied, clean off any dust created during sanding before moving on to painting or finishing.
| Step Number | Action | Tools Needed | Notes |
|---|---|---|---|
| 1 | Clean the chipped area | Soft cloth, suitable cleaner | Remove all dirt and grease |
| 2 | Dry the surface | Lint-free cloth | Ensure it is completely dry |
| 3 | Apply filler if needed | Putty knife | Overfill slightly for smooth finish |
| 4 | Smooth the surface | Sandpaper (coarse and fine grits) | Check frequently for smoothness |
| 5 | Clean off dust | Soft cloth | Prepare for painting or finishing |
Tools for Sanding and Smoothing
When it comes to chip repair, selecting the right sanding and smoothing tools is crucial for achieving a refined surface. Handheld sanders are versatile and effective for smaller areas, allowing for greater control. Detail sanders can reach into tight corners and intricate spots that larger sanders might miss. For larger surfaces, orbital sanders work efficiently, speeding up the process while providing a uniform finish. Alongside these, sanding blocks and various grit sandpaper play a significant role in ensuring the right amount of abrasion, allowing for both aggressive material removal and delicate finishing.
A good quality sanding sponge can also be incredibly useful, especially for uneven surfaces or edges. While power tools speed up the job, taking care with manual tools can lead to a smoother result. The grit level of sandpaper is integral; starting with a lower grit for heavy material removal and transitioning to higher grades for refinement helps achieve a flawless finish. Factors such as the material being repaired and the depth of the chip will dictate the choice of sanding tools and techniques. Properly utilizing these tools is essential for a professional-looking outcome.
Importance of Smooth Finishes
A smooth finish plays a critical role in the overall quality of chip repairs. It enhances the visual appeal of the surface, making imperfections less visible to the eye. This attention to detail not only improves aesthetics but also contributes to the longevity of the repair. A well-sanded surface allows for better adhesion of paint or polish, ensuring that the final layer looks professional and seamless.
Moreover, achieving a smooth finish can prevent future issues such as peeling or chipping. When surfaces are uneven, wear and tear can occur more rapidly, leading to a need for additional repairs. Employing the right sanding tools and techniques can significantly impact the durability of any repair. Taking time to focus on this aspect will yield more satisfying results and prolong the life of the repair itself.
- Smooth finishes enhance the visual appeal of surfaces.
- They make imperfections less noticeable.
- Improve the longevity of repairs by preventing wear and tear.
- Ensure better adhesion of paint or polish for professional results.
- Reduce the likelihood of future issues like peeling or chipping.
- Encourage the use of proper sanding tools and techniques.
- Foster a greater satisfaction with the overall repair process.
Painting and Finishing Tools
Selecting the right tools for painting and finishing is crucial for achieving a seamless look in chip repairs. A high-quality paintbrush or roller ensures even application of paint. Consider using a spray gun for larger areas. This can facilitate a smooth coat without brush strokes. Having a variety of sizes on hand allows for precision in both detailed areas and larger surfaces.
In addition to brushes, having a set of quality finishing tools is beneficial. Different types of finishes may require specific applicators. For example, foam brushes work well for lighter, more delicate applications, while traditional bristle brushes suit thicker paints. Preparing surfaces properly before applying paint will also enhance the overall effect. This attention to detail helps in achieving a polished look and ensures that repaired areas blend seamlessly with the original surface.
Preparing for a Perfect Finish
Achieving a flawless finish hinges on meticulous preparation of the surface. Begin by ensuring that the area is clean and free of dust, grease, or any contaminants that may affect adhesion. Utilizing a degreasing agent can help eliminate oils, while a damp cloth can remove particulate matter. Once cleaned, it’s essential to allow the area to dry completely, preventing moisture from interfering with the application of paint or filler.
Next, consider any imperfections such as scratches or dents before coating the surface. Sanding the area lightly with fine-grit sandpaper creates a smooth foundation, which enhances the application process. This step helps ensure that the final layer adheres properly and provides a consistent texture. Taking the time to prepare the surface adequately will significantly impact the overall quality of the finish.
Cleaning Tools for Chip Repairs
Having the right cleaning tools is essential for preparing surfaces before any chip repair work begins. A variety of brushes, cloths, and sprays can be utilized to remove dust, dirt, and grease from the area needing repair. Soft bristle brushes are effective for getting into smaller crevices, while lint-free cloths are great for wiping down surfaces. Cleaning solvents designed for the specific materials can also be crucial, as they ensure that any contaminants are removed completely.
Maintaining a clean workspace not only enhances the effectiveness of the repair process but also contributes to the overall quality of the results. Using a vacuum or compressed air can help eliminate loose debris. Additionally, organizing tools and materials helps prevent accidental contamination during repairs. A tidy environment promotes efficiency and allows for focus on the precise techniques required for successful chip repairs.
Ensuring a Clean Workspace
A clean workspace is essential for successful chip repairs. Dust, debris, and stray materials can compromise the quality of the repair. By organizing tools and ensuring that the area is clear, you can minimize the risk of contamination. Using drop cloths or tarps can protect surfaces from potential spills and scratches. Regularly clearing away unnecessary items helps maintain focus and efficiency while working on repairs.
Proper cleaning procedures should be implemented before starting any repair work. Wiping down surfaces with a damp cloth removes dust that could interfere with adhesives and paints. It is also beneficial to have a dedicated trash container nearby to dispose of scraps and used materials promptly. This promotes a tidy environment and helps avoid any hazards that may arise from clutter. Keeping tools in designated places will further assist in maintaining cleanliness and organization throughout the repair process.
Maintaining Your Repair Tools
Proper maintenance of repair tools is crucial for ensuring their longevity and optimal performance. Regularly inspect tools for wear and tear. Replace any worn or damaged parts to prevent further degradation. Clean tools after each use to remove dust, debris, and any leftover materials. This simple step can significantly enhance their lifespan and functionality.
Storing tools in a designated area protects them from unnecessary exposure to environmental factors. Utilize cases or racks to keep them organized and easily accessible. Additionally, periodically lubricating moving parts can prevent rust and maintain smooth operation. Keeping an inventory of tools helps track their condition and identify any items that may require attention.
Tips for Longevity and Performance
Proper care of repair tools significantly impacts their performance and lifespan. Regular cleaning is essential after each use to prevent residue build-up. For tools with moving parts, lubrication helps maintain their functionality. Check tools periodically for signs of wear and tear. Addressing small issues before they worsen can save both time and money in the long run.
Storing tools in a dry and organized space is equally important. A designated toolbox or organizer protects them from damage and makes them easier to locate. Avoiding exposure to harsh chemicals and extreme temperatures also contributes to their longevity. Lastly, investing in quality tools often leads to better performance and durability, making it a worthwhile consideration when setting up a repair kit.
Evaluating Repair Effectiveness
After completing a chip repair, it is essential to assess the effectiveness of the work done. Begin by inspecting the repaired area visually to determine if the color matches the surrounding surface and if the filler has settled appropriately. Consider using a bright light to illuminate the area, as this can reveal imperfections that might not be noticeable under normal lighting. Pay close attention to any gaps or poorly blended edges that could affect both appearance and durability.
In addition to visual inspection, conducting a physical test can help evaluate the repair’s integrity. Gently tapping or rubbing the repaired area can indicate whether the filler has adequately bonded and is resistant to chipping. If the repaired section feels uneven or if any material shifts, it may signal that the repair is not as effective as intended. Documenting these observations can assist in improving future repair techniques and help realize the longevity of the work conducted.
Methods for Assessing Repair Quality
A thorough evaluation of repair quality involves several key indicators. One primary method is visual inspection, which allows for the identification of imperfections. Look for inconsistencies in color, texture, and any visible gaps in repairs. Proper lighting enhances this assessment, as it reveals flaws that might be missed in dim conditions. Additionally, tactile examinations can be beneficial. Running fingers across the repaired area helps to feel for smoothness and identify any uneven surfaces that need further refinement.
Another method to gauge repair quality is conducting a stress test. This involves applying gentle pressure or stress to the repaired area to assess durability. If the repair holds without showing signs of cracking or separation, it indicates a successful application. Monitoring the repaired section over time also provides insight into how the repair withstands daily use and potential environmental factors. Regular assessments ensure that any issues can be addressed promptly, maintaining the integrity of the item.
Staying Updated on Tools and Techniques
Remaining informed about advancements in repair tools and techniques is vital for achieving optimal results in chip repairs. Various platforms, such as online forums, instructional videos, and social media groups, facilitate the sharing of knowledge among professionals and enthusiasts. Engaging with these resources can provide insights into emerging products and innovative methods that can streamline the repair process.
Attending workshops and trade shows presents opportunities to explore the newest tools firsthand. Networking with industry experts allows for the exchange of effective strategies and experiences, creating a community of individuals who are committed to enhancing their skills. Continuous learning reflects a dedication to quality and can significantly improve one’s craftsmanship over time.
Resources for Continued Learning
Staying informed about the latest tools and techniques in chip repair is crucial for professionals and DIY enthusiasts alike. Online forums and specialized websites offer a wealth of information. These platforms host discussions where users share experiences and advice on various repair processes. Additionally, video tutorials provide visual guidance, making it easier to grasp complex techniques.
Trade shows and workshops are excellent opportunities for hands-on learning. Attending these events allows individuals to interact with experts and manufacturers. Many organizations also publish newsletters and journals focused on advancements in repair technologies. Subscribing to these resources keeps one updated on emerging trends and best practices in chip repair.
Conclusion
Effective chip repair techniques depend on the right combination of tools and methods. A well-stocked repair kit enables quick and efficient fixes, ensuring that repairs restore both functionality and aesthetics. Understanding the application of fillers and the importance of a smooth finish can significantly affect the outcome of the repair.
Staying updated with the latest tools and techniques enhances repair skills and ensures high-quality results. Regular maintenance of tools prolongs their lifespan and optimizes performance, making every repair task easier. Continuous learning and practice will lead to greater proficiency, benefiting both professionals and DIY enthusiasts alike.
FAQS
What are the key components of a complete repair kit for chip repairs?
A complete repair kit typically includes fillers, sanding tools, brushes, cleaning supplies, and painting materials. Each component plays a crucial role in ensuring a successful repair.
What techniques are effective for applying fillers?
Effective techniques for applying fillers include using a putty knife for even application, layering the filler to build up depth, and allowing adequate drying time between applications for the best results.
Why is sanding important in the chip repair process?
Sanding is essential for creating a smooth surface that allows for better adhesion of paint and finishes. It helps to blend the repair with the surrounding area, making the repair less noticeable.
How can I prepare for a perfect finish when painting?
To prepare for a perfect finish, clean the repaired area thoroughly, use a primer if necessary, and ensure that the surface is smooth and dry before applying paint.
What should I do to maintain my repair tools?
To maintain your repair tools, clean them after each use, store them properly to avoid damage, and regularly check for wear and tear to ensure they perform effectively over time.