Table of Contents
ToggleKey Takeaways
- Smoothing the Fixed Section
- Applying Color to the Repaired Spot
- Protecting the Fix
- Allowing for Drying Duration
- Caring for Your Tub
- Knowing When to Seek Expert Help
- Relishing Your Restored Bathtub
How to Effectively Use a Repair Kit
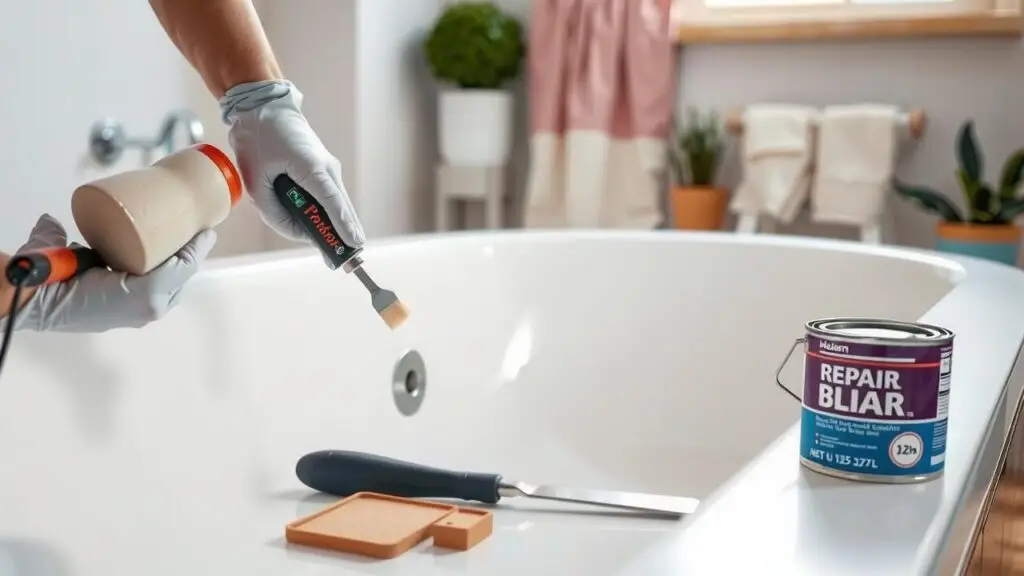
A repair kit for chips in your bathtub typically includes everything you need for a successful fix. Start by cleaning the damaged area thoroughly to remove any soap scum, dirt, or debris. This ensures that the repair material adheres properly. Once cleaned, follow the instructions provided with the kit carefully. Most kits include a resin or filler that needs to be mixed, so ensure you measure correctly for a perfect blend.
After preparing the repair compound, apply it directly into the chip with a small applicator or a putty knife, pressing firmly to eliminate any air bubbles. Be mindful not to overfill the area, as this can lead to an uneven surface. Once the compound is in place, smooth it out to match the surrounding surface. Allow it to cure as specified in the instructions, which is crucial for a long-lasting repair.
Sanding the Repaired Area
After the repair putty has fully cured, it is crucial to sand the repaired area to achieve a smooth surface. Begin with a medium-grit sandpaper to level out any imperfections. Gently sand the area in a circular motion, focusing on high spots that may be present. Ensure that you don’t over-sand or damage the surrounding areas. Checking the smoothness with your fingertips can help identify any uneven spots that need more attention.
Once the surface has been leveled, switch to a finer grit sandpaper for the final smoothing. This step will help blend the repair with the existing bathtub surface. Be sure to wipe away any dust or debris created during the sanding process before moving on to the painting stage. A clean surface ensures better adhesion for the paint, which is essential for a long-lasting repair.
Tips for Achieving a Smooth Finish
When sanding the repaired area, it’s essential to start with a coarse grit sandpaper to remove any rough edges and uneven surfaces. Gradually switch to finer grits for the finishing touches. This transition allows you to achieve a much smoother surface without damaging the repair work. It’s best to sand in a circular motion to promote an even texture. Make sure to frequently check your progress. A light touch will prevent over-sanding, which can lead to more significant issues.
Cleaning the area thoroughly after sanding will ensure that no dust particles interfere with the next steps of the repair process. Use a damp cloth to wipe away debris. Allow the surface to dry completely before applying any paint or sealant. When painting, use a brush or applicator that offers precision. Multiple thin coats of paint typically yield a smoother finish than one thick layer. Patience is key during this process; taking your time will result in a more seamless repair that blends well with the surrounding area.
Painting the Repaired Chip
Once the repair has dried and been sanded smooth, it’s time to apply paint to the repaired area. Choosing the right paint is crucial for a successful finish. Acrylic paints are often recommended for bathtub repairs due to their water resistance and durability. Before starting, ensure the paint matches the original color of the bathtub. You can either use a color match tool or consult with a paint specialist to find a suitable shade.
Applying the paint requires careful attention to detail. Use a small brush or a foam applicator for precision, avoiding overlaps onto the surrounding area. It’s essential to apply several thin coats rather than one thick layer to achieve an even finish. Allow each coat to dry completely before adding the next. This process ensures better adhesion and a smoother appearance once fully cured.
Selecting the Right Color and Paint Type
Choosing the right color and paint type is essential to achieve a seamless repair on your bathtub. First, you should determine the existing color of your bathtub. If the original shade remains intact, match the paint accordingly. Many repair kits include color matching options, but if not, consider taking a sample to a home improvement store for assistance. Environmental factors can also influence color appearance; natural light variations can alter the perception of the hue.
In terms of paint type, enamel or epoxy-based paints are typically recommended for tub repairs as they adhere well to surfaces and resist water. Make sure the paint you select is specifically designed for bathroom fixtures to ensure durability. Always review the manufacturer’s instructions for application methods and drying times. This attention to detail ensures a long-lasting and aesthetically pleasing repair.
Sealing the Repair
After completing the repair process, it’s essential to seal the area to prevent moisture from seeping in and causing further damage. A quality sealant can provide a waterproof barrier, ensuring the longevity of the repair. Apply the sealant carefully, focusing on the edges of the repaired chip where it meets the surrounding surface. Be sure to follow the manufacturer’s instructions for the best results, as different sealants may have unique application techniques.
Once the sealant is applied, allow it to dry completely before using the bathtub. This will help ensure that the repair is secure and can withstand regular use. Regular inspections of the sealed area can help you catch any signs of wear or damage early, making it easier to address issues before they require more extensive repairs. Taking these precautions will help maintain the appearance and integrity of your bathtub for years to come.
Importance of a Good Seal
A proper seal is crucial for the longevity of any bathtub repair. It creates a barrier that prevents water from seeping into the repaired area, which can lead to mold growth and further damage over time. Furthermore, a good seal helps maintain the integrity of the repair job, ensuring the materials used stay intact and function as intended. Without it, even the best repair technique can quickly become ineffective.
Ensuring a strong seal involves choosing the right products designed specifically for bathtub materials. Whether using caulk or a resin sealant, attention must be paid to application techniques. An even layer without gaps is essential for optimal protection. Regular inspections of the seal will also help catch any issues early, allowing for timely maintenance before significant problems develop.
| Sealant Type | Material Compatibility | Water Resistance | Application Method | Recommended Use |
|---|---|---|---|---|
| Silicone Caulk | Fiberglass, Acrylic | High | Apply evenly with a caulking gun | Bathtub edges, fixtures |
| Polyurethane Sealant | Fiberglass, Metal | Very High | Use a nozzle for precision | Heavy-duty, high-moisture areas |
| Epoxy Resin | Porcelain, Tile | Excellent | Mix and apply with a putty knife | Cracks, chips in surfaces |
| Latex Caulk | Drywall, Wood | Moderate | Apply with a caulking gun | Interior repairs, low-moisture areas |
Allowing for Curing Time
Once the repair process is complete, it is crucial to allow adequate time for the materials to cure. This period ensures that the repair adheres properly and achieves maximum strength. Typically, manufacturers provide specific recommendations for curing times, which can vary based on the type of product used. Allowing the repair to fully set helps prevent any premature damage that could occur if the area is disturbed too soon.
Curing time can be influenced by environmental conditions. Higher humidity and cooler temperatures may extend the necessary waiting period. Conversely, warm and dry environments might speed up the curing process. It is wise to monitor these factors and plan accordingly to avoid compromising the integrity of your repairs. Patience during this stage pays off when it comes to the longevity of your bathtub’s restoration.
Recommended Waiting Period for Repairs
After completing the repair process, it’s crucial to allow sufficient time for the new materials to cure. A general recommendation is to wait at least 24 to 48 hours before using the bathtub. This resting period ensures that the adhesive or filler has fully set, providing a more durable repair.
Factors such as humidity and temperature can also affect curing time. In areas with high humidity or cooler temperatures, it may be beneficial to extend the waiting period. Always refer to the manufacturer’s guidelines on the repair kit used for the most accurate drying and curing times.
Maintaining Your Bathtub
Regular maintenance can significantly prolong the life of your bathtub and keep it looking fresh. Simple tasks such as cleaning the surface with non-abrasive cleaners can help prevent grime and soap scum buildup. It is also a good idea to inspect the caulking and grout around the tub periodically. Any signs of wear or damage should be addressed promptly to avoid larger issues down the road.
Be cautious with the types of products you use for cleaning. Harsh chemicals can damage the surface, leading to chips or discoloration. To protect the finish, consider using a protective coating specially designed for bathtubs. This additional layer can help guard against daily wear while maintaining the shine and integrity of your tub. Regular upkeep will ensure a pleasant bathing experience and enhance the overall aesthetic of your bathroom.
Tips for Preventing Future Chips
Regular maintenance can significantly reduce the likelihood of chipping in your bathtub. Clean the surface regularly using gentle cleaners to prevent the buildup of soap scum and grime. Avoid abrasive sponges or scrubbers, as they can scratch the surface and create weak points. Additionally, using a bathtub mat can help cushion against impacts from objects that may fall onto the tub.
Be mindful when using your bathtub, particularly with heavy items like shampoo bottles or personal care products. Placing these items on the edge can lead to unintentional slips and falls, potentially causing chips. When rearranging or cleaning, always lift rather than drag items across the tub’s surface. Taking these precautions can prolong the life of your bathtub and maintain its pristine appearance.
- Regularly inspect the bathtub for any signs of wear or damage.
- Use a soft cloth or sponge to clean, avoiding harsh chemicals.
- Store heavy items in a bathroom caddy instead of on the tub’s edge.
- Avoid dropping sharp or heavy objects into the tub.
- Use a bathtub liner for added protection against scratches and chips.
- Be cautious when cleaning with tools that could scratch the surface.
- Apply a protective wax or sealant periodically for added durability.
Recognizing When to Call a Professional
Some repairs may exceed the capabilities of DIY approaches. Significant cracks or structural damage can indicate deeper issues that require expertise. In such cases, professional intervention ensures the repair is both safe and effective. Furthermore, if the damage is extensive and affects the integrity of the bathtub, it can lead to more problems down the line.
Identifying mold growth or water damage around the tub can also signal the need for professional help. This type of damage often requires more than simple cosmetic fixes. A trained technician can assess the situation thoroughly and make necessary repairs while preventing future complications. Prioritizing safety and durability will ensure the longevity of your bathtub.
Signs That Require Expert Attention
Some bathtub issues are beyond the reach of DIY repairs. Cracks that extend into the material or show signs of water damage indicate structural problems that need professional evaluation. Additionally, significant discoloration or peeling paint may suggest deeper issues that a simple touch-up cannot resolve. When the repair attempts fail repeatedly, it is time to seek expert help.
Persistent leaks can also be a warning sign that something is wrong. If water continues to escape despite repairs, the underlying problem may involve plumbing or the bathtub’s seals. Mold or mildew growth around the tub often indicates excess moisture that requires thorough investigation by a professional. Taking these signs seriously can prevent more extensive damage and costly repairs in the future.
Enjoying Your Repaired Bathtub
After successfully repairing your bathtub, it’s essential to allow some time for the fix to settle before resuming full use. Utilizing a few simple precautions can help preserve your work. Avoid using harsh chemicals during cleaning. Instead, opt for mild soap and warm water to maintain the integrity of the repair. This ensures that the surface remains smooth and intact, preventing any potential damage to the newly repaired area.
Enjoying your bathtub again can be a relaxing experience. Consider incorporating soft bath mats and gentle, non-abrasive sponges for cleaning. Opt for baths with soothing oils or bubble bath that enhances relaxation without disturbing the finish. By taking these small steps, you can ensure that your bathtub remains a sanctuary for comfort and leisure while keeping the repair looking its best.
Tips for Proper Use After Repair
After completing the repair, it’s essential to treat your bathtub with care to ensure the longevity of the fix. Avoid using harsh chemicals or abrasive cleaners in the newly repaired area. Use soft cloths or sponges, and opt for mild cleaning solutions to maintain the integrity of the surface.
When stepping into the bathtub, be cautious and avoid putting excessive weight on the repaired chip. Allow the surface to settle and bond properly before using the tub regularly. Implementing these simple practices can greatly extend the life of your bathtub and keep it looking pristine.
Conclusion
By following the steps outlined in this guide, you can effectively repair chips in your bathtub and restore its appearance. Using a repair kit, sanding the area, and carefully applying paint can make a significant difference. With attention to detail during the sealing and curing process, your bathtub can return to its original condition while providing a durable finish.
Regular maintenance is key to preventing future chips and ensuring the longevity of your bathtub. Keeping an eye on wear and tear will help you address any issues promptly. Enjoy the satisfaction of a well-maintained space, and don’t hesitate to seek professional help when necessary for more significant repairs.
FAQS
What materials do I need to fix a chip in my bathtub?
You will need a repair kit specifically designed for bathtubs, sandpaper, paint that matches your tub color, and a sealant.
How long does the repair process take?
The entire repair process can take several hours, including sanding, painting, sealing, and allowing for curing time. It’s essential to follow each step carefully.
Can I use regular paint to touch up the chip in my bathtub?
No, it’s best to use a paint specifically designed for bathtubs or one that is waterproof and adheres well to the material of your tub.
What should I do if the chip is too large to repair myself?
If the chip is significantly large or if you are unsure of your ability to repair it, it is advisable to call a professional to handle the repair.
How can I prevent future chips in my bathtub?
To prevent future chips, avoid using harsh cleaning tools, refrain from dropping heavy objects in the tub, and regularly inspect and maintain the tub’s surface.