Table of Contents
ToggleKey Takeaways
- Importance of adequate airflow
- Choosing the appropriate coating
- Readying the spraying tools
- Applying a base layer
- Methods for uniform coverage
- Allowing sufficient curing duration
- Final adjustments and tidy-up
How to Properly Tape Off Surrounding Areas
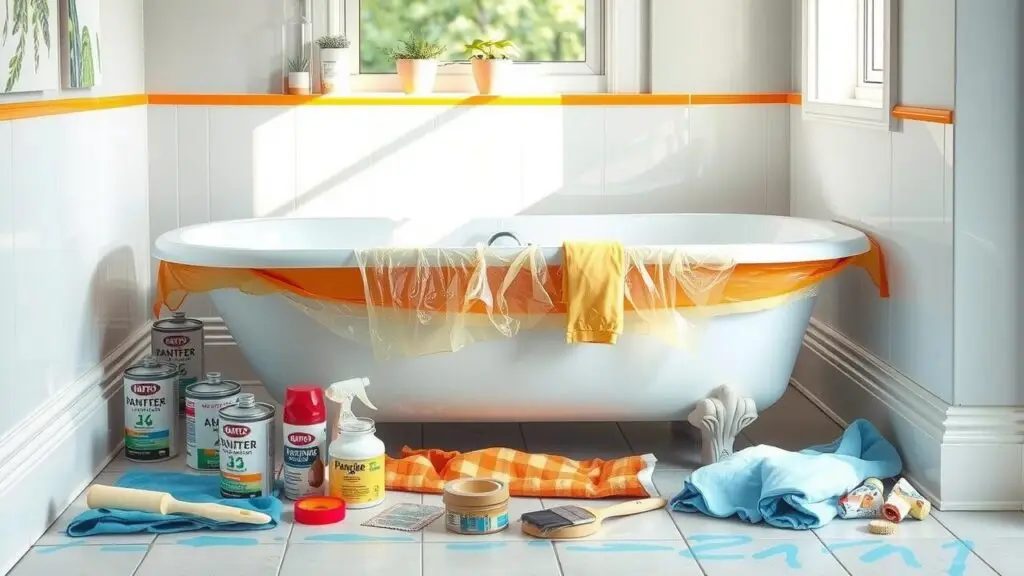
Begin by gathering the necessary materials, including painter’s tape and drop cloths. The painter’s tape provides a clean line and protects surfaces from overspray. Start by carefully applying the tape along the edges of the bathtub, ensuring it adheres firmly to prevent any paint from seeping through. Pay attention to corners and contours, making sure the tape lies flat against the surface. Drop cloths should be placed around the bathtub to capture any stray paint particles, keeping the surrounding area clean.
While taping, ensure that you cover any fixtures such as faucets, drains, and handles. These areas can be easily damaged or stained by paint, so taking the time to tape them off will safeguard against mishaps. Press down on the edges of the tape to create a strong seal. Inspect your work to confirm that there are no gaps. Properly taped surfaces will contribute to a professional-looking finish once the project is complete.
| Material | Purpose | Tips |
|---|---|---|
| Painter’s Tape | Creates clean lines and protects surfaces from paint | Ensure it’s pressed down firmly to avoid paint bleeding |
| Drop Cloths | Catches stray paint particles and protects the floor | Use a heavy-duty cloth for better absorption and coverage |
| Scissors or Utility Knife | For trimming tape or cloths to appropriate sizes | Keep them handy for quick adjustments during taping |
| Putty Knife | For pressing down the edges of the tape | Use a clean knife to avoid transferring any sticky residue |
Ensuring Proper Ventilation
Good ventilation is crucial when spray painting a bathtub. It helps to minimize the concentration of fumes and ensures that you work safely. Open windows and doors to create cross ventilation. If possible, use fans to enhance airflow. This practice not only protects your health but also improves the quality of your paint job by reducing drying times.
Avoid painting in confined spaces without adequate airflow. Lack of ventilation can lead to harmful inhalation of paint vapors, which may pose health risks. Additionally, poor air circulation can cause paint to dry unevenly, affecting the final appearance of the surface. Taking these precautions will create a safer and more effective environment for your project.
Importance of Airflow During Painting
Adequate airflow is crucial when spray painting your bathtub to prevent the buildup of harmful fumes. Ventilation allows fresh air to circulate, helping to dissipate any airborne particles and chemicals released during the painting process. This not only improves comfort but also significantly reduces health risks associated with inhaling toxic substances found in spray paint.
Furthermore, airflow plays a vital role in ensuring a smooth and even application of paint. A well-ventilated space helps to control humidity and temperature, both of which can affect the drying process. By maintaining optimal conditions, you can minimize the chances of drips and uneven finishes, resulting in a professional-looking outcome.
Selecting the Right Spray Paint
Choosing the correct spray paint is crucial for achieving a durable and visually appealing finish on your bathtub. Look for paints specifically designed for porcelain, ceramic, or acrylic surfaces. These formulations typically have better adhesion and resistance to moisture compared to standard paint. Additionally, ensure the paint has a high gloss or semi-gloss finish to mimic the look of traditional bathtub surfaces while also enhancing durability against chipping and peeling.
Consider the type of finish you want to achieve. Some paints come in various colors and sheen levels, allowing for customization according to your preferences. It’s also essential to select a paint that mentions its suitability for high-moisture environments. Checking for products that are labeled as non-toxic and low in volatile organic compounds (VOCs) can improve air quality during and after application, making it a safer choice for bathroom use.
Differences Between Types of Spray Paint
Different formulations of spray paint serve various needs, especially when it comes to surfaces like bathtubs. Enamel spray paints offer a durable finish that withstands moisture and general wear, making them an ideal choice for bathroom applications. On the other hand, acrylic spray paints provide more flexibility in application and drying times. Although they may not be as durable as enamel options, they can still deliver a satisfactory aesthetic appeal.
When choosing spray paint, consider the specific requirements of your bathtub’s material. Some paints are designed for plastic surfaces, while others adhere better to ceramic or fiberglass. Additionally, high-gloss and satin finishes can significantly impact the final look and feel of the surface. Understanding these differences helps you select the best product for your project, ensuring lasting results and a satisfying finish.
Preparing the Spray Equipment
Before starting the paint job, it’s essential to ensure that your spray equipment is in optimal condition. Begin by thoroughly cleaning your spray gun and its components, removing any paint residue from previous projects. This will help achieve a smooth application without any clogs or inconsistencies. Inspect the hose for any signs of wear or damage, as well as ensuring all connections are secure. If necessary, replace any worn parts to ensure the equipment functions correctly.
After cleaning, it’s advisable to prime the sprayer with a small amount of the chosen paint or a compatible thinner. This step helps to ensure a consistent flow and prevents sputtering during application. Adjust the nozzle settings according to the manufacturer’s recommendations, which will vary depending on the type of paint being used. Practicing on a cardboard or scrap surface can help gauge the spray pattern and make any necessary adjustments before starting on the bathtub surface.
Cleaning and Priming Your Sprayer
Before starting your spray painting project, it’s essential to clean your sprayer thoroughly. Any residue from previous uses can affect the quality of your application. Begin by disassembling the sprayer according to the manufacturer’s instructions. Rinse all the parts with warm soapy water. Pay special attention to the nozzle and paint cup, ensuring there are no clogs. After rinsing, flush the sprayer with clean water until it runs clear, and then let each component dry completely.
Once the sprayer is clean, priming it is necessary for optimal performance. Use a primer suitable for your desired paint type and both of the surfaces being sprayed. Fill the paint cup with primer and test the sprayer to ensure it’s functioning properly. This step not only prepares the sprayer for a smooth application but also helps identify any lingering issues before you start with your actual paint. Always refer to the sprayer’s manual for specific priming steps to achieve the best results.
- Ensure all parts are completely dry before reassembling the sprayer.
- Use a funnel to make filling the paint cup with primer easier and reduce spills.
- Test spray on a piece of cardboard to check for even coverage before painting your project.
- Adjust the nozzle settings according to the type of paint and surface for optimal results.
- Keep a cloth handy to wipe any excess paint that may splatter during testing.
- Store the cleaned and primed sprayer in a cool, dry place until you’re ready to start your project.
- Always clean the sprayer again immediately after completing your painting to maintain its longevity.
Applying a Primer Coat
Applying a primer coat is an essential step in achieving a flawless finish. Primer helps by creating a smooth surface that improves adhesion for the topcoat. It also seals any small imperfections in the bathtub’s surface, ensuring that the final paint job appears even and professional.
Choosing the right primer is crucial for optimal results. Look for a product specifically formulated for use on bathroom fixtures. This type of primer often contains properties that enhance bonding with subsequent layers of paint, while also offering resistance to moisture and mildew. Proper application techniques, such as using even strokes and ensuring complete coverage, will maximize the effectiveness of the primer.
Benefits of Using Primer Before Paint
Applying a primer coat before painting your bathtub enhances adhesion and durability. The primer creates a binding layer that helps the paint stick better to the surface, reducing the chances of peeling or chipping over time. This step is particularly important for porcelain, fiberglass, or acrylic surfaces which can be challenging for standard paint to adhere to effectively.
Additionally, using a primer can improve the overall finish of the paint. It fills in small imperfections and creates a smoother surface for the topcoat. This results in a more uniform application, allowing for a professional look once the job is complete. The right primer can also improve the color vibrancy of the topcoat, ensuring the final outcome is both visually appealing and long-lasting.
Techniques for Even Application
Achieving an even spray paint application on your bathtub requires careful technique and a steady hand. Begin by holding the spray can or gun approximately six to twelve inches away from the surface. This distance helps to create a fine mist that covers the area uniformly without causing drips or runs. Move in a consistent, sweeping motion to maintain control over the application. Avoid lingering in one spot for too long to prevent build-up, which can lead to uneven surfaces.
It’s beneficial to apply multiple light coats rather than one heavy coat for the best results. Light coats dry faster and tend to adhere better, reducing the risk of imperfections. Allow for adequate drying time between coats as indicated by the manufacturer’s guidelines. This method ensures that each layer bonds effectively with the previous one, providing a smooth and polished finish once all coats are applied.
Tips for Spray Painting Your Bathtub
Achieving a smooth and even finish on your bathtub requires a steady hand and careful technique. Start spraying from a consistent distance, typically around 12 to 18 inches from the surface. Move in sweeping motions, overlapping each pass slightly to avoid gaps. Maintain a steady pace to prevent drips and runs. If you notice any areas that appear uneven, it’s best to wait until the paint is dry before addressing those spots to minimize the chance of messing up the freshly painted surface.
Consider using multiple thin coats rather than applying a single thick coat. This approach not only reduces the risk of drips but also enhances the durability of the finish. Allow adequate drying time between coats to ensure proper adhesion and a flawless outcome. Keep the workspace free from dust and debris during the process, as these elements can affect the quality of the paint job. Adhering to these tips will lead to a professional-looking result that revitalizes your bathtub effectively.
Allowing for Proper Drying Time
After applying the final coat of paint, it is crucial to allow sufficient time for the surface to dry. The drying time can vary based on several factors, including the type of paint used, ambient temperature, and humidity levels in the environment. Following the manufacturer’s recommendations is essential. Generally, a thorough drying process can take anywhere from several hours to a full day. Rushing this step may lead to a compromised finish and could affect the overall durability of the paint job.
Understanding the difference between drying and curing is also important. While drying refers to the paint becoming touch-dry, curing is the process where the paint reaches its maximum hardness and durability. This phase can take considerably longer, sometimes extending to weeks, depending on the paint. During this time, avoid using the tub to prevent any unintended damage. Properly allowing for these phases ensures a long-lasting and visually pleasing outcome for your newly painted surfaces.
Understanding Curing vs. Drying
It’s essential to recognize that drying and curing are two distinct processes when it comes to paint application. Drying refers to the time it takes for the surface of the paint to become firm and no longer feel tacky. This process is often relatively quick and allows for the painted object to be touched lightly without transferring paint. However, the underlying layers may still remain vulnerable and could be easily damaged if forced to endure pressure or moisture.
Curing, on the other hand, is the process where the paint undergoes a chemical transformation, resulting in a more durable and resilient finish. This stage can last much longer, sometimes several days to weeks, depending on the paint used and environmental conditions. During curing, the paint hardens completely and adheres more effectively to the surface, ensuring longevity and resistance to chipping or peeling. Understanding the difference between these two stages enables better planning and care post-application.
Final Touches and Clean-Up
After the paint has dried and cured, inspect the surface for any imperfections or uneven areas. If needed, use fine-grit sandpaper to smooth out any rough spots. This careful attention to detail will enhance the overall finish of your bathtub. Wipe down the surface with a damp cloth to remove any dust or debris that may have settled during the drying process.
Next, it’s important to remove the tape from the surrounding areas. Take your time to peel it off slowly and at an angle to prevent any damage to the freshly painted surface. Clean your spray equipment thoroughly to ensure it remains in good condition for future projects. Dispose of any used materials responsibly and enjoy your newly refreshed bathtub.
Steps for a Polished Finish
Once the paint has dried thoroughly, inspect the surface carefully. Look for any imperfections or areas that may need a touch-up. This is the time to address any blemishes to ensure a smooth, polished finish. If necessary, lightly sand these areas using fine-grit sandpaper to create an even surface before applying additional paint as needed.
After achieving the desired look, it’s essential to clean your tools and the surrounding area. Dispose of any used materials properly to avoid clutter. Wipe down the bathtub surface with a soft cloth to remove any overspray or dust. A final inspection ensures the job has been done well, leaving the bathtub ready for use in its refreshed state.
Conclusion
Successfully spray painting a bathtub requires careful planning and attention to detail. It is essential to follow each step of the preparation process, from taping off surrounding areas to selecting the right spray paint. Proper ventilation is crucial to ensure a safe working environment while allowing for even application and effective drying. These considerations contribute to a smooth finish that can revitalize the appearance of your bathtub.
Taking the time to clean and prime your sprayer enhances the overall results of your project. Utilizing a primer coat before applying paint not only improves adhesion but also ensures better coverage. Following up with the right techniques for application and allowing adequate drying time will lead to a polished, professional-looking finish. Thorough clean-up after the project will also maintain the integrity of your tools for future use.
FAQS
What materials do I need to tape off surrounding areas before spray painting my bathtub?
You will need painter’s tape, drop cloths or plastic sheeting, scissors, and possibly a utility knife to ensure all surrounding surfaces are protected from overspray.
Why is proper ventilation important when spray painting?
Proper ventilation helps to dissipate harmful fumes and ensures that the paint dries evenly. It also contributes to a safer working environment by reducing the concentration of paint particles in the air.
What type of spray paint is best for a bathtub?
Look for spray paints specifically formulated for use on porcelain or fiberglass surfaces. These paints are durable, water-resistant, and designed to withstand the conditions of a bathroom.
How should I prepare my spray equipment before use?
Clean your sprayer thoroughly to remove any residue from previous use, and prime it according to the manufacturer’s instructions to ensure a smooth and even application.
How long should I wait before using my bathtub after spray painting?
It’s recommended to allow at least 24 hours for the paint to dry before using the bathtub, but check the specific drying and curing times listed on your paint can for best results.