Table of Contents
ToggleKey Takeaways
- Preparation of the Fixed Spot
- Applying Color to the Restored Area
- Protecting the Fix
- Giving Time for Drying
- Tidying Up Post-Repair
- Evaluating the Restoration
- Care Suggestions for Your Tub
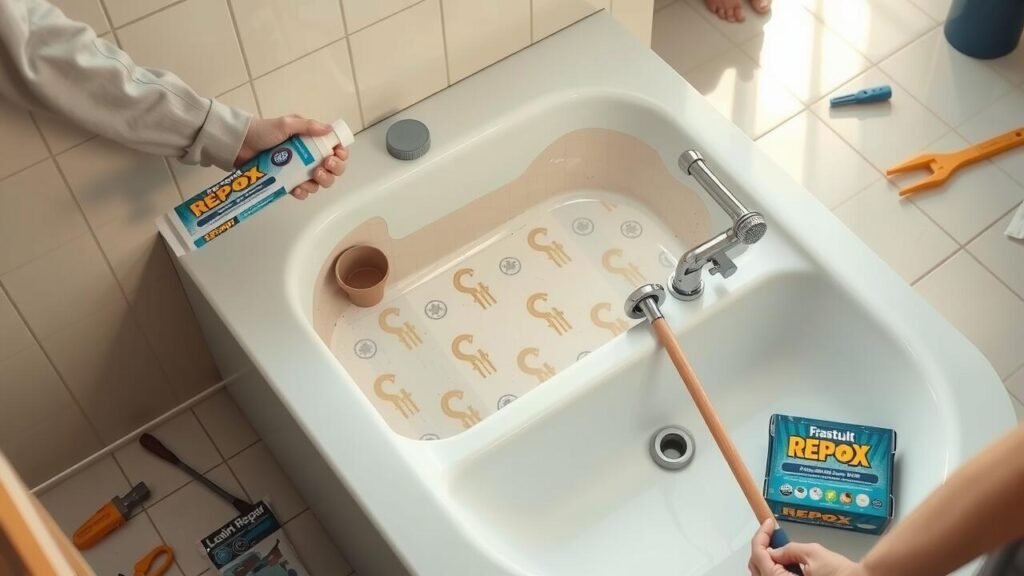
How to Properly Place the Patch
Before applying the patch, ensure the surface is clean and dry. Use a mild cleanser to remove any soap residue, oils, or dirt. After cleaning, thoroughly rinse the area and allow it to dry completely. This step is critical, as any moisture or contaminants can affect the adhesive properties of the patch. Carefully inspect the damaged area for any loose pieces or debris and remove those as well. A smooth, prepared surface will ensure better adhesion and a longer-lasting repair.
When placing the patch, align it with the edges of the damaged area, making sure it covers the entire spot. Press down firmly to eliminate air bubbles and ensure good contact. If the patch comes with adhesive backing, be cautious to avoid repositioning it after it’s adhered, as this can weaken the bond. For additional reinforcement, some kits may suggest applying extra adhesive around the edges. Follow the specific instructions provided in your repair kit to ensure the most effective placement.
| Step | Description | Importance |
|---|---|---|
| 1 | Clean the Surface | Removes contaminants that can affect adhesion |
| 2 | Dry Completely | Ensures effective adhesion and avoids moisture-related issues |
| 3 | Inspect the Area | Identifies any loose pieces that may impair adherence |
| 4 | Align and Press the Patch | Ensures full coverage and contact with the surface |
| 5 | Follow Kit Instructions | Ensures the best results for the specific patch used |
Sanding the Repaired Area
Once the patch has been applied and properly cured, sanding the repaired area becomes essential for achieving a seamless finish. Begin with a coarser grit sandpaper, typically around 120-grit, to remove any excess patch material and level the surface. Sand in circular motions to ensure an even texture. Gradually switch to finer grit sandpaper, such as 220-grit, to smooth out the surface further. This will help blend the repair into the surrounding area, making it less noticeable.
After sanding, it’s critical to clean the area thoroughly to remove any dust and debris left behind. A damp cloth works well for this purpose, ensuring that the surface is clean before proceeding with the next steps, like painting or sealing. Proper preparation at this stage facilitates better adhesion for any products applied later. Following these guidelines will enhance the overall appearance of the repair, helping to restore the bathtub’s original look.
Best Practices for a Smooth Finish
Achieving a smooth finish during bathtub repairs involves careful attention to detail. Start by ensuring surfaces are clean and dry before applying any patch or filler. Use fine-grit sandpaper to gradually smooth the patched area, working in a circular motion. This technique helps to eliminate rough edges and blend the repair seamlessly with the surrounding surface. After sanding, wipe down the area with a damp cloth to remove dust particles, preparing it for the next steps of painting and sealing.
In addition, consider using a primer on the patched surface before painting. A good primer promotes adhesion and creates an even base for the paint. When applying paint, use long, even strokes with a foam roller for the best results. This method minimizes brush marks and helps achieve a professional appearance. Allow adequate drying time between coats to ensure a durable finish. Patience during this process will pay off in the long run, resulting in a visually appealing repair that can withstand daily use.
Painting the Repaired Section
Applying a fresh coat of paint to the repaired area is essential for both aesthetics and protection. Begin by selecting a high-quality, bathtub-specific paint that is designed to adhere well to the surface. This type of paint typically features a formulation that handles moisture effectively, preventing peeling and chipping over time. Before painting, ensure the repaired section is completely dry and clean any dust or debris that may have settled.
When ready, use a brush or roller to apply an even layer of paint to the patched area. It’s advisable to work in light coats, allowing each layer to dry before adding more. This method promotes a smoother finish and ensures better adhesion. Once you achieve the desired coverage, be sure to allow ample drying time, following the manufacturer’s instructions to achieve the best results.
Choosing the Right Paint for Bathtubs
Selecting the appropriate paint for bathtubs requires consideration of both durability and finish. Epoxy-based paints are often recommended due to their water-resistant properties and strong adhesion. These paints not only withstand moisture but also resist chipping and peeling, making them ideal for a high-use area like a bathtub. Additionally, look for products labeled as specifically designed for tubs and tiles, as they are formulated to endure the rigors of constant exposure to water and heat.
Color choice is equally important, influencing not only the aesthetic appeal but also how the space feels overall. Lighter shades can create an illusion of a larger space, while darker hues may add a touch of elegance. Always opt for a high-gloss finish when painting bathtubs, as this finish is easier to clean and can help highlight the overall beauty of the bathroom. Consider purchasing a small sample to test on an inconspicuous area before proceeding with the entire project, ensuring that the final look meets your expectations.
Sealing the Repair
After completing the repair, applying a sealant is crucial to ensure durability and prevent water from seeping under the patch. Select a sealant specifically designed for bathtubs, as it will provide the best adhesion and waterproofing. Clean the area around the repair thoroughly before application. This helps the sealant adhere properly and prevents any contaminants from compromising the repair’s strength.
Using a caulking gun, carefully apply the sealant along the edges of the patch. Aim for a uniform layer that fills any gaps, ensuring a watertight seal. Avoid overapplying, as this can result in a messy finish and may need additional smoothing later on. Allow the sealant to cure according to the manufacturer’s instructions, providing a robust finish that can withstand daily use.
Types of Sealants to Use
When selecting a sealant for bathtub repairs, silicone sealant is a popular choice due to its excellent waterproofing properties. It adheres well to various surfaces, including porcelain and fiberglass, making it versatile for different types of bathtubs. Silicone sealants remain flexible, which is beneficial for areas that may experience movement or expansion. They are resistant to mildew and mold, ensuring longevity in moist environments.
Another option is polyurethane sealant, known for its durability and strong adhesion. This type of sealant provides a tough, water-resistant barrier that is ideal for high-stress areas. Polyurethane can be more challenging to apply due to its thicker consistency. However, it can offer superior protection against chemicals commonly found in cleaning products. Both silicone and polyurethane sealants require careful application to ensure the best results.
- Choose silicone sealant for easy application and flexibility.
- Opt for polyurethane sealant for added durability in high-stress areas.
- Ensure surfaces are clean and dried before applying any sealant.
- Apply in a well-ventilated area to expedite drying and curing times.
- Follow manufacturer instructions regarding curing time for best results.
- Consider using a caulking gun for even application and better control.
- Test small areas first to determine the best sealant for your specific needs.
Allowing for Cure Time
After completing the repair process, it is essential to allow adequate cure time for the materials used. Each product in your repair kit may have specific instructions regarding how long it should set before exposing it to water or heavy use. Generally, waiting at least 24 hours is recommended, but some products may require longer periods to achieve maximum strength. Referencing the manufacturer’s guidelines ensures that the repair will be effective.
Curing not only helps the repair bond effectively to the bathtub surface but also contributes to the overall durability of the fix. Additionally, maintaining a stable room temperature and allowing for proper ventilation during this period can enhance the curing process. Monitoring the drying conditions carefully can lead to a more successful outcome once the bathtub is back in service.
Recommended Curing Period
After applying the patch and sealant, it is crucial to allow sufficient time for the materials to cure properly. Typically, a curing period of at least 24 to 48 hours is recommended to achieve maximum strength and durability. Avoid using the bathtub during this time to prevent any disruption to the drying process. This waiting period contributes significantly to the longevity of the repair and reduces the likelihood of future issues.
Environmental factors can influence the curing time. Higher humidity levels or cooler temperatures may extend the necessary waiting period, while warm, dry conditions can speed up the process. Always check the specific instructions provided with your repair kit, as they may offer tailored guidance on optimal curing times based on the materials utilized. Proper adherence to these recommendations will help ensure a successful and lasting repair.
Cleaning Up After the Repair
Once the repair work is completed, it’s essential to tidy up the area to ensure a safe and clean environment. Start by carefully removing any tape or coverings used during the repair process. Dispose of any leftover material, including patches, sandpaper, or paint cans, according to local regulations. This not only helps maintain cleanliness but also avoids any potential hazards that these materials may pose.
Next, give the bathtub and surrounding area a thorough cleaning. Wipe down surfaces with a gentle cleaner to remove dust and debris. Pay attention to any residue or spills that may have occurred during the repair. Keeping the area tidy helps maintain both hygiene and the aesthetic appeal of your bathroom.
Safe Disposal of Leftover Materials
After completing your bathtub repair project, it’s important to responsibly dispose of any leftover materials. Empty cans of paint, old patches, and tools that are no longer needed should not be thrown in the regular trash unless they are clearly marked as safe for disposal. Check local regulations for specific guidelines on hazardous materials. Many areas have designated drop-off sites or collection events for these types of items, ensuring they are processed properly.
Additionally, consider recycling wherever possible. Some materials like plastic containers and cardboard packaging may be eligible for recycling. Clean these materials to prevent contamination and follow your local recycling program’s rules. Using these disposal methods not only keeps the environment safe but also helps in reducing waste in landfills.
Testing the Repair
Once the repair is fully cured, it is crucial to test the patched area to ensure its effectiveness. Begin by gently running your hand over the surface to check for any rough spots or inconsistencies. Next, use a soft cloth to wipe the area, inspecting for any moisture or signs of leakage. Passing this initial inspection indicates that the patch has adhered properly and provided an effective seal.
After the surface examination, fill the bathtub with a small amount of water. Monitor the repaired section for any signs of bubbling or cracks emerging. Performing this test exposes potential weaknesses in the repair. If everything holds up after a few hours, it suggests a successful fix that can withstand regular use. Always keep records of the repair and regularly check the area as part of your ongoing maintenance routine.
How to Ensure the Repair is Effective
After completing the repair, it’s crucial to test the area to ensure it adheres well and functions as intended. Start by gently applying pressure around the patch or repaired section. This action will help verify its stability, revealing any weaknesses in the adhesion. If possible, fill the bathtub with water to simulate typical usage conditions, allowing you to check for leaks or other issues. Observing how the repair holds up under these circumstances provides insight into its durability and effectiveness.
Regular inspections can prevent small problems from becoming significant issues. It’s advisable to maintain a close watch on the repaired area for a few weeks following the repair. Look for signs such as cracks, peeling, or discoloration. Addressing any concerns promptly can extend the life of the repair. Keeping the surface clean and avoiding harsh chemicals will also promote longevity, allowing your bathtub to remain in good condition longer. Regular maintenance can help you avoid repeated repairs in the future.
Maintenance Tips for Your Bathtub
Regular maintenance is essential for extending the life of your bathtub. Start by inspecting the surface for any signs of wear or damage. Address any minor issues promptly before they escalate into more significant problems. Always use soft sponges or cloths along with non-abrasive cleaners to avoid scratches on the tub’s surface. Rinse thoroughly after cleaning to remove any leftover product, as residue can sometimes lead to deterioration over time.
Additionally, consider the water quality in your home. High mineral content can lead to buildup that tarnishes the finish of your bathtub. Using a water softener can help minimize these effects. Keep an eye on the caulk and seals around the edges of your tub; they should remain intact to prevent water damage. Reapplying caulk as necessary will protect the surrounding areas and help maintain the overall integrity of your bathroom.
Preventing Future Damage
Regular maintenance can help prolong the life of your bathtub and minimize the chances of damage. After repairs are completed, it’s important to keep an eye on the overall condition of the surface. Avoid using abrasive cleaners or tools that could scratch or chip the finish. Instead, opt for gentle, non-abrasive cleaners and soft cloths for routine cleaning.
Proper ventilation in your bathroom can also play a significant role in preventing damage. Excess moisture can lead to mold and mildew, which may compromise the integrity of the bathtub material over time. Using an exhaust fan or opening a window during and after showers can help reduce humidity levels. Additionally, promptly addressing leaks and drips will help maintain the bathtub’s condition and overall appearance.
Conclusion
Using a bathtub repair kit can extend the life of your tub and save you money on costly replacements. With careful preparation, proper application, and adherence to the recommended curing times, homeowners can achieve professional-looking results. Following the guidelines outlined in the previous steps ensures a thorough repair process, giving your bathtub a fresh appearance.
Ongoing maintenance is essential to keep your bathtub in good condition. Regularly inspecting for cracks, chips, or signs of wear will help prevent future damage. By being proactive and using the right products, you can enjoy a functional and attractive bathing space for many years to come.
FAQS
What tools do I need for a bathtub repair using a kit?
Typically, you will need sandpaper, a putty knife, a clean cloth, and any specific tools that come with the repair kit, such as a mixing tray or brush.
How long does it take for the repair to cure completely?
The recommended curing period can vary by product, but generally, it’s best to allow at least 24 hours before using the bathtub to ensure the repair is fully set.
Can I paint over the repaired area immediately after applying the patch?
No, it’s important to allow the repair to cure completely before painting. This helps ensure better adhesion and a smoother finish.
What type of paint should I use on my bathtub repair?
It’s best to use a paint specifically designed for bathtubs or acrylic paints that are water-resistant and durable for wet environments.
How can I prevent future damage to my bathtub after making a repair?
Regular maintenance, such as cleaning with non-abrasive cleaners, avoiding harsh chemicals, and promptly addressing any new chips or cracks, can help prevent future damage.