Table of Contents
ToggleKey Takeaways
- Methods for patching damage in acrylic tubs
- Approaches for refining and polishing
- Applying paint to fill imperfections in bathtubs
- Closing the repair effectively
- Caring for your bathtub post-repair
- Financial aspects of bathtub restoration
- Strategies to avoid future damage
Cleaning and Drying the Surface
Before beginning any repair work, it is essential to ensure the surface of the bathtub is properly cleaned and dried. Begin by using a gentle cleaner to remove soap scum, grime, and any other debris that may have accumulated. A soft sponge or cloth works well for this task, preventing scratches on the bathtub surface. It is important to focus on the area around the chip, as any residual dirt will interfere with the adhesion of the repair materials. Rinse the area thoroughly with warm water to remove all cleaning agents, which could react negatively with fillers and paints.
After cleaning, allow the bathtub surface to dry completely. This step is crucial, as moisture can lead to poor bonding with repair products. Using a clean towel, carefully dry the area around the chip. If possible, let the bathtub air dry for at least an hour before proceeding with the repair. For particularly humid environments, using a fan or a hairdryer set to low heat can expedite the drying process. Ensuring the surface is completely dry will provide the best foundation for a successful repair.
Filling Chips in Acrylic Bathtubs
Acrylic bathtubs are popular for their durability and aesthetic appeal, but they can still incur chips that disrupt their smooth appearance. Addressing these chips promptly is essential to maintain the integrity of the surface. Start by thoroughly cleaning the area around the chip to remove any debris or soap residue. Once clean, ensure the surface is completely dry before proceeding with repairs. This preparation minimizes the risk of moisture interferings with the filler material.
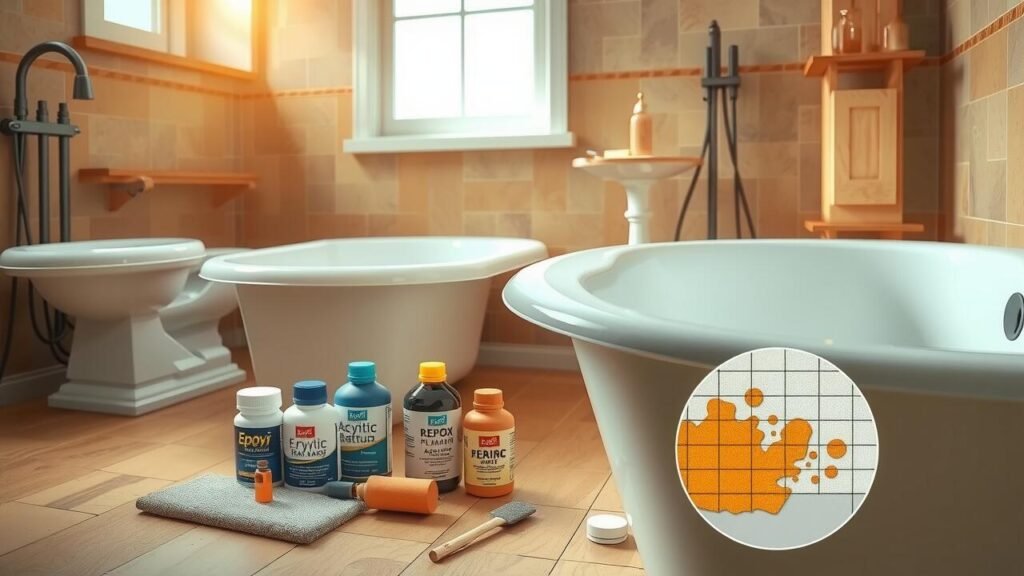
Filler products specifically designed for acrylic surfaces are crucial to achieving a seamless repair. Choose a two-part epoxy filler, as it bonds well with acrylic and provides a tough finish. Carefully apply the filler into the chip, slightly overfilling to allow for sanding later. After the filler has cured according to the manufacturer’s instructions, it can then be sanded down to match the surrounding surface. This method helps achieve a smooth, invisible fix that restores the bathtub’s appearance.
Choosing the Right Filler Product
Selecting an appropriate filler product is essential for ensuring a successful repair. Acrylic bathtubs typically require specialized fillers that match the material’s flexibility and color. Two-part acrylic kits are often the best choice, as they provide strength and durability. Some products also come in a variety of colors, allowing for easier blending with the existing surface. When choosing a filler, consider both the formulation and the final finish, as they can greatly influence the appearance of the repair.
Another factor to consider is the ease of application. Some fillers come with applicators or are designed for straightforward application, making the repair process smoother. Ensure that the product you choose adheres well to acrylic surfaces and has been recommended for bath repairs. Researching product reviews or consulting with professionals can also guide you in selecting the right filler for your specific needs.
Techniques for Sanding and Smoothing
Sanding is a critical step in achieving a professional finish when repairing chips in bathtubs. Start with a coarse grit sandpaper to remove any excess filler and level the repaired area with the surrounding surface. Once you have a smooth base, gradually transition to finer grits to refine the finish. This step is crucial for eliminating any visible scratches or imperfections, ensuring that the repaired area blends seamlessly with the rest of the bathtub.
Utilizing a sanding block or an electric sander can provide even pressure and consistency, which is essential for achieving a flawless result. Adapt your sanding technique based on the particular area being worked on. For curved or detailed surfaces, contour the sandpaper to fit the shape. Always keep the sander moving to avoid creating flat spots or ridges. After sanding, clean the area thoroughly to remove dust before proceeding to paint or seal the repair.
Sanding Techniques for a Flawless Finish
Achieving a smooth and uniform surface after repairing chips requires precise sanding techniques. Start with a coarser sandpaper, such as 120 to 220 grit, to remove any excess filler material and blend the repair area with the surrounding bathtub surface. Sand gently in a circular or back-and-forth motion, applying consistent pressure. This method helps to avoid creating uneven surfaces or additional scratches. Gradually progress to finer grit sandpaper, moving up to 400 grit or higher, ensuring an even smoother finish that prepares the area for the final touches.
Attention to detail is essential during this process. Always keep the sandpaper flat against the surface to prevent rounding edges or creating indentations. If possible, wet sanding can be employed, which utilizes water to reduce dust and improve the finish quality. This technique helps to minimize the risk of clogging the sandpaper while also providing a cooler sanding experience. After achieving the desired smoothness, wipe down the area with a damp cloth to remove any dust before proceeding to the next steps in the repair process.
| Sandpaper Grit | Purpose | Usage Tips |
|---|---|---|
| 120 – 220 | Initial sanding to remove excess filler | Use a circular or back-and-forth motion |
| 400 | smoothing the surface | Apply consistent pressure and keep paper flat |
| 600+ | Final sanding for a polished finish | Consider wet sanding to reduce dust |
| N/A | Cleaning | Wipe down with a damp cloth after sanding |
Painting Over Chips in Bathtubs
When addressing chips in bathtubs, selecting an appropriate paint is crucial for achieving a seamless appearance. The type of material the bathtub is made from will dictate the kind of paint that should be used. For acrylic and fiberglass bathtubs, look for paints specifically designed for these materials to ensure strong adhesion and durability. For porcelain or enamel surfaces, it’s best to opt for a high-quality epoxy paint that can withstand water exposure and daily usage. These paints not only provide a sleek finish but also help in protecting the base material from further damage.
Once the right paint is chosen, surfaces should be prepared meticulously. Clean the area thoroughly to remove any dust or debris that could interfere with adhesion. After the paint is applied, allow it to cure according to the manufacturer’s instructions for optimal results. Proper application technique, such as using a brush for detailed areas and a roller for larger sections, can also contribute to a more professional-looking finish. Following these steps can help restore your bathtub’s appearance and extend its lifespan.
Selecting the Right Paint for Each Material
Choosing the appropriate paint for a bathtub depends on its material. Acrylic bathtubs require a specific type of epoxy-based paint that adheres well to plastics. This paint should be durable and resistant to moisture. For porcelain bathtubs, opting for a specialized enamel paint works best. It provides a smooth finish and is designed to withstand daily use.
When selecting paint for fiberglass bathtubs, it is essential to use a paint designed explicitly for fiberglass surfaces. These products usually come in spray form to ensure even coverage. Additionally, ensure that the paint you choose is formulated to handle the constant exposure to water and cleaning agents. This will help maintain the appearance and longevity of your bathtub, allowing it to look fresh and clean for years to come.
Sealing the Repair
After filling a chip in a bathtub, it is vital to seal the repair to ensure durability and prevent water from seeping under the filler. Sealants provide a protective layer that enhances the longevity of the repair while maintaining the bathtub’s aesthetic appeal. When selecting a sealant, consider the type of material your bathtub is made from. Look for products specifically designed to bond with the filler and withstand bathroom conditions, such as moisture and temperature changes.
Proper application of the sealant is crucial for effective results. Begin by applying it evenly over the repaired area, ensuring complete coverage without over-saturating. Using a small brush or applicator can help achieve an even layer. Allow sufficient time for drying and curing, as recommended by the product instructions, before using the bathtub again. This process not only preserves the repair but also fosters a lasting finish that blends seamlessly with the surrounding area.
Effective Sealants for Long-Lasting Results
Choosing the right sealant is crucial for ensuring a durable repair of chips in your bathtub. Silicone-based sealants are often recommended due to their flexibility and excellent adhesion properties. They are resistant to moisture and can accommodate slight movements in the bathtub material, which helps in preventing future cracks. Epoxy sealants are another option, providing a hard finish that is perfect for high-traffic areas. When selecting a sealant, it is essential to consider the bathtub’s material and intended usage to ensure that the sealant can withstand water exposure and temperature fluctuations.
Application of the sealant should be done carefully for the best results. Thoroughly following the manufacturer’s instructions ensures proper curing time and optimal performance. Applying a thin, even layer over the repaired area guarantees adequate coverage while avoiding messy overflows that can detract from the overall aesthetics. After the sealant has cured, performing a water test can verify the effectiveness of the repair. Checking for any leaks or gaps ensures a waterproof seal, prolonging the life of the bathtub and maintaining its appearance.
- Make sure to clean the area thoroughly before applying the sealant to ensure better adhesion.
- Consider using a caulking gun for even application and control over the amount of sealant used.
- Allow ample curing time as recommended by the manufacturer before exposing the seal to water.
- Avoid using the bathtub until the sealant has fully cured to prevent compromising the repair.
- After the initial curing, regularly check for signs of wear or deterioration in the sealant.
- Keep extra sealant on hand for future repairs and maintenance needs.
- Follow up with routine inspections to catch any issues early and maintain a watertight seal.
Maintaining Your Bathtub After Repairs
Regular maintenance is crucial for extending the life of any bathtub, especially after repairs. It is essential to clean the surface gently using non-abrasive cleaners to prevent scratching. Harsh chemicals can damage the finish, so opting for mild soap and warm water is often the best choice. Rinsing thoroughly after cleaning helps avoid residue buildup that could lead to discoloration over time.
In addition to cleaning, monitoring for any signs of wear or damage following a repair is important. Addressing small issues early can prevent more extensive repairs down the line. Applying a protective finish or wax periodically can also help maintain the bathtub’s appearance and provide an extra layer of defense against chips and scratches. Regular inspections can ensure that the repaired areas remain intact and well-preserved.
Best Practices for Bathtub Care
Regular maintenance can significantly extend the lifespan of your bathtub. Start by cleaning the surfaces with gentle, non-abrasive cleaners to avoid scratches. Utilizing a soft sponge or cloth helps in preventing damage while ensuring that soap scum and mold do not build up. After each use, rinse the tub to remove any residues and dry it thoroughly to minimize water spots and discoloration.
Additionally, avoid using harsh chemicals that can deteriorate the finish over time. Always place a mat or rug near the bathtub to reduce the likelihood of slips and protect the surface from heavy impacts. Be mindful of how you place objects in the tub, as even small items can cause chips or scratches if not handled properly. Adopting these practices will help maintain your bathtub’s appearance and functionality for years to come.
Cost Considerations for Bathtub Repairs
Repairing chips in a bathtub can involve a variety of costs depending on the type of bathtub material and the extent of the damage. Acrylic and fiberglass tubs typically have lower repair costs due to the availability of repair kits. Porcelain and cast iron options may require professional help, increasing expenses significantly. Additional costs can arise from products used during the repair process, such as fillers and paints, which vary in price and quality.
Labor costs should also be considered, especially if hiring a professional. Rates may differ based on location and the technician’s expertise. For DIY repairs, budgeting for tools and materials is essential. While initial expenses might seem manageable, investing in higher-quality products can yield better, more durable results, ultimately saving money in the long run by reducing the need for frequent repairs.
Budgeting for Material and Labor
When planning a bathtub repair project, assessing the costs of materials and labor is essential. The type of filler, paint, and sealants needed varies significantly based on the bathtub material, whether acrylic, porcelain, or fiberglass. Prices can range from affordable DIY kits found at hardware stores to professional-grade supplies that may come at a premium. Familiarizing yourself with these options can help in selecting the right products that fit your budget.
Labor costs will differ depending on whether you choose to undertake the repair yourself or hire professionals. DIY repairs can save money, but ensure you have the time and skills required for quality results. Hiring a contractor may involve higher upfront costs but can provide assurance of a job well done. Getting multiple quotes from professionals can help you gauge the market rates and make an informed decision.
Preventative Measures for Future Chips
Taking proactive steps can significantly reduce the likelihood of chips on your bathtub surface. Use bath mats to absorb impact from dropped items and prevent damage. Additionally, be mindful of using heavy cleaning tools that could scratch or chip the surface. Regularly inspect your bathtub for any signs of wear and tear, addressing issues immediately to avoid further damage.
Consider using non-abrasive cleaners specifically designed for your bathtub’s material. These products can effectively clean without risking the integrity of the surface. When filling the bathtub with water, avoid extreme temperature changes, as they can stress the material and lead to cracks or chips. Implementing these simple measures can help maintain the appearance and longevity of your bathtub.
Tips for Protecting Your Bathtub Surface
To maintain the condition of your bathtub and minimize the likelihood of chips, consider using bathmats or protective liners. These can provide a buffer against heavy items that might accidentally fall during use. Regularly inspecting the surface for any signs of wear and tear can also help catch potential issues before they escalate.
When cleaning your bathtub, opt for gentle, non-abrasive cleaners. Harsh chemicals and rough scrubbing pads can damage the surface and make it more susceptible to chips. Additionally, encourage gentle handling of items used within the tub, as even small impacts can lead to significant damage over time.
Conclusion
Across various bathtub materials, the techniques for repairing chips can significantly extend the lifespan and appearance of your bath. Understanding the specific needs of materials like acrylic, fiberglass, or porcelain ensures that repairs are not only effective but also blend seamlessly with the existing surface. Proper cleaning, filling, sanding, and sealing are essential steps that contribute to a successful repair.
After completing repairs, ongoing maintenance and care are vital to prevent future damage. Implementing preventative measures and adhering to best practices can help maintain the integrity of your bathtub. By taking proactive steps, homeowners can enhance the durability of their bathtubs and enjoy their comfort for years to come.
FAQS
What is the first step in repairing chips in a bathtub?
The first step in repairing chips is to clean and dry the surface thoroughly to ensure proper adhesion of the filler material.
Can I use the same filler product for all types of bathtubs?
No, it’s important to choose the right filler product specific to the material of your bathtub, whether it’s acrylic, fiberglass, or porcelain, to achieve the best results.
How do I achieve a smooth finish after filling a chip?
Techniques for sanding and smoothing include using fine-grit sandpaper and sanding in a circular motion to create a flawless finish after the filler has cured.
What type of paint should I use to touch up chips in my bathtub?
Selecting the right paint depends on the bathtub material; for acrylic and fiberglass, use a paint specifically designed for those surfaces, while enamel paint may be suitable for porcelain.
How can I ensure my bathtub repairs last long-term?
Effective sealing after repairs with a quality sealant helps protect the repaired area from water damage and prolongs the lifespan of the repair.