Table of Contents
ToggleKey Takeaways
- Suggestions for a Polished Look
- Grasping Drying and Hardening Durations
- Identifying When to Seek Expert Help
- Caring for Your Recently Refurbished Tub
- Planning Finances for Your Refinishing Endeavor
- Achievement Narratives and Feedback
- Materials for Additional Education
Pitfalls That Can Ruin the Project
Underestimating preparation can lead to disastrous results in bathtub refinishing. Skipping essential steps like thorough cleaning and repair of damages can prevent the coating from adhering properly. Contaminants like soap scum, grime, and even oil from hands can compromise the surface, making it vital to ensure everything is spotless before applying refinishing materials.
Selecting the wrong products contributes significantly to project failure. Not all refinishing kits are created equal. Some might not be compatible with the material of your tub, leading to peeling or chipping. Failing to follow the manufacturer’s instructions closely can also result in an uneven finish or prolonged drying times, ultimately impacting the overall quality of the work.
Tips for a Professional Appearance
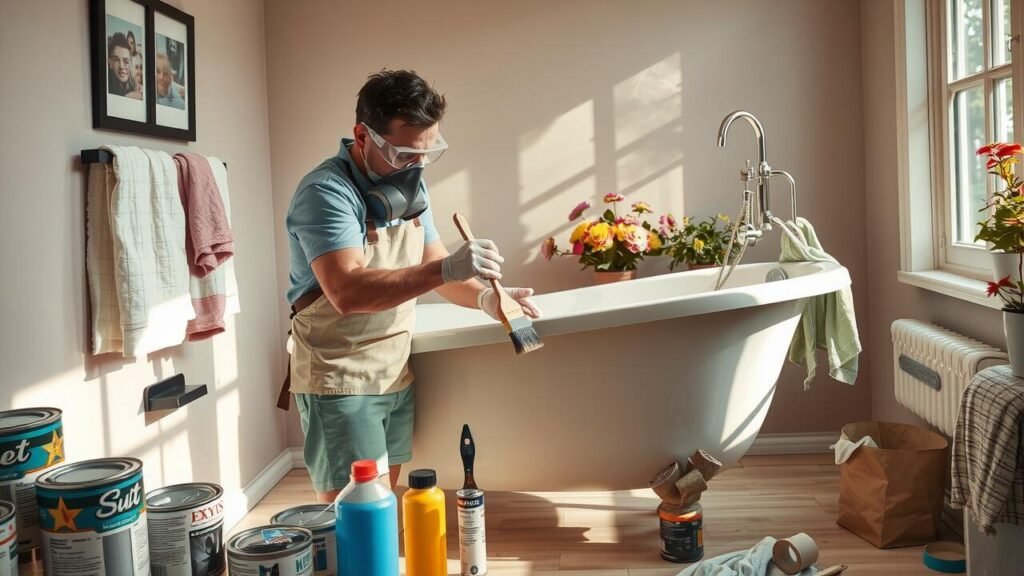
Attention to detail plays a critical role in achieving a polished finish. Before starting the refinishing process, ensure that the surface is thoroughly cleaned and any imperfections are addressed. Sanding the bathtub lightly removes any existing finish and creates a suitable surface for the new coating. This step helps in achieving better adhesion and minimizes the appearance of flaws once the refinishing is complete.
Using high-quality materials can make a significant difference in the final outcome. Invest in top-tier paint and epoxy specifically designed for bathtubs to ensure durability and a professional look. Applying thin, even coats allows for proper drying and minimizes drips. Always follow the manufacturer’s instructions for application techniques as well as recommended tools for the best results. Taking the time to follow these tips can elevate your DIY project into a stunning bathtub transformation.
Achieving a Flawless Look
Preparation and attention to detail play a critical role in creating a flawless finish. Start by thoroughly cleaning the bathtub surface to remove any soap scum, mildew, or grime. Taking the time to sand the bathtub properly ensures that the new coating adheres well. Use a high-quality primer designed for this type of project. It provides a smooth base and enhances the durability of the final finish.
When applying the refinishing material, opt for a spray application if possible. This method helps achieve an even coat without brush strokes or roller marks. Apply multiple thin layers rather than a single thick one. Allow appropriate drying time between coats, as this promotes better adherence and a higher-quality finish. A consistent spraying technique, combined with the right materials, can lead to a professional-looking outcome that revitalizes your bathroom space.
| Step | Action | Notes |
|---|---|---|
| Step 1 | Clean Surface | Remove soap scum, mildew, and grime thoroughly. |
| Step 2 | Sanding | Sand the bathtub for better adhesion of the new coating. |
| Step 3 | Apply Primer | Use high-quality primer to enhance durability and create a smooth base. |
| Step 4 | Refinishing | Opt for spray application for an even coat; apply multiple thin layers. |
| Step 5 | Drying | Allow adequate time for drying between coats for optimal results. |
Understanding Drying and Curing Times
Timing is crucial when refinishing a bathtub. Understanding the difference between drying and curing times can significantly impact the outcome of your project. Drying refers to the surface becoming dry to the touch, while curing involves the material reaching its full hardness and durability. This can take several days, depending on environmental conditions and the specific products used. Always refer to the manufacturer’s guidelines for the recommended times to ensure you achieve the best results.
During the drying phase, it’s essential to keep the bathtub well-ventilated to expedite the process. High humidity or low temperatures may prolong drying and curing times. Avoid using the bathtub until it has fully cured, as premature use can lead to damage, such as scratches or peeling. Plan your project accordingly, allowing plenty of time for both drying and curing to ensure a professional finish that stands the test of time.
Best Practices for Drying Your Bathtub
Drying your newly refinished bathtub effectively is essential to ensure a long-lasting finish. Start by using a fan to promote airflow around the tub. Position the fan for optimal circulation, typically facing the bathtub. This helps to speed up the drying process without creating direct drafts, which could lead to uneven drying. Additionally, keeping the bathroom well-ventilated can help reduce humidity levels that may prolong drying time.
It’s important to monitor the temperature and humidity in the space as well. Warmer air tends to hold moisture, so aim for a consistent temperature that’s comfortable yet encourages evaporation. Avoid closing windows or doors if the outside air is drier; opening them can help to circulate fresh air. Regular checks on the drying status can prevent you from using the tub too soon, ensuring optimum results from your refinishing effort.
- Use soft, absorbent towels to gently blot any excess moisture from the surface.
- Avoid using abrasive materials that could scratch the newly refinished surface.
- Wait at least 24 hours before using the bathtub to ensure a thorough dry.
- Clean the bathtub regularly after it has dried to maintain its finish and luster.
- Consider placing a dehumidifier in the bathroom if humidity levels are high.
- Check the manufacturer’s recommendations for drying times specific to the refinishing product used.
- Keep bath accessories off the tub until completely dry to avoid any marks or damage.
Recognizing When to Call a Professional
Tackling a bathtub refinishing project can be rewarding, but there are situations where enlisting the help of a professional is the best course of action. If you notice extensive damage to your bathtub, such as cracks or deep scratches, a skilled refinisher can address these issues more effectively. Additionally, if the original surface is coated with materials that do not accept new finishes well, a professional may have access to specialized techniques and products that ensure a smooth, lasting result.
Another sign that it’s time to call in an expert is if you’re feeling overwhelmed by the process. Bathtub refinishing requires precision and attention to detail, from the preparation of the surface to applying the finish. If you’re unsure about any step or lack the necessary tools, seeking professional help can save you time and frustration. Ultimately, investing in an expert can lead to a higher-quality finish, contributing to a more satisfying outcome.
Signs You Might Need Expert Help
DIY refinishing can be a rewarding project, but certain signs indicate that professional assistance may be the best choice. If you notice extensive damage or severe stains that do not seem to respond to cleaning and prepping techniques, it may be time to consult an expert. Additionally, if you find yourself overwhelmed by the complexity of the refinishing process or uncertain about the required steps, seeking professional help can save both time and frustration.
Another warning sign is if you have difficulty sourcing the right materials or equipment for the job. Completing a successful refinishing project requires specific products that may not be readily available at local hardware stores. If you are unsure about product compatibility or application techniques, a professional can guide you through the process, ensuring a high-quality finish that DIY methods might not achieve.
Maintaining Your Newly Finished Bathtub
Caring for your newly refinished bathtub is crucial to keep it looking its best. Start by using mild, non-abrasive cleaners free from harsh chemicals. Products designed specifically for acrylic or fiberglass surfaces are ideal. Avoid scouring pads or abrasive sponges, as these can damage the finish over time. Regular cleaning helps prevent the buildup of soap scum and mildew, preserving the tub’s appearance.
Inspecting for any signs of wear or damage can help catch issues early. Check the edges and corners where water may accumulate. Keeping bath toys or accessories off the surface minimizes wear. If you notice any chips or scratches, addressing these quickly can maintain the integrity of the finish. Seasonal maintenance can ensure the longevity of refinishing work.
Tips for Long-lasting Care
Proper maintenance is essential to ensure the longevity of your newly refinished bathtub. Regular cleaning with non-abrasive products will help preserve the surface. Avoid harsh chemicals, which can damage the finish. Instead, opt for gentle cleaners specifically designed for refinished surfaces. Routine inspections for signs of wear or damage can prevent small issues from becoming larger repairs down the line.
Additionally, using bath mats or non-slip stickers can help protect the surface from scratches and chips. Be mindful when placing heavy objects within the bathtub, as this can also lead to imperfections. Maintaining a consistent temperature in your bathroom can prevent drastic changes that might affect the finish. Taking these measures will extend the life of your refinished tub and keep it looking pristine.
Budgeting for Your Refinishing Project
Setting a budget for your bathtub refinishing project is crucial to ensure a smooth and successful experience. Begin by assessing all the required materials, which typically include primer, paint, topcoat, and any necessary tools like sanders or brushes. It’s also wise to factor in costs for protective gear such as masks and gloves. Researching prices from various suppliers can help you get the best deals and avoid overspending.
In addition to materials, consider the potential costs associated with professional help in case unforeseen issues arise. If your bathtub has extensive damage that requires repair before refinishing, this can significantly affect your overall budget. Keeping a small contingency fund for unexpected expenses is a prudent strategy. Ultimately, having a well-thought-out budget can provide clarity and peace of mind throughout your refinishing journey.
How to Estimate Costs Accurately
Understanding the costs associated with refinishing your bathtub is vital for a successful project. Start by listing all necessary supplies, including the type of refinishing kit, tools, and protective gear. Research various retailers to compare prices and identify any potential discounts or promotions. Incorporating additional costs, such as disposal fees for old materials or necessary repair tools, will help create a comprehensive budget.
Labor costs also play a role if you choose to hire help for certain parts of the process. Consider whether you will need assistance with prep work or finishing touches. Local professionals may provide estimates that can inform your budgeting. Collect quotes from different sources to ensure you have an accurate understanding of what you might spend, allowing room for unexpected expenses that may arise during the project.
Success Stories and Testimonials
Many DIY enthusiasts have successfully transformed their bathtubs with refinishing projects, sharing experiences that inspire others to take the plunge. One homeowner recounted his journey through the refinishing process, noting the careful preparation required. He filled chips and cracks, sanded the surface, and applied a high-quality refinishing kit. The result exceeded his expectations, turning his dull and outdated tub into a stunning centerpiece of his bathroom.
Another individual documented her refinishing experience on her blog, showcasing the step-by-step progression of her project. She faced challenges, such as misjudging drying times and dealing with an imperfect initial spray, but she persevered. Her detailed account includes tips on selecting materials and tools, emphasizing the importance of patience and practice. By the end of her project, the bathtub looked brand new, providing both personal satisfaction and a boost to her home’s value.
Real Experiences from DIYers
Many DIY enthusiasts have shared their experiences with bathtub refinishing, highlighting both challenges and triumphs. One homeowner mentioned the initial anxiety of tackling such a significant task. They expressed relief when they successfully transformed their worn-out tub into a glossy focal point of their bathroom. Their advice to others was to meticulously follow instructions and allow adequate drying time, which made a noticeable difference in the final outcome.
Another DIYer related a different experience, noting the importance of preparation. They emphasized the need for thorough cleaning and proper sanding before applying the new finish. This attention to detail resulted in a remarkably smooth surface that exceeded their expectations. Many shared the sentiment that while the process can be daunting, the satisfaction of achieving a professional-looking result is well worth the effort.
Resources for Further Learning
To enhance your skills in bathtub refinishing, numerous resources are available online. Websites dedicated to DIY projects often feature detailed tutorials, step-by-step guides, and video demonstrations. These resources can provide valuable insights on preparation, application techniques, and common pitfalls to avoid. Engaging with communities on forums or social media platforms can also lead to sharing experiences and tips from fellow DIY enthusiasts.
Books about home improvement often include sections specifically focused on refinishing projects. These texts can serve as comprehensive references, covering everything from initial planning to post-refinishing maintenance. Local hardware stores may also offer workshops that provide hands-on experience, allowing you to practice your skills under the guidance of professionals. Using these resources will equip you with the knowledge needed for a successful refinishing project.
Where to Find Tutorials and Guides
Numerous online platforms offer a wealth of resources for individuals interested in DIY bathtub refinishing. Websites such as YouTube host a variety of tutorial videos that guide users step-by-step through the refinishing process. These visuals can be particularly helpful in understanding techniques and tools required for a successful project. Many DIY blogs also share personal experiences, along with tips and tricks that can enhance the overall quality of the work.
Additionally, online forums and community groups provide a space for enthusiasts to exchange information and advice. Engaging with these communities allows you to ask specific questions and receive feedback from others who have tackled similar projects. Many home improvement websites feature detailed articles and printable guides, which can serve as handy references during the refinishing process. These resources not only help in planning but also ensure a more polished end result by offering expert insights.
Conclusion
Successfully refinishing a bathtub can elevate your bathroom’s aesthetics while saving you money compared to a full replacement. With careful planning, proper techniques, and a focus on quality materials, DIY enthusiasts can achieve impressive results that rival those of professional services. Understanding the nuances of the process, from preparation to finishing touches, is essential for a project that not only looks great but lasts.
While the journey may seem daunting, the satisfaction of transforming a tub yourself makes it worthwhile. Embracing both the learning experience and the creative outlet that comes with DIY work can lead to rewarding outcomes. Knowing when to seek help is equally important, ensuring that the final result meets your expectations and maintains durability for years to come.
FAQS
What tools do I need for DIY bathtub refinishing?
You’ll need several tools, including a sander, painter’s tape, a spray gun or brush, a respirator mask, and cleaning supplies. Make sure to also have the refinishing kit that includes the coating material.
How long does the refinishing process take?
The entire refinishing process can take anywhere from a few hours to a couple of days, depending on the preparation, application, and drying times. Typically, you should allow at least 24 hours for the coating to cure before using the bathtub.
Can I refinish a bathtub on my own?
Yes, many homeowners successfully refinish their bathtubs as a DIY project. However, it requires careful preparation, attention to detail, and a willingness to follow safety protocols. Assess your skills and comfort level before starting.
What are common mistakes to avoid during the refinishing process?
Common pitfalls include inadequate surface preparation, not following drying times, using the wrong type of materials, and neglecting safety measures. Be sure to read the instructions provided with your refinishing kit.
How do I maintain my newly refinished bathtub?
To maintain your refinished bathtub, avoid abrasive cleaners, use a soft sponge for cleaning, and regularly inspect for any signs of wear or damage. Following proper maintenance will help extend the life of the finish.