Table of Contents
ToggleKey Takeaways
- Selecting an Incorrect Paint Type
- Neglecting to Test a Minor Section
- Overlooking Time Investment
- Ignoring Cleanup Procedures
- Insufficient Readiness for Reinstallation
- Avoiding Professional Assistance When Necessary
- Overlooking Routine Upkeep
Addressing Existing Issues Before Refinishing
Before embarking on a bathtub refinishing project, it is essential to examine the surface for any pre-existing issues. Cracks, chips, or significant stains can affect the final outcome of your refinishing efforts. Addressing these problems before applying a new finish ensures a smooth and durable surface. Repairing any damage, such as utilizing a filler for cracks or thoroughly cleaning stained areas, lays a solid foundation for the refinishing process.
Ignoring these existing issues can lead to a less satisfactory finish that may peel or wear out quickly. Taking the time to properly prepare the bathtub not only enhances the aesthetics but also extends the lifespan of the newly applied coating. This thorough approach will save time and money in the long run, preventing the need for repeated refinishing due to poor initial preparation.
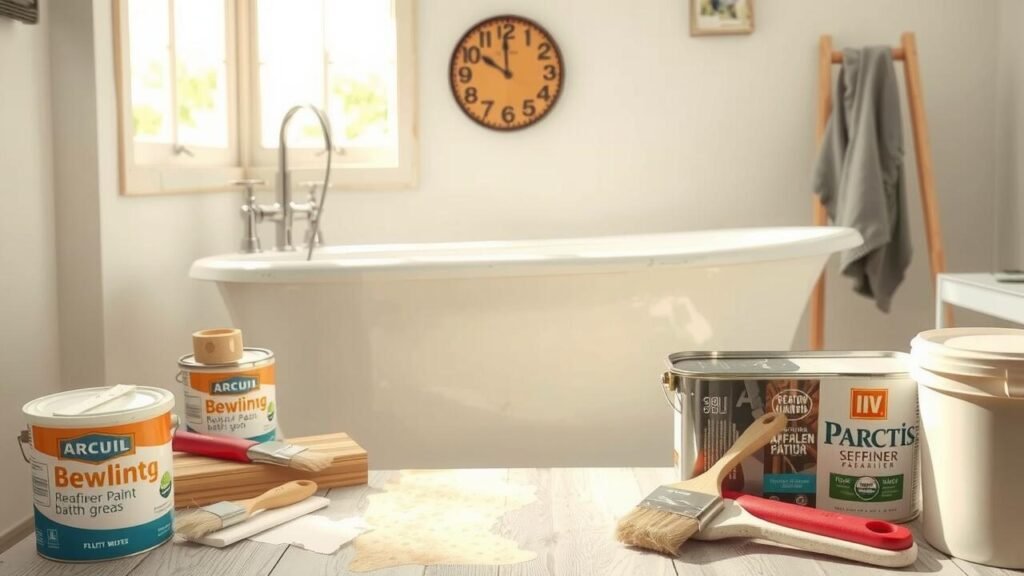
Choosing the Wrong Type of Paint
Selecting the appropriate paint is crucial for a successful bathtub refinishing project. Many people may opt for regular household paints, thinking they will work just as well. However, standard paints lack the necessary durability and resistance to water and chemicals that specialized bathtub coatings provide. Using the wrong paint can lead to peeling, bubbling, and fading over time, ultimately resulting in a disappointing finish.
Bathtub-specific coatings are designed to withstand the unique conditions within a bathroom. They are formulated with strong adhesion properties and are resistant to mold and mildew growth. These coatings not only enhance the appearance of the tub but also protect it from damage. Investing in the right type of paint ensures a long-lasting, attractive finish that can transform the look of your bathroom while providing the necessary resilience against daily wear and tear.
The Significance of Selecting Bathtub-Specific Coatings
Choosing the right coating for your bathtub is crucial to achieving a long-lasting and aesthetically pleasing finish. Generic paints may not withstand the unique conditions that bathtubs experience, such as constant moisture and exposure to harsh cleaning agents. Bathtub-specific coatings are formulated to adhere properly to the tub’s surface and resist chipping, peeling, and discoloration over time. Investing in these specialized products can significantly extend the life of your refinishing project.
Additionally, the characteristics of bathtub-specific coatings enhance the overall bathing experience. Many of these coatings provide a smooth, glossy finish that not only looks appealing but is also easier to clean. They often contain properties that resist mold and mildew, making maintenance simpler and reducing the risk of buildup. Taking the time to select a coating designed for bathtubs ensures that you are prioritizing both the durability and aesthetic quality of your refinished space.
Failing to Test a Small Area
When embarking on a bathtub refinishing project, it’s crucial to gauge how the chosen materials interact with the existing surface. Skipping a small patch test can lead to unexpected results, including poor adhesion or undesirable color outcomes. A simple test on a discreet area can reveal issues before committing to the entire surface. This step allows homeowners to closely observe the drying process and finalize their decisions concerning the color and texture before diving into a potentially costly mistake.
Patch testing serves multiple purposes. It helps in assessing the reaction of the refinishing product with the bathtub’s material. Additionally, it provides insight into coverage and curing time. By taking a moment to conduct this essential test, refinishing enthusiasts can avoid frustration and ensure a more satisfactory end result. It adds a layer of security, making the completing process smoother and more predictable.
The Benefits of Patch Testing
Patch testing allows you to assess how the chosen paint will adhere to the surface of your bathtub. By applying a small amount of paint in an inconspicuous area, you can observe its compatibility with the existing finish. This simple step can prevent a larger disaster if the paint doesn’t bond well or reacts unfavorably with the original material.
Conducting a patch test can also help you evaluate the final appearance of the paint once it dries. Differences in color or texture become apparent through this method. If the results are unsatisfactory, you can select a different product without having wasted time and resources on the entire refinishing project.
Underestimating Time Requirements
When embarking on a DIY bathtub refinishing project, many homeowners fail to account for the necessary time investment. Refinishing a bathtub is not a quick task; it often requires several hours or even a full day, depending on the condition of the tub and the complexity of the job. Rushing through the process can lead to poor results, such as uneven surfaces or improper bonding of the coatings. Planning and allocating enough time can make a significant difference in the final outcome.
Properly preparing the area and allowing sufficient drying time between application steps are critical to achieving a professional-looking finish. This includes time for cleaning, repairing any damage, and applying multiple coats, if necessary. If a project runs over schedule, the final result might suffer due to impatience or haste. Evaluating the time required and creating a realistic timeline are essential for setting expectations and ensuring a successful refinishing experience.
Planning Your Refinishing Project Effectively
Successfully refinishing a bathtub requires careful planning to ensure a smooth process and satisfactory results. Begin by assessing your available time realistically. Dedicate sufficient blocks of time not only for the refinishing itself but also for necessary preparation and drying periods. Make a detailed checklist of tasks, including surface cleaning, repairs, and the actual application of coatings. Properly organizing each step can prevent overlap and mistakes that may arise from rushing through the project.
Consider the environment in which you’ll be working. Adequate ventilation is crucial when using chemicals common in refinishing products. Ensure your workspace is clean and free from any obstructions that could hinder your progress or contaminate the finish. Gather all necessary materials prior to starting so there are no interruptions. This organized approach will help maintain focus and efficiency throughout the refinishing project, leading to a visually appealing and durable outcome.
Disregarding Cleanup
Cleanup after a refinishing project is often overlooked, yet it plays a crucial role in achieving a polished final result. Residue from paint, primer, or other materials can lead to unsightly messes that detract from the overall appearance of the bathtub. Ensuring that all areas are thoroughly cleaned helps to maintain the integrity of the finish and prevents any potential hazards, such as slippery surfaces.
Proper cleanup extends beyond simply wiping surfaces; it also involves disposing of materials responsibly. Many refinishing products contain chemicals that require special handling. Following manufacturer guidelines for disposal not only protects the environment but also ensures compliance with local regulations. A comprehensive cleanup routine allows you to enjoy your newly refinished bathtub without lingering concerns about safety or aesthetics.
Importance of Post-Project Cleanup
Post-project cleanup plays a crucial role in ensuring the longevity and appearance of your refinished bathtub. After the refinishing process is complete, leftover dust, paint splatters, and other residues can create an unkempt look. Thorough cleanup is essential to maintain a professional finish. It also prevents potential damage that can arise from neglecting to remove these materials, which may become embedded in the new surface.
Additionally, proper cleanup promotes a healthy environment by eliminating any harmful chemicals used during the refinishing process. Ensuring that your workspace is free of any hazardous materials contributes to your safety and the well-being of those who use the bathroom. Taking the time to clean up properly not only enhances the aesthetic appeal but also helps maintain the functionality of the bathtub for years to come.
Inadequate Preparation for Reinstallation
Reinstalling a newly refinished bathtub requires careful attention to detail to ensure it fits securely and functions properly. Review the manufacturer’s instructions before starting. Check for any necessary materials or tools needed for proper reinstallation. Ensure that any additional fixtures or components, such as drains and faucets, are also cleaned and prepped for reinstallation. Failing to take these steps can lead to improper sealing or alignment issues, which can result in leaks or damage over time.
It is also essential to thoroughly inspect the surrounding area before placing the refurbished tub back in its designated spot. Remove any debris or old caulking that could interfere with a snug fit. A level check on the area where the bathtub will sit is vital to prevent future complications. Make sure to reapply caulk to secure the edges and prevent water damage to the surrounding surfaces. Neglecting these details can undermine the refinishing work, leading to a disappointing outcome.
Ensuring a Secure and Safe Replacement
Proper reinstallation of a refinished bathtub is critical to ensure safety and functionality. Before securing the tub, check that all connections are free from debris and moisture. This step prevents mold growth and ensures a tight seal that can withstand regular use. Make sure to align the bathtub accurately with plumbing fixtures. An uneven installation can lead to leaks and structural problems.
Utilizing the right materials during installation adds to the security of the bathtub. Use a high-quality caulk to seal the edges where the tub meets the wall. This prevents water from seeping behind tiles or drywall, which can cause further damage. Additionally, double-check the fasteners used to attach any fixtures or supports. Ensuring everything is securely fastened will contribute to the longevity of your refinished bathtub.
| Installation Step | Importance | Recommended Materials |
|---|---|---|
| Pre-installation Inspection | Ensures there is no debris/moisture | N/A |
| Alignment with Plumbing | Prevents leaks and structural issues | N/A |
| Caulking Edges | Protects against water damage | High-quality caulk |
| Fastening Fixtures | Contributes to bathtub longevity | Durable fasteners |
Not Seeking Professional Help When Needed
Many DIY enthusiasts believe they can handle every aspect of home improvement on their own. However, bathtub refinishing presents unique challenges that may require the expertise of a professional. Common pitfalls, such as improper surface preparation or using the wrong products, can lead to unsatisfactory results. When individuals undervalue the complexity involved, they risk creating a situation that may become more costly in the long run.
Recognizing the signs that professional assistance is necessary can save time and frustration. If a homeowner feels overwhelmed or unsure about the specifics of the refinishing process, consulting an expert can provide clarity and confidence. Professionals bring experience and specialized knowledge, which significantly increases the chances of achieving a high-quality finish. Making the choice to seek help can ultimately result in a more durable and aesthetically pleasing outcome.
Recognizing When to Consult an Expert
Homeowners may find themselves overwhelmed by the complexities of bathtub refinishing. While many tasks can be tackled with confidence, certain situations require the expertise of trained professionals. If there’s extensive damage, such as deep cracks or significant rust, an expert’s intervention may be necessary. Additionally, complex shapes or specialized materials can pose challenges that are best handled by someone with experience.
Attempting a refinishing project without adequate knowledge can lead to unsatisfactory results. If the desired finish seems difficult to achieve or if previous DIY attempts have failed, it may be wise to seek professional help. This decision not only saves time but also ensures a quality outcome that protects the investment made in the bathtub. Recognizing these signs can prevent frustration and lead to a successful refinishing project.
Forgetting About Regular Maintenance
Regular maintenance is crucial for extending the lifespan of a newly refinished bathtub. Neglecting this aspect can lead to noticeable wear and tear, diminishing the original work’s quality. Simple practices, such as using non-abrasive cleaners and avoiding harsh chemicals, can help retain the finish. Regular inspections for any signs of damage or wear can also catch issues early before they escalate into larger problems.
Establishing a cleaning routine can prevent grime and soap scum buildup, which not only ensures a clean appearance but also protects the refinished surface. A gentle wipe-down after each use helps maintain shine and prevents staining. Additionally, addressing any minor chips or scratches immediately can prevent them from expanding, preserving the tub’s overall aesthetic and functionality for years to come.
Tips for Keeping Your Bathtub Looking New
Regular maintenance significantly extends the life of a refinished bathtub. Cleaning with gentle, non-abrasive detergents helps prevent the buildup of grime and soap scum. Harsh chemicals can damage the new finish, so opting for products designed for delicate surfaces is essential. A soft cloth or sponge is ideal for maintaining the shine and integrity of the coating. Rinsing the surface after each use keeps residue at bay and reduces the frequency of deep cleaning.
Routine inspections are crucial to catch any minor issues before they escalate. Look for signs of wear, cracks, or discoloration, addressing these problems promptly can prevent more extensive repairs in the future. Additionally, establishing a schedule for maintenance tasks—such as deep cleaning and inspections—ensures your bathtub remains in excellent condition. Keeping the area well-ventilated reduces humidity and moisture, which can contribute to deterioration over time.
- Use a soft cloth to hand-dry the tub after use to prevent water spots.
- Avoid using metal scrubbers or abrasive pads that can scratch the surface.
- Place a mat or non-slip surface in the tub to protect the finish from potential damage.
- Keep bath products organized to prevent spills and leaks that can harm the tub’s surface.
- Always use coasters or trays for bottles to avoid leaving marks or scratches.
- Schedule a deep cleaning at least once a month to maintain the tub’s appearance.
- Keep an eye on the caulk and seals to ensure they remain intact and prevent water damage.
Conclusion
Successful bathtub refinishing requires careful planning and attention to detail. By avoiding common mistakes, homeowners can achieve a professional-looking finish that enhances the overall appearance of their bathroom. Ensuring you address existing issues, choosing the right products, and following proper procedures contributes to a smoother refinishing experience.
Regular maintenance is essential after refinishing to prolong the life of the new surface. Investing time and effort into proper care will keep your bathtub looking fresh and beautiful for years to come. Remember to stay informed about the best practices and seek professional assistance when necessary to avoid pitfalls in your DIY project.
FAQS
What are some common issues to address before refinishing my bathtub?
Before refinishing, it’s important to check for cracks, chips, or mold. Addressing these issues ensures a smoother and more durable finish.
Why is it important to choose the right type of paint for bathtub refinishing?
Using the wrong type of paint can lead to poor adhesion, chipping, or discoloration. It’s essential to select paint that is specifically designed for use on bathtubs to ensure lasting results.
What is patch testing, and why should I do it before refinishing?
Patch testing involves applying the refinishing material to a small, inconspicuous area first. This helps you assess how well the surface will accept the new finish and whether the color and texture meet your expectations.
How much time should I allocate for a bathtub refinishing project?
Time requirements can vary, but it’s advisable to plan for at least a full day for preparation, application, and curing. Underestimating the time needed can lead to rushed and unsatisfactory results.
Why is cleanup important after refinishing a bathtub?
Proper cleanup is crucial to remove any residual dust, debris, or chemicals from the refinishing process. This not only improves the appearance of your tub but also maintains hygiene and prevents future issues.
What should I keep in mind for reinstallation after refinishing?
Ensure that all components are clean and free from old caulk or debris. Proper preparation for reinstallation will help ensure a secure and safe fit for fixtures and accessories.
When is it time to seek professional help for bathtub refinishing?
If you encounter significant damage, lack experience, or feel uncertain about any step of the refinishing process, it’s wise to consult a professional to avoid costly mistakes.
How can I maintain my newly refinished bathtub?
Regular cleaning with non-abrasive materials, avoiding harsh chemicals, and using a bathtub mat can help keep your refinished tub looking new and prolong its lifespan.