Table of Contents
ToggleKey Takeaways
- Overlooking Safety Measures
- Utilizing Incorrect Equipment
- Skipping Repair Assessments
- Avoiding Professional Assistance When Necessary
- Neglecting Upkeep Post-Repair
- Misjudging Repair Expenses
- Ignoring Environmental Considerations
Consequences of Insufficient Curing
Insufficient curing can lead to a variety of problems that ultimately compromise the integrity of the repair. Without adequate time for the repair material to set, the bonds formed during the application may weaken. This can result in chips becoming loose or even completely detaching. Water exposure before the curing process is finished can exacerbate these issues, causing bubbling or discoloration in the repaired area. The aesthetics of a newly repaired bathtub may suffer significantly, detracting from its overall appearance.
Additionally, failing to allow for proper curing can affect the durability of the repair. Soft or improperly set materials are prone to scratching and chipping, which means the initial repair may need to be redone sooner than anticipated. Homeowners may find themselves facing unplanned expenses and additional downtime without fully understanding the underlying reason for these recurring issues. Ultimately, ensuring sufficient curing time is a critical step that plays a significant role in the longevity and success of bathtub repairs.
Neglecting Safety Precautions
When tackling bathtub repairs, many individuals overlook the importance of safety precautions. Skipping safety measures can lead to serious injuries or accidents. Fumes from repair materials may cause respiratory issues if proper ventilation is not ensured. Additionally, sharp tools or uneven surfaces present hazards that can result in cuts or falls. Taking the time to implement safety strategies protects both the person performing the repair and the overall integrity of the work environment.
Using appropriate safety gear is crucial to reducing risk during repairs. Safety goggles shield the eyes from potential debris or splashes, while gloves protect hands from harsh chemicals and sharp edges. Non-slip footwear helps maintain balance on slick surfaces, and masks can prevent inhalation of harmful particles. Investing in these basic protective items is a small price to pay for ensuring a safer and more effective repair experience.
Essential Safety Gear for Repairs
When embarking on a bathtub repair project, prioritizing safety gear is crucial. Protective eyewear helps shield the eyes from debris or splashes of harmful chemicals. Additionally, a well-fitted mask can prevent inhalation of dust and fumes released during the repair process. Gloves made from durable materials protect the hands from potential cuts and irritating substances like epoxy or adhesive.
Wearing knee pads is also beneficial, especially when working on a low surface. Comfort during long repair sessions can enhance focus, reducing the risk of accidents. It’s advisable to choose clothing that covers the skin adequately to minimize exposure to sharp edges and chemicals. Ensuring the workspace is well-ventilated further contributes to a safer and more effective repair environment.
Using Improper Tools
Relying on the wrong tools can significantly undermine the quality of bathtub repairs. Each step of the process requires specific instruments designed for the materials in question. For instance, using a standard screwdriver instead of a specialized tool may damage the surface or fail to provide the necessary leverage to make precise adjustments. Proper tools not only improve the outcome but also streamline the repair process.
Additionally, the right tools can enhance safety during repairs. Using makeshift equipment increases the risk of accidents or injuries. A tool designed for the task ensures better control, reducing the likelihood of slips or mishaps. Investing in appropriate tools can also save time, allowing for a smoother and more efficient repair experience, ultimately leading to a more satisfactory result.
Recommended Tools for Bathtub Repair
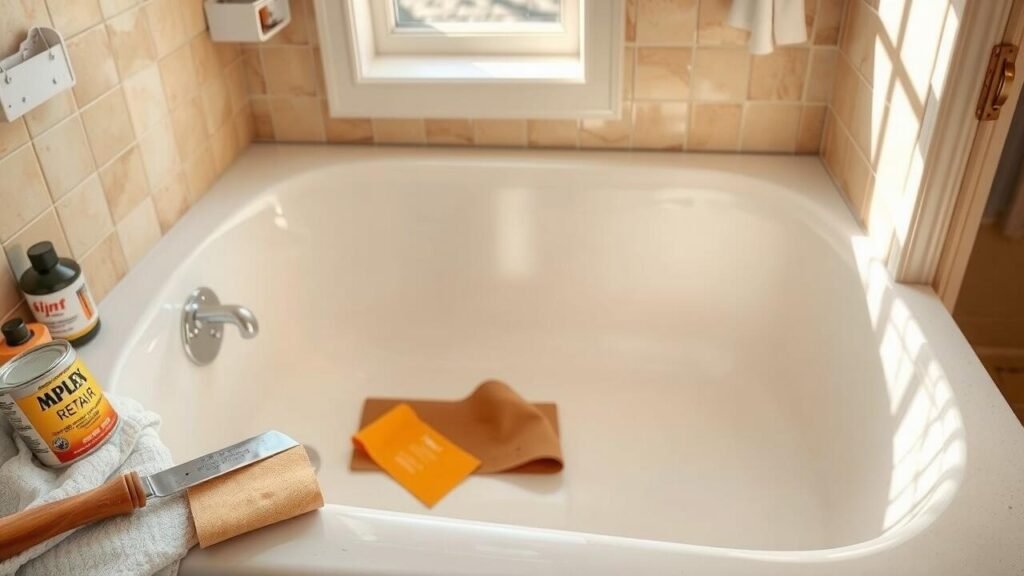
Having the right tools on hand is essential for an effective bathtub repair. A good-quality epoxy or repair kit designed for bathtubs is crucial. These kits typically include a color-matched resin that can effectively fill in the chips or cracks. Sandpaper of varying grits will help smooth the repaired area, and a putty knife is useful for applying the epoxy precisely. Additionally, a small paintbrush can be handy for touch-ups after the repair is dried.
Safety should also be a priority when selecting tools. Wearing a dust mask and gloves protects against harmful fumes and debris during the repair process. A protective eyewear is equally important to shield your eyes from splashes or flying particles. Having a sturdy drop cloth can prevent any mess from reaching your bathroom surfaces. Keeping these tools and safety gear ready helps streamline the repair process while ensuring safety is not compromised.
Failing to Test the Repair
Testing the repair after completion is an essential step that many homeowners overlook. Failing to assess the integrity of the patch can lead to further damage and costly repairs down the line. This often includes checking for cracks, inconsistencies in texture, and color matching with the existing surface. A thorough examination ensures that the repair is not only aesthetically pleasing but also structurally sound.
Once the repair has cured, conducting a water test can provide clarity on its durability. Filling the tub and observing for leaks or signs of weakness will help identify any issues that may not be immediately visible. Addressing these problems early can save both time and money, allowing for adjustments before the bathtub is put back into regular use.
Assessing the Durability Post-Repair
Once the repair is complete, it is crucial to evaluate how well the work has held up over time. A thorough inspection should include checking for any signs of chipping, peeling, or discoloration around the repaired area. This assessment can help identify any underlying issues that may have been overlooked during the initial repair process. Regular inspections allow homeowners to catch problems early, which can prevent more extensive damage and costly repairs in the future.
Testing the integrity of the repair is equally important. This can involve applying gentle pressure to the repaired section and examining it for any signs of flexing or movement. Additionally, homeowners should consider the conditions the bathtub is subjected to. Factors such as water temperature, usage frequency, and cleaning products can all impact the longevity of the repair. Being aware of these influences can aid in determining whether further maintenance or additional repairs are necessary over time.
Not Seeking Professional Help When Needed
Many homeowners attempt to tackle bathtub repairs themselves, often underestimating the complexity of the task. While DIY projects can be rewarding, they can also lead to further damage if not done correctly. Factors such as the extent of the chip, the material of the bathtub, and the tools required can make repairs challenging. In some cases, a simple fix can turn into a major project if underlying issues are present or if the repair isn’t executed properly.
Recognizing when to call a professional can save time, money, and frustration. If a repair seems beyond your skill set, it may be wise to consult an expert. Professionals have the knowledge and experience to properly assess the damage and recommend the best course of action. They also possess the right tools necessary for a successful repair. Prioritizing quality work can lead to long-lasting results and ensure the bathtub remains functional and aesthetically pleasing.
Signs It’s Time to Call a Pro
Sometimes, the extent of damage may surpass what a DIY repair can handle. Cracks that run deep or chips that affect the structural integrity of the tub often require the expertise of a professional. This is particularly true when water leaks emerge, as they can lead to severe damage in surrounding areas if not addressed swiftly and effectively. Professionals bring experience and tools that ensure repairs are both durable and visually appealing.
Another indicator that it’s time to seek help is if the initial attempts at repair have not yielded satisfactory results. Repeated failures or visible imperfections can indicate a need for specialized techniques that require professional attention. Hiring an expert can save time, prevent further damage, and ultimately result in a more successful restoration of the bathtub. It’s crucial to recognize when the repair task exceeds one’s skill level.
| Issue | DIY Success Rate | Professional Intervention Recommended |
|---|---|---|
| Deep Cracks | Low | Yes |
| Chips Affecting Structure | Medium | Yes |
| Water Leaks | Low | Yes |
| Visible Imperfections after Repair | Medium | Yes |
| Repeated Repair Failures | Low | Yes |
Ignoring Maintenance After Repair
After repairing chips or cracks in a bathtub, ongoing maintenance is essential to ensure the longevity of the repair. This involves regular cleaning with non-abrasive products to prevent deterioration of the repaired area. Routine checks for new chips or cracks can help catch potential issues early before they develop into larger problems. A diligent approach to maintenance can significantly extend the life of both the repair and the bathtub itself.
Post-repair care also includes being mindful of the cleaning methods and products used afterward. Harsh chemicals can harm the repair material, potentially leading to premature wear. Routine sealing or touch-ups may be necessary, depending on the type of repair materials used. Establishing a schedule for maintenance checks and simple touch-ups can help preserve the aesthetic and functional integrity of your bathtub.
Best Practices for Long-Term Care
Regular cleaning is crucial for the longevity of a repaired bathtub. Utilize mild, non-abrasive cleaners to avoid damaging the surface. It’s important to wipe down the tub after each use to prevent soap scum and mineral buildup. Stubborn stains should be addressed promptly to avoid lasting marks. Soft sponges or cloths are ideal for this task, as they minimize scratching.
Additionally, maintaining an appropriate environment helps preserve repairs. Avoid exposing the tub to extreme temperatures or high humidity levels. When the bathroom is well-ventilated, it reduces moisture accumulation, which can lead to mold growth or damage to the repair. Periodically check for signs of wear and address any issues immediately to keep the tub in optimal condition.
- Regularly inspect the bathtub for cracks or leaks to catch problems early.
- Use a bath mat or non-slip surface to prevent accidental damage from heavy objects.
- Maintain the room’s humidity by using dehumidifiers if necessary, especially in damp climates.
- Store cleaning supplies safely away from the tub to avoid accidental spills or damage.
- Schedule professional inspections or repairs every few years to ensure long-term maintenance.
- Educate family members about proper care techniques to promote consistent upkeep.
- Keep the tub’s surface dry when not in use to minimize moisture-related issues.
Underestimating the Cost of Repairs
Repairing a chipped bathtub often involves more than just the price of materials. Homeowners frequently overlook additional costs associated with the repair process. These can include tools needed for the job, safety equipment, and potential cleaning supplies. Additionally, there is the risk of unforeseen problems that may arise during the repair, which can further drive up expenses.
It is wise to budget for professional help if the job proves too complex or if the initial repair does not hold up as expected. Ignoring these potential costs can lead to financial strain and frustration down the line. Establishing a realistic budget ahead of time can help manage expectations and ensure that the project remains within financial reach.
Budgeting for Bathtub Repair
When planning for bathtub repair, it’s essential to create a realistic budget that accounts for all potential expenses. The costs can vary significantly based on the type of damage, the repair materials needed, and whether you choose to do the work yourself or hire a professional. Researching the price of materials and tools, as well as obtaining quotes from repair specialists, can help you get a clearer picture. Setting aside a contingency fund for unexpected expenses is also a wise approach, as repairs rarely go exactly as planned.
In addition to direct repair costs, it’s prudent to consider any necessary preparatory work or post-repair maintenance. This may include removing fixtures, repainting, or resealing surfaces that interact with the bathtub. Long-term maintenance should also be factored into the overall budget, as certain materials may require more attention than others to maintain their appearance and function. By accounting for both immediate and ongoing expenses, you can achieve a more accurate financial projection for your bathtub repair project.
Disregarding Environmental Factors
Temperature and humidity levels play a crucial role in the effectiveness of bathtub repair projects. High humidity can prolong drying times for adhesives and sealants, leading to inadequate bonding. Conversely, excessive heat can cause materials to cure too quickly, affecting the finish and integrity of the repair. Since most repair products have specific temperature ranges for optimal performance, it is essential to check the manufacturer’s recommendations before starting the project.
Ignoring these environmental conditions can result in a repair that fails to hold up over time. For example, improper curing due to humidity may lead to peeling or bubbling of the surface. Temperature fluctuations can also cause expansion and contraction, which may worsen existing chips or cracks. Understanding and planning for environmental factors is vital for achieving a lasting and professional-looking repair.
Impact of Temperature and Humidity on Repairs
Temperature and humidity play a crucial role in the success of bathtub chip repairs. Extreme temperatures can affect the curing process of repair materials. High heat may cause quick drying, leading to cracks or a weak bond, while low temperatures can prevent proper curing altogether. Similarly, high humidity can introduce moisture into the repair area, interfering with adhesion and leading to poor results.
It is vital to choose a time and environment conducive to achieving the best possible repair. Ideally, repairs should be performed in stable conditions, with a temperature range that allows materials to set correctly. Monitoring humidity levels is equally important, as excessive moisture can compromise the integrity of the repair. Ensuring optimal conditions not only enhances the durability of the fix, but also prolongs the lifespan of the bathtub itself.
Conclusion
Repairing chips in your bathtub can be a straightforward task if approached with the right knowledge and tools. By understanding common pitfalls such as insufficient curing times, improper tool usage, and neglecting safety precautions, you can ensure a more effective repair process. Taking the time to properly assess the damage and select appropriate materials is crucial for achieving long-lasting results. Always remember to consider environmental factors that may impact the repair’s success.
Neglecting post-repair maintenance can lead to future issues, which makes ongoing care essential. Budgeting effectively for repairs can prevent unexpected costs down the line. In some cases, recognizing when a repair is beyond your skill set is important. Seeking professional help can save time and enhance the overall outcome of the repair. By being vigilant about these considerations, you’ll improve the durability and appearance of your bathtub.
FAQS
What are the consequences of insufficient curing in bathtub repair?
Insufficient curing can lead to weakened repairs, resulting in chips or cracks reappearing, peeling of the repair material, and ultimately, more costly and extensive repairs down the line.
What safety precautions should I take when repairing a bathtub?
Always wear appropriate safety gear like gloves, goggles, and a mask, ensure proper ventilation in the workspace, and follow the manufacturer’s instructions for any repair products used.
What tools are recommended for bathtub repair?
Recommended tools include a putty knife for applying repair compounds, sandpaper for smoothing surfaces, a utility knife for trimming excess material, and a cleaning solution to prepare the surface before repairs.
How can I assess the durability of my bathtub repair?
After allowing sufficient curing time, check the repair by applying gentle pressure and observing for any cracks or weaknesses. Ensure the repair feels solid and does not shift under pressure.
When should I consider hiring a professional for bathtub repairs?
Consider hiring a professional if the damage is extensive, if you’re unsure about the repair process, or if you lack the necessary tools and experience to ensure a quality repair.