Table of Contents
ToggleKey Takeaways
- Comprehending Setup Guidelines
- Safety Measures While Fixing
- Readying Your Tub for Restoration
- Extra Equipment You Might Require
- Care Suggestions Following Restoration
- References for Additional Support
- Evaluating Guarantee Choices
Budgeting for DIY vs. Professional Help
When deciding between tackling a bathtub repair yourself or hiring a professional, it’s essential to evaluate the financial implications of each option. A DIY approach often involves purchasing repair kits and tools, which can be a relatively low upfront cost compared to professional labor fees. However, if you lack experience, you may encounter unexpected expenses, such as additional materials or redoing work that didn’t go as planned.
On the other hand, enlisting a professional typically comes with a higher initial investment. This option often guarantees a more polished finish and minimizes the risk of future issues. Budgeting for a professional also means considering the long-term benefits of having a skilled technician handle the repair, potentially saving you money on future maintenance. Carefully considering your budget and skill level can help you make a more informed decision that aligns with your needs.
Understanding Installation Instructions
Installation instructions serve as essential guides that detail each step necessary for a successful bathtub repair. Following these guidelines ensures that you understand the specific requirements of your chosen repair kit. Each product may have unique features or components, and neglecting these instructions can lead to suboptimal results or even additional damage. Familiarizing yourself with the layout and suggested processes will help clarify what tools are needed and the order in which tasks should be completed.
Before starting any repair work, it’s advisable to thoroughly read through the provided manual. This preliminary step allows you to visualize the repair process and appreciate the complexity of the tasks involved. Taking the time to comprehend the instructions can save both time and frustration. Additionally, manufacturers often include troubleshooting tips that might be invaluable should issues arise during the repair. Proper understanding of the installation instructions could dramatically affect the outcome.
Importance of Following Manufacturer Guidelines
Adhering to manufacturer guidelines is crucial when selecting and using a repair kit for your bathtub. These instructions typically contain specific information about the materials and techniques that ensure proper application. Following these recommendations helps in achieving satisfactory results, as they are formulated based on extensive testing and experience.
Neglecting these guidelines can lead to unnecessary complications and even damage to your bathtub. For instance, using the wrong type of adhesive or sealant might result in leaks or surface deterioration. Ensuring compliance with the manufacturer’s recommendations not only enhances the repair’s effectiveness but also prolongs the life of your bathtub.
Safety Precautions During Repair
Before beginning any repair work on your bathtub, it is essential to prioritize safety. Ensure the work area is well-ventilated to avoid inhaling fumes from adhesives or chemicals. Wearing gloves protects your hands from harsh substances, while goggles safeguard your eyes from potential splashes. Additionally, keep a first aid kit nearby in case of minor injuries. If you’re working with power tools or heavy materials, consider using a dust mask to limit inhalation of particles.
Electrical safety is another critical consideration. If your bathtub has electrical components, make sure to turn off the power supply before starting any repair tasks. This step minimizes the risk of electric shock. Also, having someone nearby can provide assistance in case of emergencies. By taking these precautions, you can create a safer environment for your repair project and ensure a smooth process.
Essential Gear for a Safe Experience
Safety should always be a top priority when undertaking any repair project, especially in a wet environment like a bathtub. A good pair of rubber gloves is essential to protect your hands from harsh chemicals and materials. Safety glasses can shield your eyes from debris while you work. Non-slip footwear is another key consideration, as it helps prevent slips on wet surfaces.
Ensure you have an appropriate mask if you’re working with materials that release fumes. Ventilation is crucial, so consider using fans or opening windows if the weather allows. Having a first aid kit nearby is wise in case of accidents. This basic gear will create a safer workspace and provide peace of mind as you tackle the repair.
| Gear Item | Purpose | Importance Level |
|---|---|---|
| Rubber Gloves | Protect hands from chemicals and materials | High |
| Safety Glasses | Shield eyes from debris | High |
| Non-Slip Footwear | Prevent slips on wet surfaces | Medium |
| Respirator Mask | Protect from harmful fumes | High |
| First Aid Kit | Address minor injuries or accidents | Medium |
Preparing Your Bathtub for Repair
Before beginning any repair work on your bathtub, it’s essential to properly prepare the surface. Start by removing all items such as soap, shampoo, and bath mats from the area. Clear away any personal belongings to create a clean and organized workspace. This will not only help you focus on the repair itself but also prevent any items from becoming damaged during the process.
Once the area is clear, inspect the bathtub for any existing damage beyond what you intended to repair. Look for cracks, chips, or signs of mold that may require additional attention. Thoroughly clean the surface to remove soap scum and debris, ensuring the area is dry before proceeding with repairs. Proper preparation lays the foundation for a successful repair.
Steps to Clean and Dry the Surface
Cleaning the bathtub surface is crucial before starting any repair. Begin by removing any items such as toiletries and towels that clutter the area. Next, use a mixture of warm water and mild detergent to scrub the entire surface. A non-abrasive sponge or cloth helps to avoid scratches while efficiently removing grime and soap scum. Pay special attention to areas around drains and any cracks, as these are common sites for buildup.
Once the surface is clean, thoroughly rinse off the soap residue with clean water. It’s important to ensure that no detergent remains, as this can interfere with the adhesion of the repair kit. After rinsing, dry the surface completely with a soft towel or allow it to air dry in a well-ventilated area. Proper drying not only prepares the surface for adhesive but also prevents trapping moisture, which could compromise the repair.
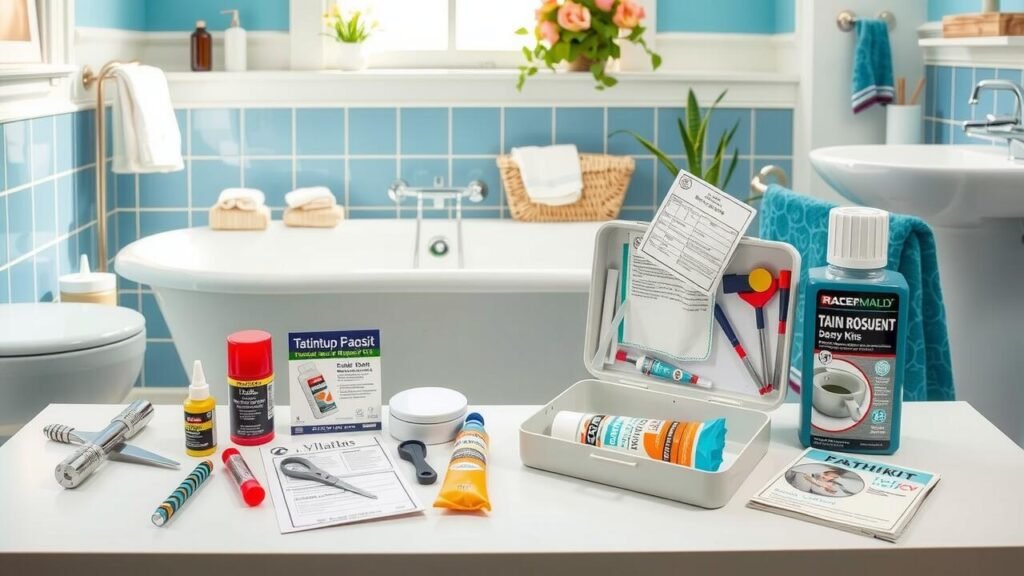
Additional Tools You May Need
When tackling a bathtub repair, certain tools can enhance your efficiency and effectiveness. A high-quality caulking gun is essential for applying sealants evenly and neatly. Additionally, a putty knife can assist in removing old caulk or debris from the surface, making way for a fresh application. Tape measures help ensure precise measurements, which can prevent mistakes that could lead to further repairs down the line.
You might also find a heat gun useful for softening previous adhesives or caulks, making removal much easier. If you’re working on a fiberglass tub, consider having a sanding block on hand for surface preparation. A level tool will help ensure that any new components are installed correctly, supporting a long-lasting repair. These tools can make a significant difference in the final outcome of your project.
Essential Equipment for a Successful Repair
Successful bathtub repair often hinges on having the right tools. A quality repair kit typically includes essential items such as a putty knife for applying fillers, sandpaper to smooth the surface, and a mixing tray for combining materials. Additionally, you may need a caulking gun for precise application of sealants. These tools will help ensure that your repair is clean and efficient, resulting in a more polished finish.
Aside from the basic tools, adhesives and fillers specifically designed for bathtub materials are crucial for a long-lasting repair. Epoxy or fiberglass resin can be great choices, depending on the surface type of your bathtub. Having these materials at your disposal will not only streamline the repair process but will also enhance the durability of the results. Proper equipment is a critical investment in your DIY project, leading to a successful and satisfying outcome.
Maintenance Tips After Repair
Once the repair is complete, regular maintenance is crucial for ensuring the longevity of your bathtub. Routine cleaning is essential. Opt for gentle, non-abrasive cleaners to avoid damaging the repaired area. It’s best to avoid harsh chemicals that can compromise the integrity of the materials used in the repair. Inspect the surface frequently for signs of wear or damage. Early detection can save you time and money in potential future repairs.
To further enhance the lifespan of your bathtub repair, consider using bathmats and avoiding excessive weight on the repaired sections. Storing items carefully and avoiding direct impact can limit stress on the repaired area. Additionally, applying a protective sealant may be beneficial. This helps shield the surface from moisture and dirt accumulation, ultimately prolonging the effects of your repair efforts. Regular upkeep will keep your bathtub looking great and functioning well for years to come.
Ensuring Longevity of the Repair
After completing your bathtub repair, maintenance plays a crucial role in ensuring that the repair remains effective over time. Regularly inspect the repaired area for any signs of wear or damage. Clean the bathtub with gentle, non-abrasive cleaners to prevent degrading the repair material. Avoid using harsh chemicals that could weaken the seal or finish.
It is also beneficial to establish a routine to maintain the integrity of the bathtub. This can include periodic checks for any leaks or cracks and addressing them immediately. Keeping the bathtub dry when not in use can help prevent water damage and prolong the lifespan of both the repair and the fixture itself. Regular care will greatly enhance the durability of your repair efforts.
Resources for Further Assistance
Finding the right resources can be crucial for a successful bathtub repair project. Online platforms offer a wealth of tutorials, step-by-step guides, and videos that can provide visual assistance. Websites like YouTube and DIY blogs often feature user experiences and specific tips, making complex tasks more manageable. Forums and community groups related to home improvement can also serve as valuable sources for advice and troubleshooting.
In addition to online resources, local hardware stores usually have knowledgeable staff who can answer questions or offer recommendations for specific repair kits. Some stores even host workshops that might cover basic repairs or product usage. Brochures and pamphlets found at these establishments can provide useful information about various products, helping you make informed decisions. Utilizing both online and in-person resources can empower you throughout the repair process.
Finding Online Tutorials and Guides
The internet is a treasure trove of information, offering a myriad of resources for anyone looking to repair their bathtub. A simple search can yield countless videos, articles, and forums dedicated to DIY home repairs. These platforms allow users to visually follow along with experts or fellow enthusiasts, significantly enhancing the understanding of complex processes. Many websites also provide step-by-step guides, complete with images and troubleshooting tips, ensuring a smoother repair experience.
Utilizing these online tutorials can help demystify the installation process and highlight common pitfalls to avoid. It’s beneficial to review multiple sources to gain diverse perspectives and techniques. Engaging with online communities can also be invaluable, as they often share personal experiences and suggestions. By researching thoroughly and tapping into the wealth of knowledge available online, you’ll be better prepared to tackle your bathtub repair project with confidence.
- Explore video platforms like YouTube for visual demonstrations of bathtub repairs.
- Visit DIY-focused websites for comprehensive articles and guides.
- Join forums or social media groups focused on home improvement for community support.
- Look for specialized home repair blogs that offer tips and firsthand experiences.
- Read reviews and comments on tutorial sites to gauge the effectiveness of different methods.
- Bookmark reliable resources for quick access during your repair work.
- Keep a notepad handy to jot down key steps or tips as you learn.
Considering Warranty Options
When selecting a repair kit for your bathtub, it is essential to consider the warranty options provided by manufacturers. A good warranty can offer peace of mind, ensuring that you are covered for any defects or issues that may arise after installation. Typically, warranties can range from a few months to several years, depending on the product and brand. Carefully reviewing the terms of the warranty will help you understand what is included and any potential limitations.
In addition to the basic coverage, check if there are guarantees related to the longevity and effectiveness of the repair. Some manufacturers provide extended warranties or satisfaction guarantees, which can be beneficial in case the repair does not hold up as expected. Ensuring that you have a clear understanding of these options can help you make a more informed decision when choosing a repair kit, as it adds an extra layer of security to your investment.
Importance of Product Guarantees
Product guarantees play a crucial role in the decision-making process when selecting a repair kit for your bathtub. They offer assurance that the manufacturer stands behind their product’s quality and performance. This can provide peace of mind, especially for DIY enthusiasts who may be uncertain about their ability to achieve a lasting repair. A warranty can also save you money in the long run, covering any unexpected issues that may arise shortly after the installation.
Having a guarantee means you can have confidence in both the materials and the instructions provided. If a repair fails or does not meet expectations, a valid warranty can facilitate the replacement of faulty items or even refund your purchase. This level of support can be particularly valuable when dealing with extensive repairs, as it demonstrates the manufacturer’s commitment to customer satisfaction and product reliability.
Conclusion
Choosing the right repair kit for your bathtub involves evaluating various factors. Prioritizing the type of damage, the materials used, and your own skill level can make a significant difference in the outcome. Taking the time to consider your options will help ensure that you select a product that meets your specific needs without causing additional issues.
After completing the repair, ongoing maintenance is crucial to prolonging the life of your bathtub. Regular cleaning and preventative measures can safeguard your investment and maintain its aesthetic appeal. Staying informed about proper care techniques and following manufacturer recommendations will further enhance the durability of your repair.
FAQS
What factors should I consider when choosing a repair kit for my bathtub?
When selecting a repair kit, consider the type of material your bathtub is made of, the extent of damage, your budget, and whether you plan to DIY or hire a professional for the repair.
Are there specific tools I need to have on hand before starting the repair?
Yes, essential tools may include a putty knife, sandpaper, a cleaning cloth, and possibly a heat gun, depending on the type of repair kit you choose. Some kits may also come with tools included.
How do I prepare my bathtub before using a repair kit?
First, clean the surface thoroughly to remove any soap scum, dirt, or grease. Then, dry the area completely to ensure proper adhesion of the repair material.
Can I repair my bathtub myself, or should I hire a professional?
It depends on your comfort level with DIY projects and the complexity of the repair. Smaller issues can often be tackled by homeowners, while larger or more complicated repairs might be best left to a professional.
What safety precautions should I take during the bathtub repair process?
Always wear protective gear such as gloves and goggles, ensure proper ventilation in the area, and follow the manufacturer’s instructions closely to avoid accidents and injuries.