Table of Contents
ToggleKey Takeaways
- Selecting the Appropriate Refinishing Material
- Using Primer on the Bathtub Surface
- Recoating the Tub
- Drying Duration and Correct Maintenance
- Reinstalling Fixtures and Accessories
- Cleaning and Caring for Your Recently Finished Tub
- Investigating Other Refinishing Alternatives
Protecting Your Bathroom from Spray
Before starting the refinishing process, it is essential to safeguard your bathroom against any potential overspray. A simple method involves using a combination of drop cloths and painter’s tape. Cover the floor, surrounding walls, and any fixtures that might be exposed to spray. Ensure the drop cloths are laid out securely to avoid slipping. Painter’s tape helps create clean edges and prevents refinishing product from reaching areas where it is not intended.
Ventilation plays a key role in both safety and the quality of the refinishing job. Open windows and doors to allow fresh air to flow through the space. If possible, use fans to enhance air circulation. Proper ventilation not only protects you from harmful fumes during the application but also aids in the drying process of the refinishing product. Taking these precautions will result in a cleaner, safer environment while you work.
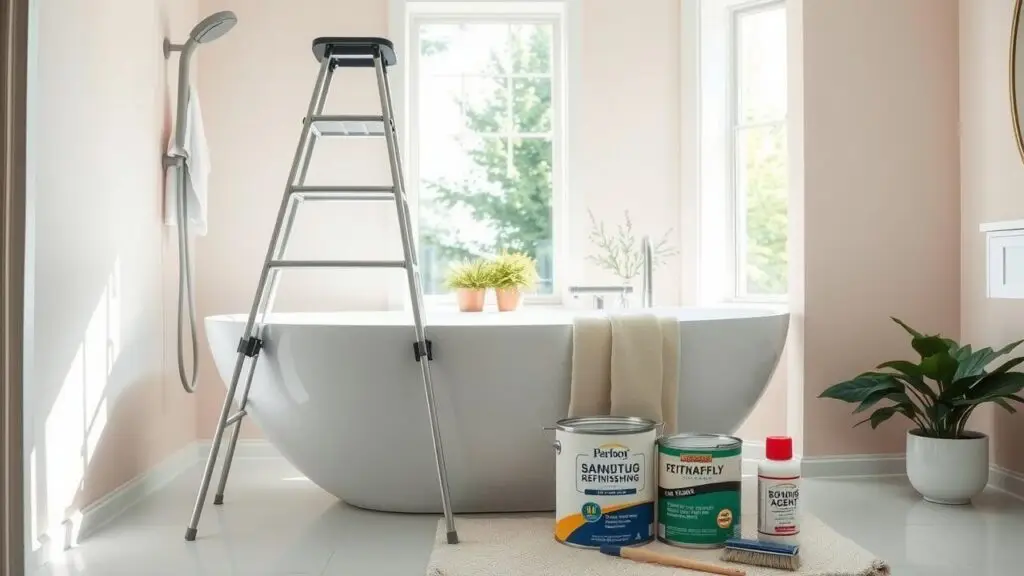
Choosing the Right Refinishing Product
Selecting the appropriate refinishing product is crucial for achieving a long-lasting, beautiful finish on your acrylic bathtub. Several options are available, including spray-on coatings and brush-on paints. Spray-on products often provide a smoother finish and allow for more even coverage. Brush-on products can be easier to control, especially for touch-ups or small areas. Consider the condition of your tub and your comfort level with application methods when making your choice.
In addition to application methods, it’s essential to evaluate the product’s durability and resistance to common wear factors such as scratches, stains, and chemicals. Look for products specifically designed for acrylic surfaces, as they typically adhere better and offer a more robust finish. Reading customer reviews and checking for warranties can also provide insight into the performance of the refinishing products you are considering.
Comparing Different Coatings
When considering refinishing options for your acrylic bathtub, it is essential to explore the different types of coatings available. Each coating has its unique properties and advantages. For instance, epoxy coatings offer a durable, high-gloss finish that can withstand harsh cleaning products. Polyester-based coatings also provide good durability while maintaining a smooth surface that can easily be cleaned. Understanding the strengths of various coatings can help you make an informed decision that aligns with your specific needs.
Additionally, the application process for each coating can differ significantly. Some coatings require professional application, while others can be applied as a DIY project. This consideration is crucial, especially if you are looking to save on costs or prefer a hands-on approach. Always check the manufacturer’s recommendations for preparation and application to ensure optimal results. Taking the time to compare these factors will guide you toward the best choice for a successful refinishing project.
| Coating Type | Durability | Gloss Finish | Application Method | Recommended Usage |
|---|---|---|---|---|
| Epoxy Coating | High | High-Gloss | Professional | Heavy Use Areas |
| Polyester Coating | Moderate | Semi-Gloss | DIY | Light to Moderate Use |
| Urethane Coating | Very High | High-Gloss | Professional | All Usage Types |
| Acrylic Coating | Moderate | Glossy | DIY | Light Use |
Applying Primer to the Surface
A clean and dry surface is essential before applying primer to your acrylic bathtub. Start by thoroughly cleaning the tub using a non-abrasive cleaner to remove any soap scum, dirt, and debris. Rinse well and allow the surface to dry completely. Once prepped, choose a high-quality primer specifically designed for acrylic surfaces. This primer should provide good adhesion to the surface and facilitate a smooth finish for the topcoat.
When applying the primer, use a foam roller or brush to achieve a consistent layer. Work systematically to cover the entire area, ensuring even distribution without leaving thick spots. Pay special attention to corners and edges, as these areas often require more precision. Allow the primer to cure as per the manufacturer’s instructions before moving on to the refinishing process. Following these steps will help ensure that your refinishing project begins on the right footing.
Importance of a Strong Base Layer
A reliable base layer is essential for a successful bathtub refinishing project. This foundational application acts as the primary bond between the surface of the acrylic tub and the top coating that will be applied later. Any imperfection or inconsistency in this layer can compromise the entire refinishing job. It serves to both smooth out imperfections and provide a texture that enhances adhesion, reducing the risk of peeling or chipping over time.
Applying a primer specifically designed for bathtubs is recommended to ensure optimal results. Such primers are formulated to withstand moisture and temperature fluctuations typical in bathroom environments. Properly preparing the surface by cleaning and sanding also prepares the tub, allowing the primer to effectively grip and bond. A well-executed base layer strengthens the overall durability of the refinished surface, making it more resistant to everyday wear and tear.
Refinishing the Bathtub
Before beginning the refinishing process, ensure that the work area is well-ventilated. This helps reduce exposure to fumes and accelerates drying time. Gather all necessary tools and materials, including a spraying tool or brush, the chosen refinishing product, and appropriate safety gear like gloves and masks. Proper preparation of the bathtub’s surface is essential, so ensure it is clean and free of any dirt or oils.
When applying the refinishing material, follow the product instructions closely. Start at one end of the tub and work methodically to avoid overlapping and streaks. Apply even coats, allowing for adequate drying time between applications if required. Monitor the thickness of each layer; a thicker coating may seem appealing but can lead to problems in adhesion and durability over time. Patience during this step ensures a smooth and professional-looking finish.
Step-by-Step Application Process
Before diving into the refinishing process, gather all necessary materials. This includes the chosen refinishing product, a high-quality primer, spray gun or foam roller, and protective equipment. Ensure the bathroom is well-ventilated to reduce exposure to fumes. Begin by applying a thin coat of primer across the surface of the bathtub. This step is vital for enhancing adhesion and ensuring a smooth finish.
Once the primer has dried, it’s time to apply the refinishing product. Start at one end of the bathtub and work your way across in even strokes. Keep the spray consistent to avoid drips and uneven patches. Wait for the recommended drying time between layers as specified on the product instructions. Generally, two to three coats will provide optimal durability and shine. After completing the application, clean the area and remove any protective coverings, but allow the bathtub to cure fully before using it.
- Ensure all materials are ready before starting the refinishing process.
- Choose a high-quality refinishing product specifically designed for bathtubs.
- Use a well-ventilated space to prevent inhalation of fumes during the process.
- Apply multiple thin coats of refinishing product for the best results.
- Follow drying times between coats as recommended by the product instructions.
- Prepare the area by cleaning up thoroughly after finishing and ensuring all coverings are removed.
- Allow the bathtub ample time to cure completely before use for optimal results.
Curing Time and Proper Care
After refinishing, allowing adequate curing time is essential. This period enables the new coating to fully harden, ensuring durability and resistance to wear. Typically, most refinishing products require at least 24 to 48 hours to cure effectively. It is crucial to avoid using the bathtub during this time to prevent any damage to the fresh surface. Proper ventilation in the bathroom also supports faster curing, allowing any lingering fumes to dissipate.
Following the curing process, maintaining the integrity of the finish requires mindful care. Regular cleaning with a gentle, non-abrasive cleaner helps preserve the surface’s sheen without causing scratches. Avoid aggressive scrubbing pads or harsh chemicals that could compromise the new coating. Additionally, establishing a routine for inspections will allow you to catch any potential issues early, helping to prolong the lifespan of your newly refinished bathtub.
Keeping Your Bathtub Safe After Refinishing
After refinishing your acrylic bathtub, it’s essential to handle it with care to ensure the surface remains intact. Avoid using abrasive cleaning tools that could scratch or damage the new finish. Instead, opt for soft sponges or microfiber cloths for routine cleaning. It’s best to let the surface dry completely after washing to prevent any moisture-related issues. Keeping the bathtub free from heavy objects will also help maintain its integrity.
Additionally, maintain a consistent temperature in your bathroom. Extreme heat or cold can affect the finish. Make sure to use mats or slip-resistant surfaces and avoid chemicals that may react negatively with the refinished surface. Limiting the use of bath oils or bath bombs that contain dyes can prevent staining. By taking these precautions, you can help prolong the life of your refinished bathtub and enjoy its new appearance for years to come.
Reattaching Fixtures and Accessories
After allowing sufficient curing time for the refinished surface, it is essential to reattach fixtures and accessories carefully. Begin by assessing the condition of each fixture before installation. Clean any existing hardware to ensure a smooth fit. Use plumber’s putty or silicone sealant where necessary for added protection against leaks. Employ a level to ensure everything is aligned correctly, as misaligned fixtures can lead to future issues.
Once the fixtures are properly positioned, secure them tightly to avoid any wobbling. Depending on the type of fixture, this may require specific tools. It is crucial to double-check the functionality of each item after installation. Ensure faucets and knobs easily turn and that drains operate effectively. Taking these steps will help maintain the integrity of your refinished acrylic bathtub while enhancing its overall appearance.
Ensuring Proper Sealing and Functionality
After refinishing, it is essential to ensure that all fixtures are reattached properly. Pay close attention to components such as faucets, drains, and any additional accessories. Use a silicone-based sealant to provide a watertight finish, which prevents leaks and prolongs the life of your newly refinished bathtub. Make sure that the threads are clean and free from old sealant before reinstalling any screws or bolts. This small effort can significantly impact the durability and performance of your plumbing fixtures.
Checking for leaks after reattachment is a critical step. Turn on the water slowly and observe for any signs of dripping or pooling. Tighten any loose fittings as needed. It’s beneficial to give the caulking around the bathtub a final inspection as well. Proper sealing not only enhances the appearance of the bathtub but also protects against water damage. If any issues arise, don’t hesitate to address them immediately to avoid complications in the future.
Cleaning and Maintaining Your Newly Finished Bathtub
After refinishing your acrylic bathtub, proper cleaning routines are essential for preserving its appearance and extending its life. Use a soft cloth or sponge for cleaning. Harsh scrubbers or abrasive cleaning materials can scratch the surface and cause damage. Stick to mild soap and warm water for routine cleaning. For tougher stains, a solution of vinegar and baking soda may help without compromising the finish.
Maintaining the shiny surface involves avoiding products containing bleach or acids, as these can deteriorate the new coating over time. Regularly rinsing the tub after each use minimizes soap scum build-up and preserves the glossy finish. Inspecting the surface periodically for any signs of wear or damage allows you to tackle issues early before they worsen. Taking these steps ensures your refinished bathtub remains a beautiful focal point in your bathroom.
Best Practices for Longevity
Maintaining the beauty and durability of your newly refinished acrylic bathtub requires mindful practices. Regular cleaning with non-abrasive products helps prevent scratches and keeps the surface looking fresh. It is advisable to use soft cloths or sponges to avoid damaging the finish. Avoid harsh chemicals that could wear down the protective layer.
In addition to careful cleaning, proper water temperature should be considered. Extremely hot water can weaken the finish over time, so using warm rather than boiling water is beneficial. Furthermore, using bath mats or oils sparingly can help protect the surface from wear and tear. Following these practices will ensure your refinished bathtub remains attractive and functional for many years.
Exploring Alternative Refinishing Options
When considering refinishing for your acrylic bathtub, you may encounter various alternatives. Options include professional services that specialize in bathtub refinishing. Engaging experienced technicians often guarantees a high-quality finish and meticulous work. Alternatively, there are DIY kits available for those who prefer a hands-on approach. These kits typically come with all necessary materials and instructions, making it easier for homeowners to take on the project themselves.
Evaluating the pros and cons of each option is essential. Professional refinishing generally offers superior durability and longevity, often justifying the higher cost. DIY projects may save money but require careful adherence to instructions and safety precautions. Weighing the time commitment against potential savings will help determine the best route for your specific needs. Each choice presents its own set of benefits, and understanding these will aid in making an informed decision.
Comparing DIY vs. Professional Services
Deciding between tackling a refinishing project yourself or hiring a professional can significantly impact the outcome of your acrylic bathtub. A DIY approach often appeals due to lower costs and the satisfaction of completing a home improvement project. However, it requires a certain level of skill, an investment in materials, and a commitment of time. Those unaccustomed to the process may face challenges such as uneven application or inadequate preparation, which could lead to disappointing results.
On the other hand, professional services offer expertise and access to high-quality materials often not available to the average consumer. Professionals can ensure proper surface preparation, application of the right coatings, and adherence to safety regulations. While the upfront cost may be higher, the results can lead to a durable finish that requires minimal upkeep. Weighing the benefits and drawbacks of each option is essential to determine the best choice for your specific situation.
Conclusion
Refinishing an acrylic bathtub can significantly enhance its appearance and extend its lifespan. Following the outlined steps ensures a smoother process while achieving a professional-looking finish. Careful preparation, selection of quality products, and attention to detail during application are crucial for successful results. Protecting surrounding areas and allowing adequate curing time also contribute to the durability of the refinishing job.
Regular maintenance following refinishing is essential to keep the bathtub looking fresh and new. Implementing best practices for cleaning will help preserve the finish and prevent future damage. Whether you choose to tackle the project yourself or hire professionals, understanding the refinishing process lays the foundation for a successful outcome. Taking the time to prepare properly will lead to satisfaction and longevity in your refinished bathtub.
FAQS
What is the first step I should take when preparing my acrylic bathtub for refinishing?
The first step is to thoroughly clean the bathtub to remove any soap scum, dirt, or grime. This will ensure that the refinishing product adheres properly to the surface.
How do I protect my bathroom from spray during the refinishing process?
You can protect your bathroom by using drop cloths and plastic sheeting to cover floors and surrounding surfaces. Make sure to tape off edges and fixtures to prevent overspray.
What type of refinishing product should I choose for my acrylic bathtub?
It’s important to choose a product specifically designed for acrylic surfaces. Look for high-quality refinishing kits that include both primer and topcoat for optimal results.
How long does the curing process take after refinishing an acrylic bathtub?
Curing time can vary depending on the product used, but it typically takes about 24 to 48 hours for the surface to cure properly. Always refer to the manufacturer’s instructions for specific guidelines.
Can I use my bathtub immediately after refinishing?
No, it’s best to avoid using the bathtub until the curing time is complete. This will help ensure the finish hardens correctly and lasts longer.
What are some best practices for maintaining my newly finished acrylic bathtub?
To maintain your refinished bathtub, avoid abrasive cleaners, use a soft cloth for cleaning, and avoid placing heavy objects in the tub to prevent scratches or dents. Regular maintenance will help prolong the life of the finish.