Table of Contents
ToggleKey Takeaways
- Caring for a Recently Completed Tub
- Solving Frequent Problems
- Do-It-Yourself versus Expert Refinishing
- Ecological Factors
- Budgeting for Your Refinishing Endeavor
- Organizing Your Refinishing Schedule
- Investigating Other Refinishing Techniques
Understanding the Importance of Patience
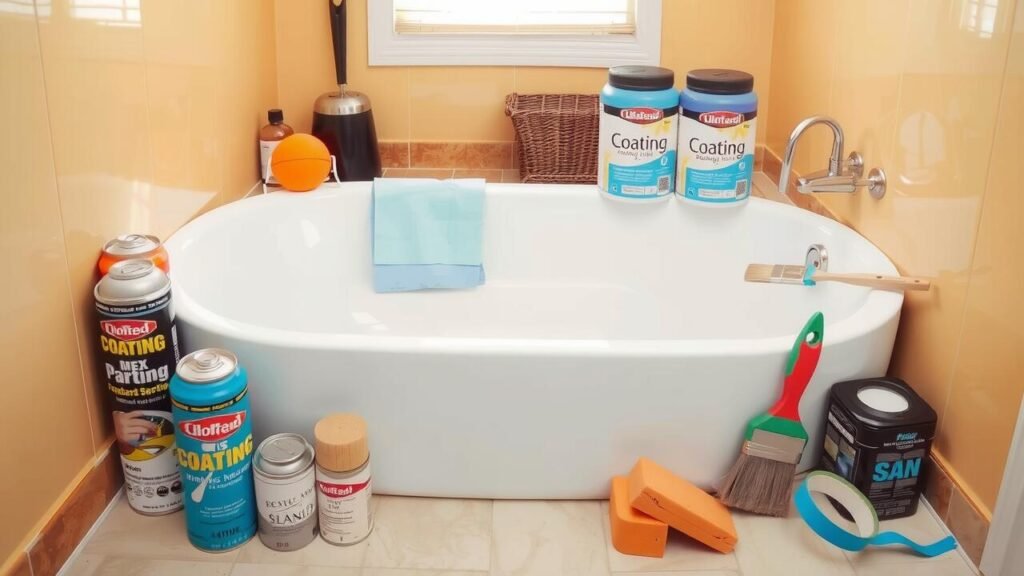
Taking on a DIY bathtub refinishing project requires more than just skill; it demands a great deal of patience. Rushing through steps can lead to mistakes that diminish the quality of the finish. Each stage of the process, from preparation to application, needs careful attention. Properly cleaning, sanding, and priming the surface all contribute to a successful outcome. Skipping these essentials often leads to poor adherence of coatings and ultimately a frustrating experience.
Allowing enough time for each component to completely cure is equally important. Many people underestimate how long a finish needs to harden before it can withstand regular use. This wait is crucial for achieving a durable and aesthetically pleasing result. By understanding that patience is not merely a virtue but a necessity in refinishing, DIYers are much more likely to achieve professional-level results.
| Stage of Refinishing | Recommended Time | Tips for Success |
|---|---|---|
| Cleaning | 1-2 hours | Use a non-abrasive cleaner to avoid scratching the surface. |
| Sand Surface | 2-3 hours | Use fine-grit sandpaper to ensure a smooth base for the primer. |
| Apply Primer | 24 hours drying time | Ensure the primer is evenly applied for best adhesion. |
| Apply Top Coat | 48 hours curing time | Multiple thin layers are better than one thick layer for durability. |
Maintaining a Newly Finished Bathtub
Proper maintenance immediately following a refinishing job is crucial to ensure the longevity of the newly finished surface. Cleaning should be approached with gentle, non-abrasive materials. Harsh scrubbing pads or abrasive cleaners can damage the finish and reduce its lifespan. Ideally, use mild soap and a soft sponge for regular cleaning. After use, always rinse thoroughly to prevent soap scum buildup, which can dull the surface over time.
In addition to cleaning, avoiding heavy impacts or the use of bathroom mats with rubber backing can help protect the finish. Water should be wiped down regularly to prevent mineral stains and water spots. It’s advisable to let the bathtub dry between uses. Avoiding aggressive cleaning techniques and maintaining a consistent maintenance schedule will preserve the refinishing job and keep the bathtub looking pristine for years.
Best Practices for Longevity and Care
Maintaining the integrity of a newly refinished bathtub requires regular care and attention. It is important to avoid abrasive cleaners, as these can damage the newly applied coating. Instead, opt for gentle, non-abrasive cleaning products that are specifically designed for use on refinished surfaces. Using a soft cloth or sponge will help keep the finish intact without scratching. Regularly rinsing the tub after use and wiping it dry can also prevent soap scum buildup, leading to a longer-lasting shine.
In addition to careful cleaning methods, consider implementing precautionary measures to protect the surface. Always use bath mats to minimize scratches caused by foot traffic. Avoid placing heavy objects directly into the tub and be mindful when using bath accessories that could potentially cause damage. Keeping the bathroom well-ventilated can also help control humidity levels, reducing the risk of mold and mildew, which can compromise the newly refinished area. Taking these steps will ensure the longevity of your bathtub’s new finish.
Troubleshooting Common Issues
When undertaking a DIY bathtub refinishing project, various issues can arise that may affect the final outcome. Bubbles in the finish often occur due to applying the coating too thickly or environmental factors like high humidity. If you encounter bubbles, it is essential to address them promptly. Allow the surface to dry completely, then sand down the affected area before reapplying a thin layer of the coating. This method helps achieve a smooth finish while ensuring longevity.
Cracking and peeling are signs of poor adhesion and can result from inadequate surface preparation or using incompatible products. To resolve these problems, first, identify the cause by checking the surface for dirt, grease, or previous coatings that may not have adhered properly. Remove any loose or damaged areas and prepare the surface anew. After cleaning and sanding, a high-quality primer specifically designed for the type of coating being used can effectively prevent future issues, ensuring a better bond and a smoother finish.
Solutions for Bubbles, Cracking, and Peeling
Bubbles, cracking, and peeling are common issues that can arise during or after a DIY bathtub refinishing project. To tackle bubbles, start by ensuring that your surface is meticulously cleaned before applying the coating. Any contaminants can cause the coating to lift. If bubbles do appear, gently poke them with a pin and smooth the area with a brush. For cracks, a sanded, smooth surface is crucial before applying a touch-up coating. Use a fine-grit sandpaper to feather the edges and ensure a seamless finish.
Peeling often results from inadequate preparation or humidity issues. If peeling occurs, assess the area and remove any loose paint using a scraper. After achieving a clean surface, reapply the coating, making sure to follow the recommended curing times and environmental conditions on the product label. Keeping your bathroom well-ventilated during the refinishing process can also help prevent these issues from manifesting in the first place. Following these preventive measures and solutions will enhance the durability of your refinished bathtub.
DIY vs. Professional Refinishing
Choosing between a DIY approach and hiring a professional for bathtub refinishing can significantly impact the outcome and experience of the project. A DIY project allows for full control over the process. Enthusiasts can customize their techniques and choose products suited to their needs. On the other hand, the learning curve may lead to mistakes that could result in further costs or additional efforts.
Engaging a professional can provide assurance of a high-quality finish and dedicated expertise. Experts in refinishing have the experience to handle potential challenges effectively. Though this option typically comes with a higher upfront cost, the long-term benefits may justify the investment. Homeowners should weigh their own skill levels, the complexity of the job, and the importance of the finished look when making their decision.
Evaluating Cost and Time Investment
When considering a DIY bathtub refinishing project, understanding the financial and time commitments involved is crucial. The cost of materials, including specialty coatings and tools, can vary significantly based on quality and brand. Home improvement stores may offer a range of options, from budget-friendly choices to premium products. It’s beneficial to factor in potential unexpected expenses, such as additional tools or supplies needed to achieve an optimal finish.
Time investment is equally important to gauge before starting the project. Preparing the bathtub, applying the coatings, and allowing for proper drying time can span several days. Depending on the size and condition of the bathtub, the entire refinishing process might take anywhere from a weekend to over a week. Planning for these timelines ensures a smoother workflow and prevents interruptions during the refinishing process.
- Determine the approximate budget for materials and supplies before starting the project.
- Research and compare prices of different coatings and tools at various retailers.
- Account for additional costs, such as safety equipment or waste disposal.
- Set a realistic timetable that includes preparation, application, and drying times.
- Prepare your workspace ahead of time to ensure efficient progress during the project.
- Consider seeking help from a friend or family member to speed up the process.
- Be patient and allow sufficient time for proper curing to achieve the best results.
Environmental Considerations
Refinishing a bathtub can have implications for the environment, particularly regarding the materials used during the process. Traditional coatings often contain harmful chemicals that can release volatile organic compounds (VOCs) into the air. These VOCs are detrimental to both indoor air quality and the broader environment. Opting for eco-friendly products that meet regulatory standards can mitigate these effects while still providing a durable finish.
In addition to considering product safety, proper disposal of leftover materials is crucial. Many refinishing products require specific disposal methods to prevent pollution or contamination. Researching local guidelines can help ensure that waste is managed responsibly. When choosing coatings and prior to starting the project, it’s wise to assess the environmental impact to make choices that reflect a commitment to sustainability.
Eco-Friendly Coating Options
Many consumers are increasingly aware of their environmental impact, leading to a demand for eco-friendly products in home improvement projects. When it comes to bathtub refinishing, several low-VOC (volatile organic compounds) coatings are available that reduce harmful emissions without sacrificing quality. These coatings typically utilize water-based formulations that cure more quickly than traditional solvent-based options, thus minimizing environmental hazards.
In addition to being safer for the environment, eco-friendly coatings often provide excellent durability and longevity. Some brands specifically highlight the use of renewable resources in their products. This not only promotes sustainability but also ensures that homeowners can enjoy a beautifully refinished bathtub without compromising their values regarding health and environmental responsibility. Exploring these options offers a way to refresh your bathroom while being mindful of the planet.
Financing Your Refinishing Project
Budgeting for a bathtub refinishing project requires careful consideration of various factors. Start by researching the average costs associated with materials and tools needed for a DIY job. These expenses may vary based on the size of the bathtub and the type of coating chosen. In addition, account for any additional supplies like safety gear and cleaning products. Consider potential costs for professional assistance if needed, as some tasks may be challenging for beginners.
When planning your financing, it helps to create a detailed budget that outlines all expected costs. To avoid overspending, prioritize essential items and explore different options in terms of products. Look for coupons or discounts to reduce material costs. Setting aside a small buffer for unforeseen expenses will also help keep the project on track financially. Taking the time to budget appropriately can make a significant difference in successfully completing your refinishing project without financial strain.
Budgeting Tips and Cost Estimates
Creating a realistic budget for a bathtub refinishing project begins with understanding the materials you will need. Generally, you can expect to spend between $50 to $100 on high-quality refinishing kits that include epoxy coatings, primers, and necessary tools. Additional costs will arise from cleaning supplies, protective gear, and any repairs needed before refinishing. Be sure to factor in unexpected expenses, as older bathtubs may have hidden issues that require attention.
Time is another important consideration when estimating costs. Many refinishing projects require a couple of days to complete, with drying and curing times extending the overall timeline. If you plan to hire a professional, obtain quotes from multiple contractors to ensure you receive a fair price. Keep in mind that while DIY refinishing may appear less expensive upfront, consider your skill level and the time needed to achieve satisfactory results, as this can also impact your overall budget.
Planning Your Refinishing Timeline
Establishing a clear timeline for your refinishing project will ensure that every step is executed smoothly. Begin by assessing the state of your bathtub and determine how much preparation time is necessary. Gather all materials and tools before starting to avoid delays. Allocate time for the application of each layer of coating as well as the curing periods. This attention to detail will help streamline the entire process and prevent any unforeseen interruptions.
Consider local temperature and humidity levels when scheduling your refinishing task. These environmental factors can significantly impact drying times and overall adhesion of the coating. With a well-thought-out plan, you can manage your expectations and adhere to your deadlines more effectively. Document each step, and don’t hesitate to adjust your timeline based on the progress. Careful planning allows for a successful and hassle-free refinishing experience.
Creating a Step-by-Step Schedule
A well-structured schedule is essential for a successful bathtub refinishing project. Begin by setting a clear timeframe that includes each stage of the process. Allocate specific days for tasks such as surface preparation, coating application, and curing time. Allow flexibility in your timeline to account for any unexpected delays or weather-related issues that may arise. Breaking down the project into manageable steps can help maintain focus and ensure each task is completed thoroughly.
Next, gather all necessary materials and tools in advance to avoid wasting time searching for items once you start. Create a checklist that outlines each step, from cleaning and sanding the surface to applying the primer and final coat. This organized approach promotes efficiency and helps track your progress. Remember to include time for ventilation and curing, as these are crucial for achieving optimal results. By following a detailed schedule, you can steer clear of rushed decisions and ensure a high-quality finish on your bathtub.
Exploring Alternative Refinishing Methods
While traditional coating remains a popular choice for bathtub refinishing, several alternative methods can provide impressive results. One such option is the use of kits that employ acrylic or polyester resins. These materials are known for their durability and can create a finish similar to that of a professional-grade refinishing job. Their application usually involves a straightforward process, making them accessible for DIY enthusiasts looking for a reliable finish.
Another alternative is the installation of a bathtub liner. This method involves placing a custom-fitted acrylic or PVC liner directly over the existing bathtub. It’s an effective strategy for addressing problems like chips or deep scratches without the need for extensive surface preparation. Liners come in various styles and colors, allowing homeowners to customize the appearance of their bathrooms easily. Each of these methods has its advantages, making it essential to evaluate which option aligns best with individual preferences and project goals.
Other Options Beyond Coating
Refinishing a bathtub can take many forms, and sometimes simply applying a new coating isn’t the best solution. For those seeking a more robust transformation, options such as reglazing or using acrylic liners may be worth exploring. Reglazing involves applying a new layer of porcelain over the existing surface, providing a longer-lasting finish than traditional coatings. This option often leads to a shiny, brand-new appearance and is suitable for tubs that have significant damage or wear.
Acrylic liners offer another alternative by creating a custom-fit layer that covers the entire tub and surrounding area. This method can be particularly appealing for those looking to update the entire look of their bathroom. It effectively resolves issues with aging surfaces while also improving insulation. Though these methods may require professional assistance and a higher upfront cost, they can yield impressive results that last for many years.
Conclusion
Successfully refinishing a bathtub can breathe new life into an outdated bathroom. The right preparation and choice of materials can lead to stunning results, transforming a worn fixture into a centerpiece of relaxation and style. Embracing patience during the process not only enhances the quality of the final finish but also contributes to the longevity of the restoration.
Whether opting for a DIY approach or considering professional help, understanding the various options and techniques available is crucial. Budgeting effectively and planning the project timeline can alleviate common stresses associated with refinishing. By focusing on careful execution and proper maintenance, homeowners can enjoy beautiful, durable bathtubs for years to come.
FAQS
What type of coating is best for DIY bathtub refinishing?
The best coatings for DIY bathtub refinishing typically include epoxy, acrylic, and urethane-based paints. Each has its own advantages, such as durability and ease of application, so choose one that fits your specific needs.
How long does a bathtub refinishing job usually take?
A typical DIY bathtub refinishing job can take anywhere from one to three days, depending on the condition of the tub and the type of coating used. This includes preparation, application, and curing time.
Can I use regular paint for refinishing my bathtub?
No, regular paint is not suitable for refinishing a bathtub as it lacks the necessary durability and water-resistance. It’s essential to use specialized coatings designed specifically for bathtubs.
How do I maintain my newly refinished bathtub?
To maintain your newly refinished bathtub, avoid abrasive cleaners, use soft sponges, and ensure proper ventilation to prevent moisture buildup. Regular cleaning and care will extend the life of the finish.
Are there eco-friendly options for bathtub refinishing?
Yes, there are several eco-friendly coating options available for bathtub refinishing, such as water-based epoxy and low-VOC (volatile organic compounds) paints. These options are safer for the environment and your health.