Table of Contents
ToggleKey Takeaways
- Solutions for Frequent Problems and Upkeep Post-Refinishing
- Money-Saving Advice for Your Undertaking and When to Employ an Expert
- Investigating Different Refinishing Methods and Summary of Essential Budgeting Approaches
- Extra Materials and Assistance
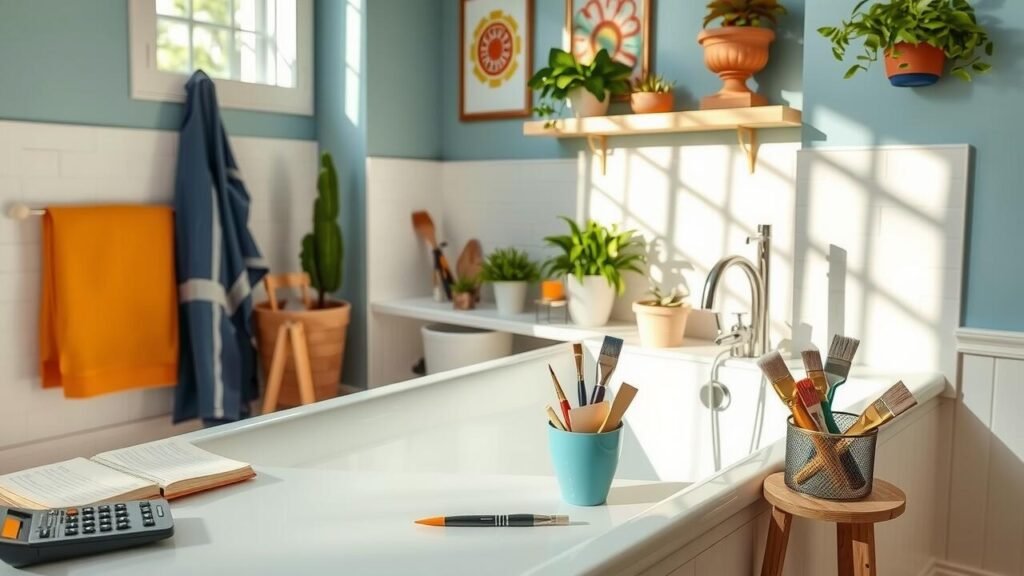
Detailed Steps for a Flawless Finish
Preparing the bathtub for refinishing begins with thorough cleaning. Remove any soap scum, oils, or other residues using a non-abrasive cleaner. After cleaning, sand the surface lightly to create a better bonding surface for the new finish. Use fine-grit sandpaper to smooth out any imperfections and ensure that the old finish is properly roughened up. A well-prepared surface is crucial for achieving a smooth final result.
Once the surface is prepped, apply a primer designed for bathtubs. This primer acts as a foundation for the refinishing compound. Follow the manufacturer’s instructions regarding drying times and application methods. After the primer has fully dried, proceed with applying the topcoat using a spray technique. This method allows for an even application, minimizing the chances of drips or unevenness. Aim for multiple thin coats rather than one thick layer to enhance durability and ensure a flawless finish.
Troubleshooting Common Issues
When undertaking a DIY bathtub refinishing project, it’s common to encounter issues that can affect the final outcome. One of the most prevalent problems is an uneven finish. This can occur due to improper application techniques, such as not maintaining a consistent distance from the surface while spraying or brushing. If this happens, it’s essential to address the uneven areas promptly. Lightly sand the affected spots and reapply the refinishing material, ensuring each layer dries thoroughly before attempting to add more.
Another frequent challenge is peeling or chipping, which can emerge if the surface was not properly prepped or if the refinishing material was applied too thickly. To resolve this issue, it may be necessary to strip the faulty finish and start over. Thoroughly clean and sand the bathtub to promote better adhesion, and use a thinner application of the refinishing product. Following the manufacturer’s recommendations for drying time and application techniques can also help minimize these issues in the future.
Solutions for Frequent Refinishing Problems
Chipping or peeling paint can be a common issue after refinishing. To address this, ensure that the surface is thoroughly cleaned and sanded before applying the new coating. Proper preparation creates a better bond. If chipping occurs shortly after the refinishing, it may suggest that the materials were not fully cured or that moisture was trapped underneath. Allowing for adequate drying time and using a top-quality primer can prevent these frustrations.
Another frequent problem is the presence of bubbles in the finish. This issue can arise from applying the coating too thickly or using a spray method that incorporates air. To resolve this, consider applying thinner coats and ensuring proper ventilation during the application process. If bubbles still appear, lightly sanding the affected areas once dry and applying another layer can help to achieve a smoother finish. Keeping a close eye on application techniques can lead to better long-term results.
Maintenance After Refinishing
Proper maintenance is essential for ensuring the longevity of your newly refinished bathtub. Regular cleaning with non-abrasive cleaners will help maintain the finish without causing damage. Avoid using harsh chemicals or abrasive tools, as these can scratch or dull the surface. After each use, a simple wipe down with a soft cloth can prevent soap scum and grime buildup, helping to keep your tub looking fresh and new.
Monitoring for any signs of wear or damage is also important after the refinishing process. Inspect the surface periodically for chips, cracks, or discoloration. Quick repairs can extend the life of your finish. When minor imperfections occur, addressing them promptly can prevent more significant issues down the line. Regular upkeep will not only enhance the appearance of your bathtub but also ensure it remains a functional and inviting part of your bathroom.
Tips for Keeping Your Bathtub Looking New
Regular cleaning is essential to maintain the pristine appearance of your refinished bathtub. Use non-abrasive cleaners to prevent scratches on the surface. Baking soda and vinegar create an effective natural solution that can tackle soap scum without causing damage. Wiping down the tub after each use helps minimize mineral deposits and soap buildup, ensuring a consistently clean look.
It’s also beneficial to establish a routine maintenance schedule. Inspect the tub periodically for signs of wear or damage. Address any small issues promptly to prevent them from becoming larger problems. Consider using a gentle sealer or protective coating designed for refinished surfaces to enhance longevity. This extra layer can provide additional protection against stains and chips, helping your bathtub stay as good as new for years to come.
Cost-Saving Tips for Your Project
DIY projects can quickly become expensive, but with careful planning, significant savings are possible. Start by setting a clear budget that outlines all expected costs, including materials, tools, and any potential labor if you choose to enlist help. Research various suppliers and compare prices to find the best deals. Consider purchasing supplies in bulk or during sales events to take advantage of lower prices. Local hardware stores often have discount sections where you can find slightly damaged or surplus items at a fraction of the original cost.
Another effective way to save money is to borrow tools instead of purchasing them outright. Many communities have tool libraries or rental services that allow you to access high-quality equipment for a small fee or even for free. Additionally, seek advice from friends or family who may have experience with refinishing projects. Encouragingly, joining online forums or local community groups can also provide insights and tips that may lead to discovering hidden savings. Taking these steps not only enhances your budget but can also make the refinishing process more enjoyable.
Finding Discounts and Deals
Shopping for materials and tools can significantly impact your project budget. Many home improvement stores offer seasonal sales or clearance items that can help reduce costs. Online retailers often have flash sales or discounts for first-time customers. Joining loyalty programs or signing up for newsletters can also provide access to exclusive deals and coupons. Websites dedicated to home improvement may feature promotional offers that can further enhance savings.
Consider exploring local classified ads or community marketplaces for second-hand equipment. Many DIY enthusiasts sell their unused supplies at reasonable prices. Networking with friends or family who have undertaken similar projects can lead to unused leftover materials or resources available for borrowing. Engaging with local DIY groups, both online and in person, may yield opportunities to find deals or learn about upcoming sales.
When to Hire a Professional
DIY projects can be rewarding, but there are times when the task may be beyond your skill set. If you find yourself feeling overwhelmed by the refinishing process, it may be wise to consider hiring a professional. Complex jobs, such as extensive damage repair or the need for specialized tools, often necessitate expert intervention. Professionals have the training and experience to handle unexpected challenges, ensuring a high-quality finish that might be difficult to achieve on your own.
Another sign that professional help is needed includes a lack of time or resources. Bathtub refinishing can be a time-consuming project, particularly if you want a flawless end result. If your schedule is tight or you’re unsure about your ability to dedicate the necessary time and effort, it’s sensible to entrust the work to a skilled refinisher. This decision may not only save you stress but also enhance the longevity of your bathtub’s new surface.
Signs You Should Seek Expert Help
Recognizing when a DIY project may be too challenging is essential for a successful outcome. If the surface of the bathtub shows signs of significant damage, such as deep cracks or extensive rust, seeking professional help is advisable. These issues often require specialized tools and expertise that may be beyond typical DIY capabilities. Additionally, if the refinishing process is becoming overwhelming with unfamiliar techniques and products, hiring an expert can provide peace of mind and ensure a quality finish.
Another indication that professional assistance may be necessary is if time constraints are looming. Refinishing a bathtub can be time-consuming, especially for those without prior experience. If the project is taking longer than anticipated or you are unsure about the next steps, it might be a good time to consult a refinishing service. Professionals can often complete the job efficiently while delivering results that meet your expectations.
Exploring Alternative Refinishing Techniques
When considering alternatives to traditional bathtub refinishing methods, one popular option is the use of acrylic liners. These liners offer a quick and clean solution, manufactured to fit over existing tubs. Installation often requires minimal preparation, making it an appealing choice for those seeking convenience. Another method gaining traction is the application of bathtub paint, which can provide a fresh appearance without the need for professional refinishing. This approach allows for various color options, catering to personal style preferences while also being more budget-friendly.
Another innovative technique involves using epoxy coatings. These coatings provide a durable, glossy finish that can withstand the rigors of daily use. Unlike conventional refinishing methods, epoxy applications often create a surface that is resistant to scratches and stains, prolonging the lifespan of the tub. Each alternative technique possesses unique benefits and potential drawbacks, allowing homeowners to choose a method that aligns with their budget, time constraints, and desired outcomes.
Other Methods to Consider
If traditional refinishing techniques do not align with your vision, consider alternative methods that can also revitalize your bathtub. One option is the use of bathtub liners, which involve placing a new acrylic surface over the existing tub. This can create a seamless appearance and comes in various styles. Additionally, paint specifically designed for appliances can provide a budget-friendly alternative, offering a fresh look without intensive labor.
Another creative approach is using a bath mat or decals designed for bathtubs. These options can add personality and improve grip while being easily replaceable. However, keep in mind that these methods may not provide the long-lasting durability of refinishing, so weigh the pros and cons based on your needs. Exploring these alternatives can help you find a solution that best suits your aesthetic and budget.
Recap of Key Budgeting Strategies
Creating a budget for your bathtub refinishing project starts with understanding the overall costs. Begin by evaluating the necessary materials, which typically include primer, paint, and protective gear. Researching pricing from multiple suppliers can yield better deals. It is also wise to factor in additional costs, such as tools required for the job or possible disposal fees for any old materials you may need to remove.
Once you have a basic estimate, build in a contingency fund for unexpected expenses. This fund should cover any surprises that may arise during the project, such as surface repairs or extra paint needed for touch-ups. Keeping track of all expenditures throughout the process will help maintain your budget and provide insight into any adjustments needed for future DIY projects.
Final Thoughts on Effective Budgeting
Establishing a realistic budget for your DIY bathtub refinishing project is crucial for its successful completion. Take the time to assess all potential costs, including materials, tools, and any unexpected expenses that may arise during the process. A well-planned budget serves as a roadmap, guiding you through each phase and ensuring you remain on track financially.
It’s wise to set aside a contingency fund for unforeseen issues. Refinishing may unveil hidden problems that require additional resources. By anticipating these challenges, you can manage your finances effectively while also creating a beautiful and durable finish for your bathtub. Prioritizing quality materials can enhance the longevity of your refinishing work, yielding a better return on your investment in the long run.
| Item | Estimated Cost | Details |
|---|---|---|
| Refinishing Kit | $75 – $150 | Includes epoxy, primer, and glaze |
| Tools | $50 – $100 | Brushes, rollers, sandpaper, masking tape |
| Contingency Fund | $25 – $100 | For unexpected repairs and issues |
| Cleaning Supplies | $20 – $50 | Chemical cleaners and sponges |
Additional Resources and Support
A variety of online resources can enhance your bathtub refinishing project. Websites like DIY forums or home improvement blogs often provide step-by-step guides and tutorials that cater to both novice and seasoned DIYers. Video tutorials on platforms like YouTube can offer visual guidance, making it easier to understand complex techniques. Additionally, many home improvement stores maintain a library of project guides featuring essential tips and tools required for successful refinishing.
Local community workshops and classes can also serve as valuable sources of knowledge. Many hardware stores and community colleges host sessions that cover various home improvement skills, including refinishing techniques. Participating in these workshops allows for hands-on practice and direct interaction with experts. Furthermore, joining social media groups or online forums can create opportunities to connect with others who share the same interests, fostering support and knowledge-sharing within the DIY community.
Useful Websites and Community Forums
Numerous websites and online forums can serve as valuable resources for those embarking on a DIY bathtub refinishing project. Sites like Reddit and DIY Network feature communities where enthusiasts share their experiences, tips, and tricks. These platforms allow users to pose questions and receive advice from those who have tackled similar projects. Engaging in these forums can provide insights that are not often found in traditional guides, enhancing the overall refinishing experience.
In addition to community forums, several dedicated websites offer step-by-step tutorials, video demonstrations, and product reviews specific to refinishing bathtubs. Websites such as This Old House and Home Improvement Stack Exchange are excellent starting points. Many of these resources not only discuss the refinishing process but also highlight the best materials and tools, ensuring that users are well-equipped for their projects. Utilizing these online platforms can further streamline the refinishing journey, making it more efficient and enjoyable.
- Research the best tutorial videos on bathtub refinishing techniques.
- Join social media groups focused on DIY home improvement projects.
- Visit local hardware store websites for additional product recommendations.
- Check online reviews and ratings for refinishing kits and tools.
- Participate in Q&A sessions on specialized forums for expert advice.
- Follow blogs that document personal experiences with bathtub refinishing.
- Download helpful checklists for materials and steps needed for your project.
Conclusion
Taking on a DIY bathtub refinishing project requires careful planning and budgeting. By clearly outlining the costs involved, from materials to equipment, you can effectively manage your finances and avoid unexpected expenses. Prioritize quality supplies to ensure a successful, long-lasting finish. Incorporating maintenance tips and techniques will further extend the life of your refinished bathtub and keep it looking brand new.
Being mindful of when to seek professional help is equally important. Not every situation is suited for a DIY approach, and knowing your limits can save you time, money, and frustration. With the right resources, a well-structured budget, and a clear understanding of the process, you can achieve a beautiful result that enhances the value of your bathroom.
FAQS
What is the average cost of DIY bathtub refinishing?
The average cost can vary widely depending on the materials used and the size of the bathtub, but you can expect to spend between $100 to $500 for a DIY project.
How long does the refinishing process take?
The refinishing process typically takes about 5 to 7 hours, but it’s important to allow an additional 24 to 48 hours for the finish to fully cure before using the bathtub.
What materials do I need for a DIY bathtub refinishing project?
You will need a refinishing kit, sandpaper, a respirator mask, painter’s tape, a paintbrush or spray gun, and possibly a primer, depending on the kit instructions.
Can I refinish a bathtub that has cracks or deep scratches?
Yes, but you will need to repair these imperfections before refinishing. Use a repair kit designed for bathtubs to fill in cracks and scratches for a smooth surface.
How often should I maintain my refinished bathtub?
To keep your refinished bathtub looking new, clean it regularly with non-abrasive cleaners and avoid using harsh chemicals. A good maintenance routine can help extend the life of the finish for several years.